Preventing Live Migration Over SMB Starving CSV Traffic in Windows Server 2012 R2 with Set-SmbBandwidthLimit

One of the big changes in Windows Server 2012 R2 is that all types of Live Migration can now leverage SMB 3.0 if the right conditions are met. That means that Multichannel & SMB Direct (RDMA) come in to play more often and simultaneously. Shared Nothing Live Migration & certain forms of Storage Live Migration are often a lot more planned due to their nature. So one can mitigate the risk by planning.  Good old standard Live Migration of virtual machines however is often less planned. It can be done via Cluster Aware Updating, to evacuate a host for hardware maintenance, via Dynamic optimization. This means it’s often automated as well. As we have demonstrated many times Live Migration can (easily) fill 20Gbps of bandwidth. If you are sharing 2*10Gbps NICs for multiple purposes like CSV, LM, etc. Quality of Service (QoS) comes in to play. There are many ways to achieve this but in our example here I’ll be using DCB  for SMB Direct with RoCE.

New-NetQosPolicy “CSV” –NetDirectPortMatchCondition 445 -PriorityValue8021Action 4
Enable-NetQosFlowControl –Priority 4
New-NetQoSTrafficClass "CSV" -Priority 4 -Algorithm ETS -Bandwidth 40
Enable-NetAdapterQos –InterfaceAlias SLOT41-CSV1+LM2
Enable-NetAdapterQos –InterfaceAlias SLOT42-LM1+CSV2
Set-NetQosDcbxSetting –willing $False

Now as you can see I leverage 2*10Gbps NIC, non teamed as I want RDMA. I have Failover/redundancy/bandwidth aggregation thanks to SMB 3.0. This works like a charm. But when leveraging Live Migration over SMB in Windows Server 2012 R2 we note that the LM traffic also goes over port 445 and as such is dealt with by the same QoS policy on the server & in the switches (DCB/PFC/ETS). So when both CSV & LM are going one how does one prevent LM form starving CSV traffic for example? Especially in Scale Out File Server Scenario’s this could be a real issue.

The Solution

To prevent LM traffic & CSV traffic from hogging all the SMB bandwidth ruining the SOFS party in R2 Microsoft introduced some new capabilities in Windows Server 2012 R2. In the SMBShare module you’ll find:

  • Set-SmbBandwidthLimit
  • Get-SmbBandwidthLimit
  • Remove-SmbBandwidthLimit

image

To use this you’ll need to install the Feature called SMB Bandwidth Limit via Server Manager or using PowerShell:  Add-WindowsFeature FS-SMBBW

You can limit SMB bandwidth for Virtual machine (Storage IO to a SOFS), Live Migration & Default (all the rest).  In the below example we set it to 8Gbps maximum.

Set-SmbBandwidthLimit -Category LiveMigration -BytesPerSecond 1000MB

So there you go, we can prevent Live Migration from hogging all the bandwidth. Jose Baretto mentions this capability on his recent blog post on Windows Server 2012 R2 Storage: Step-by-step with Storage Spaces, SMB Scale-Out and Shared VHDX (Virtual). But what about Fibre Channel or iSCSI environments?  It might not be the total killer there as in SOFS scenario but still. As it turns out the Set-SmbBandwidthLimit also works in those scenarios. I was put on the wrong track by thinking it was only for SOFS scenarios but my fellow MVP Carsten Rachfahl kindly reminded me of my own mantra “Trust but verify” and as a result, I can confirm it even works to cap off Live Migration traffic over SMB that leverages RDMA (RoCE). So don’t let the PowerShell module name (SMBShare) fool you, it’s about all SMB traffic within the categories.

So without limit LM can use all bandwidth (2*10Gbps)

image

With Set-SmbBandwidthLimit -Category LiveMigration -BytesPerSecond 1250MB you can see we max out at 10Gbps (2*5Gbps).
image

Some Remarks

I’d love to see a minimum bandwidth implementation of this (that could include safety buffer for spikes in CSV traffic with SOFS). The hard cap limit might lead to some wasted bandwidth. In other scenarios you could still get into trouble. What if you have 2*10Gbps available but one of those dies on you and you capped Live Migration Traffic at 16Gbps. With one NIC gone you’re potentially in trouble until the NIC has been replaced. OK, this is not a daily occurrence & depending on you environment & setup this is less or more of a potential issue.

Virtual Receive Side Scaling (vRSS) In Windows Server 2012 R2 Hyper-V

What is it?

One of the cool new features that takes scalability in Windows Server 2012 R2 Hyper-V to a new level is virtual Receive Side Scaling (vRSS). While since In Windows Server 2012, Receive Side Scaling (RSS) over SR-IOV is supported it’s best suited for some specialized environments that require the best possible speeds at the lowest possible latencies. While SR-IOV is great for performance it’s not as flexible as for example you can’t team them so if you need redundancy you’ll need to do guest NIC Teaming.

vRSS is supported on the VM network path (vNIC, vSwitch, pNIC) and allows VMs to scale better under heavier network loads. The lack of RSS support in the guest means that there is only one logical CPU (core 0) that has to deal with all the network interrupts.  vRSS avoid this bottleneck by spreading network traffic among multiple VM processors. Which is great news for data copy heavy environments.

What do you need?

Nothing special, it works with any NICs that supports VMQ and that’s about all 10Gbps NICs you can buy or posses. So no investment is needed. It’s basically the DVMQ capability on the host NIC that has VMQ capabilities that allows for vRSS to be exposed inside of the VM over the vSwitch. To take advantage of vRSS, VMs must be configured to use multiple cores, and they must support RSS => turn it on in the vNIC configuration in the guest OS and don’t try to use a home PC 1Gbps card Winking smile

image

vRSS is enabled automatically when the VM uses RSS on the VM network path. The other good news is that this works over NIC Teaming. So you don’t have to do in guest NIC Teaming.

What does it look like?

Now without SR-IOV it was a serious challenge to push that 10Gbps vNIC to it’s limit due to all the interrupt handling being dealt with by a single CPU core. Here’s what a VMs processor looks like under a sustained network load without vRSS. Not to shabby, but we want more Smile

image
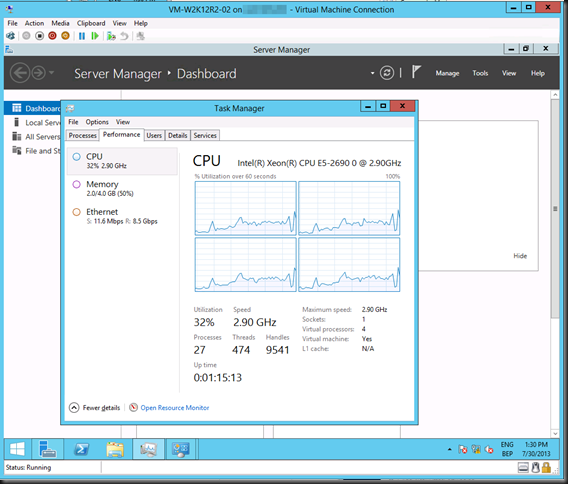
As you can see the incoming network traffic has the be dealt with by good old vCore 0. While DVMQ allows for multiple processors on the host dealing with the interrupts for the VMs it still means that you have a single core per VM. That one core is possibly a limiting factor (if you can get the network throughput and storage IO, that is). vRSS deals with this limitation. Look at the throughput we got copying  lot of data to the VM below leveraging vRSS. Yeah that’s 8.5Gbps inside of a VM. Sweet Open-mouthed smile. I’m sure I can get to 10Gbps …

image

Migrating a Hyper-V Cluster to Windows 2012 R2

Introduction

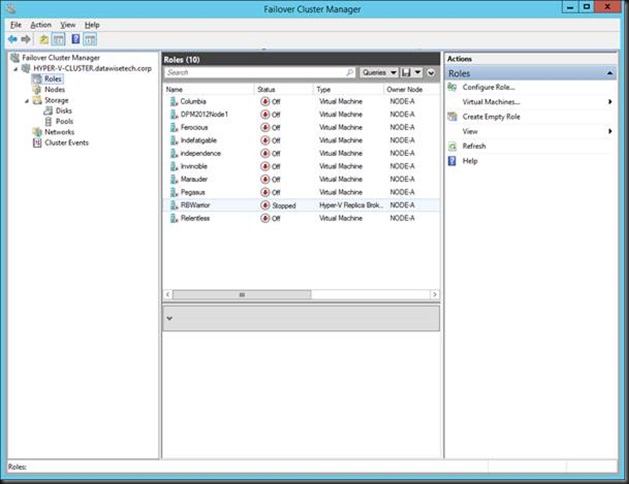
We’ll walk through a transition of a Windows Server 2012 Hyper-V Cluster to R2. For this we’ll use the Copy Cluster Roles Wizard (that’s how the Migration Wizard is now called). You have to approaches. You can start with a R2 cluster new hardware and you might even use new storage. For the process in my lab I evicted the nodes one by one and did a node by node migration to the new cluster. How you’ll do this in your environments depends on how many nodes you have, the number of CSVs and what workload they run. This blog post is an illustration of the process. Not a detailed migration plan customized for you environment.

Step by Step

1. Preparing the Target node(s)/cluster

Install the OS, add the Hyper-V role & the Failover cluster feature on the new or the evicted node.You’ll already have some updates to install only a week after the preview bits came available. Microsoft is on top of things, that’s for sure.

clip_image002

Configure the networking for the virtual switch, CSV, LM, management and iSCSI (that’s what I use in the lab) on the OS. Nothing you don’t know yet for this part.

Create a Virtual switch in Hyper-V manager. This is important. If you can you should give it the same name as the ones on the old cluster. Also note that the virtual switch name is case sensitive. If you forget to create one you will not be able to copy the hyper-v virtual machine roles.

Create a new Cluster & configure networking. One of the nice things of R2 is that is intelligent enough to see what type of connectivity suits the networks best and it defaults to that. It sees that the ISCSI network should be excluded for cluster use and that the CSV/LM network doesn’t need to allow client access.clip_image004

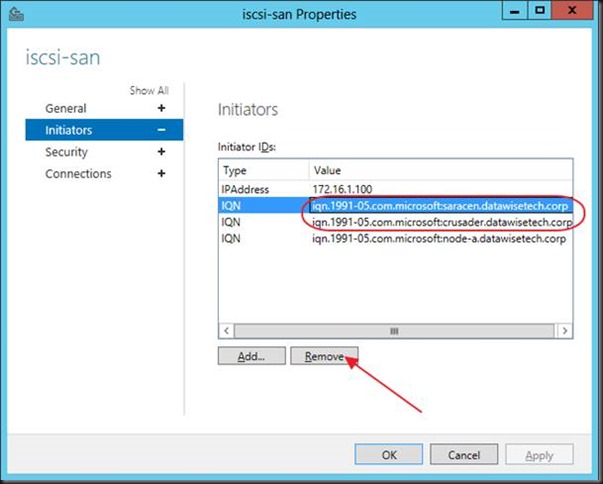
On the ISCSI Target (a W2K12RTM box) I remove the evicted node from the ISCSI initiators and I add the newly installed new cluster node. You can wait to do this out of precaution but the cluster itself does leave the newly detected LUNS off line by default. On top of that it detects the LUNs are in use (reservations) and you can’t even bring them on line.clip_image006

Right click the cluster and select “Copy Cluster Roles”clip_image008

Follow the wizard instructionsclip_image010

Click Next and then click Browse to select the source cluster (W2K12)clip_image012

Select “Warrior” and click OK.clip_image014

Click Next and see how the connection to the old cluster is being established.clip_image016

The wizard scans for roles on the old cluster that can be migrated.clip_image018

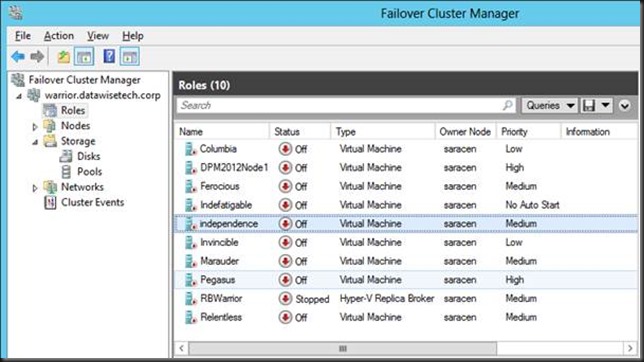
In this example the results are the Roles per CSV and the Replication Broker. For migration you can select one of the CSV’s and work LUN per LUN, select multiple of them or even all. It all depends on your needs and environment. I migrated them all over at once in the lab. In real live I usually do only 1 or a couple of interdependent LUNS (for example OS, DATA, LOGS, TempDB on separate CSVs of virtualized SQL Servers).clip_image020

Note that if you did not specify a virtual switch you will not see any Roles on the CSV listed. So that’s why it’s important defining a virtual switch.clip_image022

As we did it right we do see all the virtual machines. As we are not migrating to new storage we have to move all VMs on a LUN in one go. That’s because you cannot expose a LUN to multiple clusters.clip_image024

So we select all the clustered roles and click Next. As we use all capitals in the new virtual switch for the guests we are asked to map it manually. When the names are one on one identical AND in the same case, the mapping happens automatically. You can see this for the virtual switches for guest clustering CSV & ISCSI network connectivity.clip_image026

We view the report before we click next and see exactly what will be copied.clip_image028

Close the report and click Next.clip_image030

Click Next again to kick of the migration.clip_image032

When don you can view a report of the results. Click finish to close the wizard.clip_image034

You now have copied your virtual machine cluster roles and the Replication Broker role.clip_image036

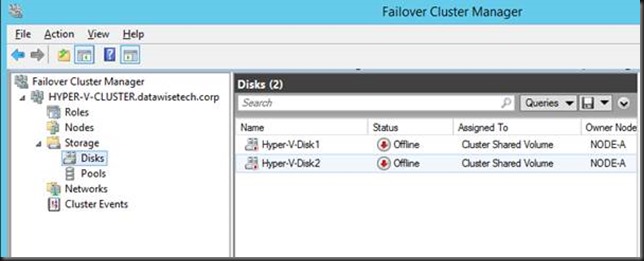
Even the storage is already there in the cluster but off line as it’s not yet available to the new cluster. Remember that your workload is still running on the old cluster so all what you have do until now is a zero down time exercise. clip_image038

2. Preparing to make the switch on the source cluster node(s)

On the source cluster we shut down all the virtual machines and the Replication Broker role.clip_image040

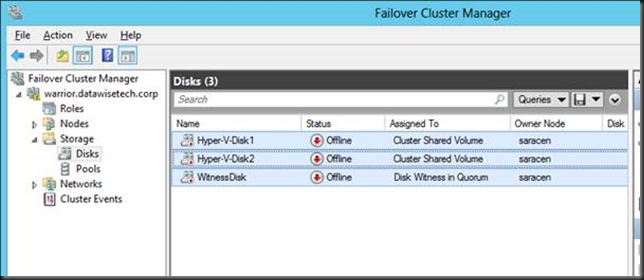
We then take the CSVs off line.clip_image042

If you did not (or could not due to lack of disk space) create a new witness disk you can recuperate this LUN as well. Not ideal I a production migration but dynamic quorum will help you staying protected. Not so with Windows 2008 R2. But you’ll fight as you are. Things are not always perfect.clip_image044

3. Swapping The Storage From the Source To The Target

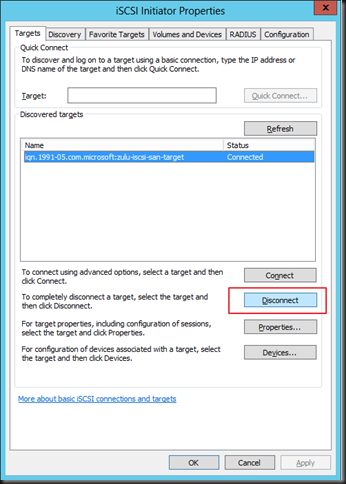
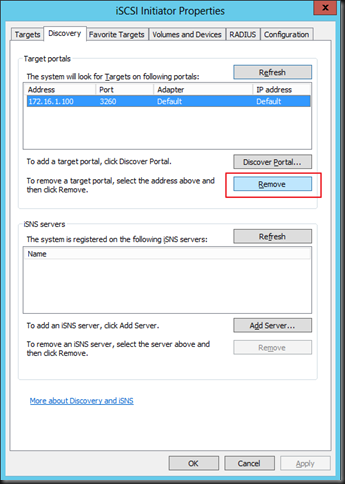
We’ll now disconnect the ISCSI initiator from the target on the old cluster node and remove the target.clip_image045

clip_image046

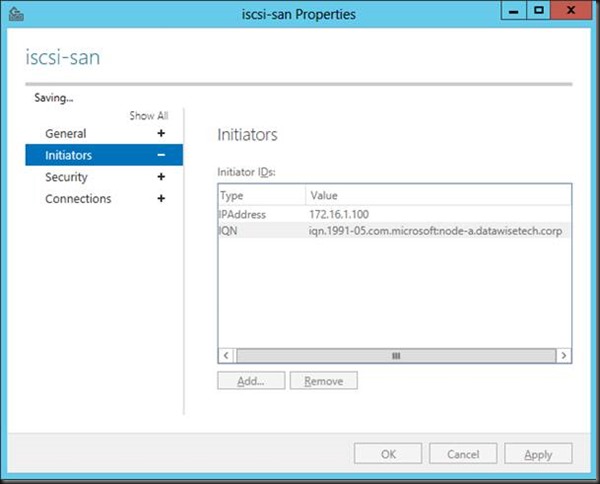
On the ISCSI target we’ll also remove the old nodes from the list of ISCSI initiators to keep the environment clean. You could wait until you see the VMs up and running on the new environment to facilitate putting the old environment back up if the migration should fail.

clip_image048

Wait until the process has completed and click applyclip_image050

4. Bringing the new cluster into production

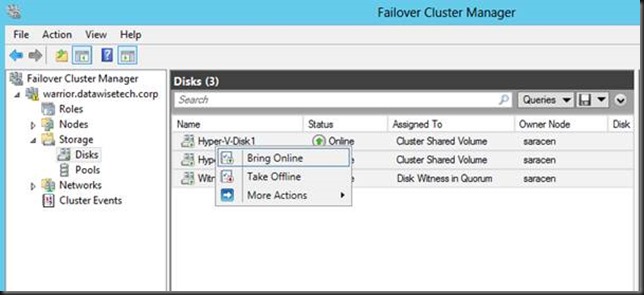
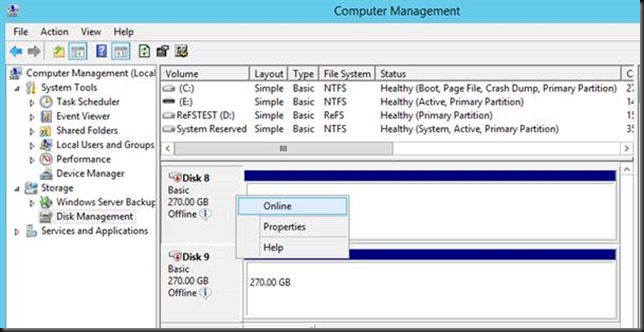
Bring the CSV LUNs on line on the new cluster.clip_image052

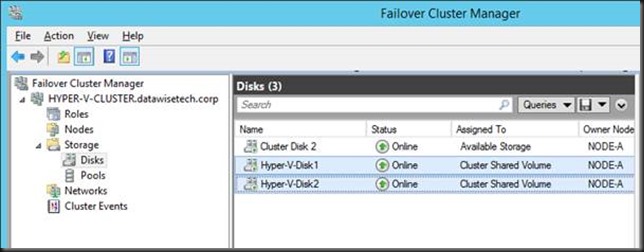
You’ll see then become available / on line in the cluster storage.clip_image054

You are now ready to start up your virtual machines on the new cluster. With careful planning the down time for the services running in the virtual machines can be kept as low as 10 to 15 minutes depending on how fast you can deal with the storage switch over. Pretty neat.clip_image056

Conclusion

You can now keep adding new nodes as you evict them from the old cluster. As said the exact scenario will vary based on the workload, number of nodes and CSV in your environment. But this should give you a good head start to work out your migration part. Keep in mind this is all done using the R2 Preview bits. Things are looking pretty good.

In a future blog I’ll discuss some best practices like making sure you have no snapshots on the machines you migrate as this still causes issues like before. At least in this R2 preview.

MVP Carsten Rachfahl Visits & Interviews Me On Networking & Storage in Windows Server 2012

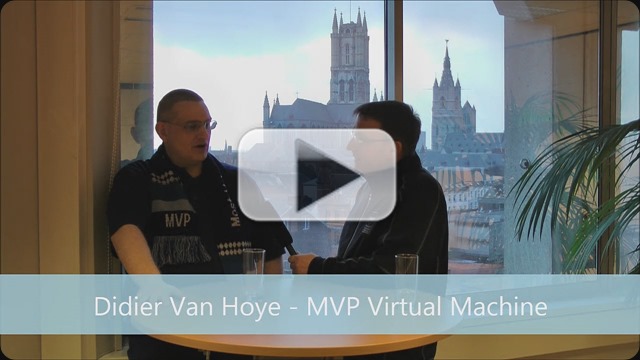
Last month Carsten (MVP – Virtual Machine) & Kerstin Rachfahl (MVP – Office 365) visited me in my home town. Apart from a short visit to the historic center & a sushi diner amongst friends we also did an interview where we discussed our ongoing Windows Server 2012 Hyper-V activities. We’re trying to leverage as much of the product we can to get the best TCO & ROI and as early adopters we’ve been reaping the benefits form the day the RTM bits were available to us. So far that has been delivering great results. Funny to hear me mention the Fast Track designs as a week later we saw version 3 of those at MMS2013. The most interesting to me about those was the fact that the small & medium sizes focus on Cluster in a Box and Storage Spaces!

While we were having fun talking about the above we also enjoyed some of the most beautiful landmarks of the City of Ghent as a back drop for the interview. It was filmed in a meeting room at AGIV, to whom I provide Infrastructure services with a great team of colleagues. Just click the picture to view the video.

Videointerview_with_Didier_Van_Hoye_Storage_Networking_and_other_Stuff-Thumb2

You can also enjoy the video on Carsten’s blog http://www.hyper-v-server.de/videos/interview-mit-didier-van-hoye-ber-seinen-storage-netwerk-und-mehr/ All I need to do now is to arrange for Carsten to physically touch the Compellent storage I think.