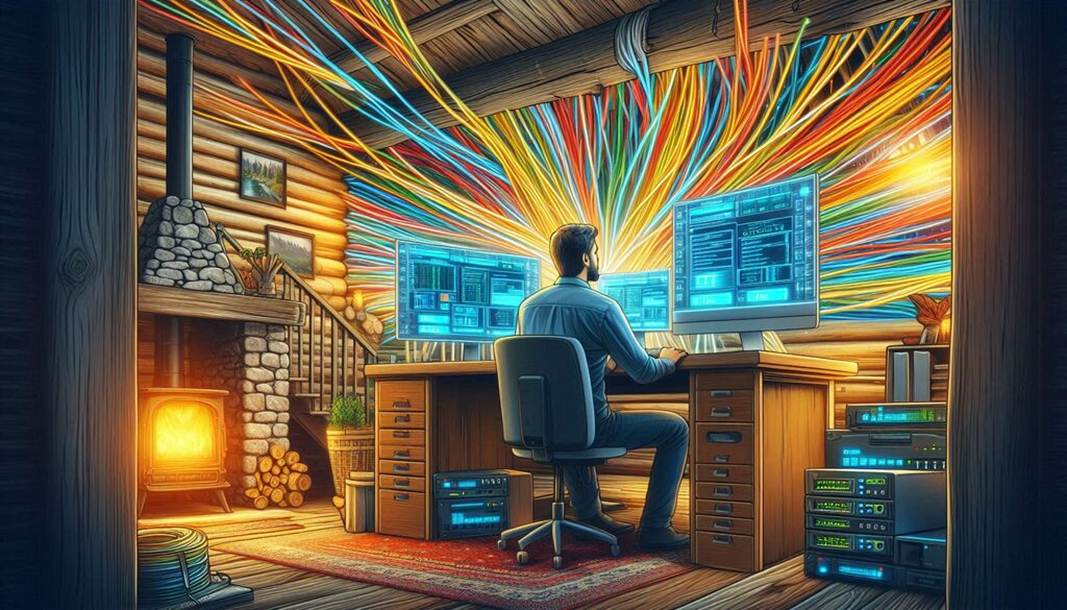
Deploying an OPNsense/pfSense Hyper-V virtual machine

Introduction

I recently wrote a 3 part series (see part 1, part 2, and part 3) about setting up site-to-site VPNs to Azure using an OPNsense router/firewall appliance. That made me realize some of you would like to learn more about deploying an OPNsense/pfSense Hyper-V virtual machine in your lab or production. In this blog post, using PowerShell, I will start by showing you how to deploy one or more virtual machines that are near perfect to test out a multitude of scenarios with OPNsense. It is really that easy.

Deploying an OPNsense/pfSense Hyper-V virtual machine

Hyper-V virtual switches

I have several virtual switches on my Hyper-V host (or hosts if you are clustering in your lab). One is for connections to my ISP, and the other is for management, which can be (simulated) out-of-band (OOB) or not; that is up to you. Finally, you’ll want one for your workload’s networking needs. In the lab, you can forgo teaming (SET or even classic native teaming) and do whatever suits your capabilities and /or needs.

I can access more production-grade storage, server, and network hardware (DELL, Lenovo, Mellanox/Nvidia) for serious server room or data center work via befriended MVPs and community supporters. So that is where that test work happens.

Images speak louder than a thousand words

Let’s add some images to help you orient your focus on what we are doing. The overview below gives you an idea about the home lab I run. I acquired the network gear through dumpster diving and scavenging around for discards and gifts from befriended companies. The focus is on the required functionality without running up a ridiculous power bill and minimizing noise. The computing hardware is PC-based and actually quite old. I don’t make a truckload of money and try to reduce my CO2 footprint. If you want $$$, you are better in BS roles, and there, expert technical knowledge is only a hindrance.

The grey parts are the permanently running devices. These are one ISP router and what the rest of the home network requires. An OPNsense firewall, some Unifi WAPs, and a managed PoE switch. That provides my workstation with a network for Internet access. It also caters to my IoT, WiFi, and home networking needs, which are unimportant here.

The lab’s green part can be shut down unless I need it for lab scenarios, demos, or learning. Again this saves on the electricity bill and noise.

The blue part of the network is my main workstation and about 28 virtual machines that are not all running. I fire those up when needed. And we’ll focus on this part for the OPNsense needs. What is not shown but which is very important as a Veeam Vanguard is the Veeam Backup & Replication / Veeam ONE part of the lab. That is where I design and test my “radical resilience” Veeam designs.

Flexibility is key

On my stand-alone Hyper-V workstation, I have my daily workhorse and a small data center running all in one box. That helps keep costs down and means that bar the ISP router and permanent home network, I can shut down and cut power to the Barracuda appliance, all switches, the Hyper-V cluster nodes, and the ISCSI storage server when I don’t need them.

If you don’t have those parts in your lab, you need fewer NIC ports in the workstation. You can make the OOB and the LAN vSwitch internal or private, as traffic does not need to leave the host. In that case, one NIC port for your workstation and one for the ISP router will suffice. If you don’t get a public IP from your ISP, you can use a NIC port for an external vSwitch shared with your host.

This gives me a lot of flexibility, and I have chosen to integrate my workstation data center with my hardware components for storage and Hyper-V clustering.

Even with a laptop or a PC with one NIC, you can use the script I share here using internal or private virtual switches. As long as you stay on your host, that will do, with certain limitations of cause.

Three virtual switches

OOB-MGNT: This is attached to a subnet that serves no purpose other than to provide an IP to manage network devices. Appliances like the Kemp Loadmasters, the OPNsense/pfSense/VyOS appliances, physical devices like the switches, the Barracuda firewall, the home router, and other temporary network appliances. It does not participate in any configuration for high availability or in carrying data.

ISP-WAN: This vSwitch has an uplink to the ISP router. Virtual machines attached to it can get a DHCP address from that ISP router, providing internet access over NAT. Alternatively, you can configure it to receive a public IP address from your ISP via DHCP (Cable) or PPoE (VDSL). With some luck, your ISP hands out more than just one. If so, you can test BGP-based dynamic routing with a site-to-site VPN from OPNsense and Azure VWAN.

LAN: The LAN switch is for carrying configuration and workload data. For standard use virtual machines, we configure the VLAN tag on the vNIC settings in the portal or via PowerShell. But network appliances must be able to carry all VLAN traffic. That is why we configure the virtual NICs of the LAN in trunk mode and set the list of allowed VLANs it may carry.

Downloads

OPNsense: https://opnsense.org/download/ (choose the DVD image for the ISO)

pfSense: https://www.pfsense.org/download (choose AMD64 and the DVD image for the ISO)

PowerShell script for deploying an OPNsense/pfSense Hyper-V virtual machine

Change the parameters in the below PowerShell function. Call it by running CreateAppliance. You can parameterize the function at will and leverage it however you see fit. This is just to give you an idea of how to do it and how I configure the settings for the appliance(s).

function CreateAppliance() {
    Clear-Host


    $Title = @"
    ___           _                     _      _               _                     _     _
   /   \___ _ __ | | ___  _   _  /\   /(_)_ __| |_ _   _  __ _| |   /\/\   __ _  ___| |__ (_)_ __   ___
  / /\ / _ \ '_ \| |/ _ \| | | | \ \ / / | '__| __| | | |/ _`  | |  /    \ / _`  |/ __| '_ \| | '_ \ / _ \
 / /_//  __/ |_) | | (_) | |_| |  \ V /| | |  | |_| |_| | (_| | | / /\/\ \ (_| | (__| | | | | | | |  __/
/___,' \___| .__/|_|\___/ \__, |   \_/ |_|_|   \__|\__,_|\__,_|_| \/    \/\__,_|\___|_| |_|_|_| |_|\___|
           |_|            |___/
  __                ___  ___    __                            __      __ __
 / _| ___  _ __    /___\/ _ \/\ \ \___  ___ _ __  ___  ___   / / __  / _/ _\ ___ _ __  ___  ___
| |_ / _ \| '__|  //  // /_)/  \/ / __|/ _ \ '_ \/ __|/ _ \ / / '_ \| |_\ \ / _ \ '_ \/ __|/ _ \
|  _| (_) | |    / \_// ___/ /\  /\__ \  __/ | | \__ \  __// /| |_) |  _|\ \  __/ | | \__ \  __/
|_|  \___/|_|    \___/\/   \_\ \/ |___/\___|_| |_|___/\___/_/ | .__/|_| \__/\___|_| |_|___/\___|
                                                              |_|

"@

    Write-Host -ForegroundColor Green $Title

    filter timestamp { "$(Get-Date -Format "yyyy/MM/dd hh:mm:ss"): $_" }

    VMPrefix $= 'OPNsense-0'
    $Path = "D:\VirtualMachines\"
    $ISOPath = 'D:\VirtualMachines\ISO\OPNsense-23.7-vga-amd64.iso'
    #$ISOPath = 'C:\VirtualMachines\ISO\pfSense-CE-2.7.1-RELEASE-amd64.iso'
    $ISOFile = Split-Path $ISOPath -leaf
    $NumberOfCPUs = 2
    $Memory = 4GB

    $NumberOfVMs = 1 # Handy to create a high available pair or multiple test platforms
    $VMGeneration = 2 # If an apliance supports generation 2, choose this, always! OPNsense, pfSense, Vyos support this.
    $VmVersion = '10.0'  #If you need this VM yo run on older HYper-V hosts choose the version accordingly

    #vSwitches
    $SwitchISP = 'ISP-WAN' #This external vSwitch is connected to the NIC towards ISP router. Not shared with the hyper-V Host
    $SwitchOOBMGNT = 'OOB-MGNT' #This can be a private/internal netwwork or an external one, possibly shared with the host.
    $SwitchLAN = 'LAN' #This can be a private/internal netwwork or an external one, possibly shared with the host.

    #vNICs and if applicable their special configuration.
    $WAN1 = 'WAN1'
    $WAN2 = 'WAN1'
    $OOBorMGNT = 'OOB'
    $LAN1 = 'LAN1'
    $LAN1TrunkList = "1-2048"
    $LAN2 = 'LAN2'
    $LAN2TrunkList = "1-2048"

    write-host -ForegroundColor green -Object ("Starting deployment of your appliance(s)." | timestamp)
    ForEach ($Counter in 1..$NumberOfVMs) {
        $VMName = $VMPrefix + 1

        try {
            Get-VM -Name $VMName -ErrorAction Stop | Out-Null
            Write-Host -ForegroundColor red ("The machine $VMName already exists. We are not creating it" | timestamp)
            exit
        }
        catch {
            $NewVhdPath = "$Path\$VMName\Virtual Hard Disks\$VMName-OS.vhdx" 
            If ( Test-Path -Path $NewVhdPath) {
                Write-host ("$NewVhdPath allready exists. Clean this up or specify a new location to create the VM." | timestamp)
            }
            else {
                Write-Host -ForegroundColor Cyan ("Creating VM $VMName in $Path ..." | timestamp)
                New-VM -Name $VMName -path $Path -NewVHDPath $NewVhdPath
                -NewVHDSizeBytes 64GB -Version $VmVersion -Generation $VMGeneration -MemoryStartupBytes $Memory | out-null

                Write-Host -ForegroundColor Cyan ("Setting VM $VMName its number of CPUs to $NumberOfCPUs ..." | timestamp)
                Set-VMProcessor –VMName $VMName –count 2

                #Get rid of the default network adapter -renaning would also be an option
                Remove-VMNetworkAdapter -VMName $VMName -Name 'Network Adapter'

                Write-Host -ForegroundColor Magenta ("Adding Interfaces WAN1, WAN2, OOBMGNT, LAN1 & LAN2 to $VMName" | timestamp)
                write-host -ForegroundColor yellow -Object ("Creating $WAN1 Interface" | timestamp)
                #For first ISP uplink
                Add-VMNetworkAdapter -VMName $vmName -Name $WAN1 -SwitchName $SwitchISP
                write-host -ForegroundColor green -Object ("Created $WAN1 Interface succesfully" | timestamp)

                write-host -ForegroundColor yellow -Object ("Creating $WAN2 Interface" | timestamp)
                #For second ISP uplink
                Add-VMNetworkAdapter -VMName $vmName -Name $WAN2 -SwitchName $SwitchISP
                write-host -ForegroundColor green -Object ("Created $WAN2 Interface succesfully" | timestamp)

                write-host -ForegroundColor yellow -Object ("Creating $OOBorMGNT Interface" | timestamp)
                #Management Interface - This can be OOB if you want. Do note by default the appliance route to this interface.
                Add-VMNetworkAdapter -VMName $vmName -Name $OOBorMGNT  -SwitchName $SwitchOOBMGNT #For management network (LAN in OPNsense terminology - rename it there to OOB or MGNT as well - I don't use a workload network for this)
                write-host -ForegroundColor green -Object ("Created $OOBorMGNT Interface succesfully" | timestamp)

                write-host -ForegroundColor yellow -Object ("Creating $LAN1 Interface" | timestamp)
                #For workload network (for the actual network traffic of the VMs.)
                Add-VMNetworkAdapter -VMName $vmName -Name $LAN1 -SwitchName $SwitchLAN
                write-host -ForegroundColor green -Object ("Created $LAN1 Interface succesfully" | timestamp)

                write-host -ForegroundColor yellow -Object ("Creating $LAN2 Interface" | timestamp)
                #For workload network (for the actual network traffic of the VMs. he second one is optional but useful in labs scenarios.)
                Add-VMNetworkAdapter -VMName $vmName -Name $LAN2 -SwitchName $SwitchLAN
                write-host -ForegroundColor green -Object ("Created $LAN2 Interface succesfully" | timestamp)

                Write-Host -ForegroundColor Magenta ("Setting custom configuration top the Interface (trunking, allowed VLANs, native VLAN ..." | timestamp)
                #Allow all VLAN IDs we have in use on the LAN interfaces of the firewall/router. The actual config of VLANs happens on the appliance.
                write-host -ForegroundColor yellow -Object ("Set $LAN1 Interface to Trunk mode and allow VLANs $LAN1TrunkList with native VLAN = 0" | timestamp)
                Set-VMNetworkAdapterVlan -VMName $vmName -VMNetworkAdapterName $LAN1 -Trunk -AllowedVlanIdList $LAN1TrunkList -NativeVlanId 0
                write-host -ForegroundColor green -Object ("The $LAN1 Interface is now in Trunk mode and allows VLANs $LAN1TrunkList with native VLAN = 0" | timestamp)
                write-host -ForegroundColor yellow -Object ("Set $LAN2 Interface to Trunk mode and allow VLANs $LAN2TrunkList with native VLAN = 0" | timestamp)
                Set-VMNetworkAdapterVlan -VMName $vmName -VMNetworkAdapterName $LAN2 -Trunk -AllowedVlanIdList $LAN2TrunkList -NativeVlanId 0
                write-host -ForegroundColor green -Object ("The $LAN2 Interface is now in Trunk mode and allows VLANs $LAN2TrunkList with native VLAN = 0" | timestamp)

                Write-Host -ForegroundColor Magenta ("Adding DVD Drive, mounting appliance ISO, setting it to boot first" | timestamp)
                Write-Host -ForegroundColor yellow ("Adding DVD Drive to $VMName"  | timestamp)
                Add-VMDvdDrive -VMName $VMName -ControllerNumber 0 -ControllerLocation 8
                write-host -ForegroundColor green -Object ("Succesfully addded the DVD Drive." | timestamp)
                Write-Host -ForegroundColor yellow ("Mounting $ISOPath to DVD Drive on $VMName" | timestamp)
                Set-VMDvdDrive -VMName $VMName -Path $ISOPath
                write-host -ForegroundColor green -Object ("Mounted $ISOFile." | timestamp)
                Write-Host -ForegroundColor yellow  ("Setting DVD with $ISOPath as first boot device on $VMName and disabling secure boot"  | timestamp)
                $DVDWithOurISO = ((Get-VMFirmware -VMName $VMName).BootOrder | Where-Object Device -like *DVD*).Device
                #I am optimistic and set the secure boot template to what it most likely will be if they ever support it :-)
                Set-VMFirmware -VMName $VMName -FirstBootDevice $DVDWithOurISO `
                    -EnableSecureBoot Off -SecureBootTemplate MicrosoftUEFICertificateAuthority
                write-host -ForegroundColor green -Object ("Set vDVD with as the first boot device and disabled secure boot." | timestamp)
                $VM = Get-VM $VMName
                write-Host -ForegroundColor Cyan ("Virtual machine $VM  has been created."  | timestamp)
            }
        }
    }
    write-Host -ForegroundColor Green "+++++++++++++++++++++++++++++++++++++++++++++++++++++++++++++++++++++++++++++++++++++"
    write-Host -ForegroundColor Green "You have created $NumberOfVMs virtual appliance(s) with each two WAN ports, a Management port and
    two LAN ports. The chosen appliance ISO is loaded in the DVD as primary boot device, ready to install."
    write-Host -ForegroundColor Green "+++++++++++++++++++++++++++++++++++++++++++++++++++++++++++++++++++++++++++++++++++++"
}
#Run by calling
CreateAppliance

Conclusion

Deploying an OPNsense/pfSense Hyper-V virtual machine is easy. You can have one or more of them up and running in less seconds. For starters, it will take longer to download the ISOs for installing OPNsense or pfSense than to create the virtual machine.

Finally, the virtual machine configuration allows for many lab scenarios, demos, and designs. As such, they provide your lab with all the capabilities and flexibilities you need for learning, testing, validating designs, and troubleshooting.

Do Azure VPN Gateways that leverage BGP support BFD?

Introduction

Anyone doing redundant, high-available VPN gateways leveraging BGP (Border Gateway Protocol) has encountered BFD (Bi-Directional Forwarding Detection). That said, BFD is not limited to BGP but also works with OSPF and OSPF6. But before we answer whether Azure VPN Gateways that leverage BGP support BFD, l briefly discuss what BFD does.

Bi-Directional Forwarding Detection

The BFD (Bi-Directional Forwarding Detection) protocol provides high-speed and efficient detection for link failures. It works even when the physical link has no failure detection support itself. As such, it helps routing protocols, such as BGP, failover much quicker than they could achieve if left to their own devices.

BFD control packets are transmitted via UDP from source ports between 49152-65535 to destination port 3784 (single-hop, RFC 5880, RFC 5881, and RFC 5882) or 4784 (multi-hop, RFC 5883). It can be IPv4 as well as IPv6. See Bidirectional Forwarding Detection on Wikipedia for more information. Note that this works between directly connected routers (single-hop) or (multi-hop).

Azure VPN Gateways that leverage BGP support BFD

Currently, OPNsense and pfSense, with the FRR (Flexible Rigid Routing) plugin, support BFD integration with BGP, Open Shortest Path First (OSPF), and Open Shortest Path First version 6 (OSPF6). Naturally, most vendors support this, but I mention OPNsense and pfSense because they offer free, fully functional products that are very handy for demos and lab testing.

Do Azure VPN Gateways that leverage BGP support BFD?

TL;DR: No.

You do not find much information when you search for BFD information about Microsoft Azure networking. Only for Azure ExpressRoute does Microsoft clearly state that it is supported and provides information.

But what about Azure VPN gateways with BFD? Well, no, that is not supported at all. You can try to set it up, but your VPN Gateways on-premises is shouting into a void. The session status with the peers will always be “down.” It just won’t work.

Visualize an Always On VPN device tunnel connection while disabling the disconnect button

Visualize an Always On VPN device tunnel connection while disabling the disconnect button

The need to visualize an Always On VPN device tunnel connection while disabling the disconnect button arises when the user experiences connectivity issues. End users should be able to communicate quickly to their support desk whether or not they have a connected Always On VPN device tunnel. They usually do not see the device VPN tunnel in the modern UI. Only user VPN tunnels show up. Naturally, we don’t want them to disconnect the device VPN or change its properties, so we want to disable the “disconnect” and the “advanced setting buttons. Since a device VPN tunnel runs as a “SYSTEM,” they cannot do this anyway. The GUI shows “Disconnecting” but never complete.

Refreshing the GUI correctly shows “Connected” again. However, it makes sense to disable the buttons to indicate this. So how to we set all of this up?

Visualize an Always On VPN device tunnel connection

Visualizing the Always On VPN device tunnel in the modern GUI is something we achieve via the registry. Scripting deploying these registry settings via GPO or Intune is the way to go.

New-Item -Path ‘HKLM:\SOFTWARE\Microsoft\Flyout\VPN’ -Force
New-ItemProperty -Path ‘HKLM:\Software\Microsoft\Flyout\VPN\’ -Name ‘ShowDeviceTunnelInUI’ -PropertyType DWORD -Value 1 -Force

Disable the disconnect button and the advanced options buttons

Now that the Always On VPN device tunnel is visible in the GUI, we want to disable the disconnect button and the advanced options buttons. How? Well, we can do this in Windows 11 22H2 or more recent versions. For this, we add the following to the VPN configuration file.

<!-- The below 2 GUI settings are only available in Windows 11 22H2 or higher. --><DisableAdvancedOptionsEditButton>true</DisableAdvancedOptionsEditButton><DisableDisconnectButton>true</DisableDisconnectButton>

  <!– These GUI settings below are only available in Windows 11 22H2 or higher. –>    <DisableAdvancedOptionsEditButton>true</DisableAdvancedOptionsEditButton>    <DisableDisconnectButton>true</DisableDisconnectButton>

Visualize a device VPN tunnel connection while disabling the disconnect button

Results

For an administrative account, the Always On VPN device tunnel is visible, but the buttons are dimmed (greyed out).

As before, the administrator can still use the rasphone GUI to hang up the Always On VPN device tunnel or edit the properties like before. Usually, you’ll configure the setting with Intune or via GPO with Powershell and custom XML. There is also a 3rd party option for configuring Always On VPNs via GPO (AOVPN Dynamic Profile Configurator).

For a non-administrator user account, the GUI looks precisely the same. The big difference is that when such a user launches the rasphone GUI, they cannot “Hang Up” the connection. The error message may not be the clearest, but in the end, a user with non-administrative rights cannot disconnect the Always On VPN device tunnel.

So now we have the best of both worlds. An administrator and a standard user can see that the Always On VPN device tunnel is connected. Remember that disabling the buttons requires Windows 11 22H2 or more recent. This blog was written using 23H2. The administrator can use the rasphone GUI or rasdial CLI to access the Always On VPN device tunnel like before.

Conclusion

Device VPN tunnels are supposed to be connected at all times, whether a user is logged on or not. It is also something that users are not supposed to be concerned about in contrast to a user VPN tunnel. However, it can be beneficial to see whether the Always On VPN device tunnel is connected. That is most certainly so when talking to support about an issue. We showed you how to achieve this, combined with disabling the “disconnect” and “advanced” options buttons), in this blog post.

Setting a static MAC address on a guest NIC team in Hyper-V

Introduction

Before we talk about setting a static MAC address on a guest NIC team in Hyper-V. We go back to Ubuntu Linux. Do you remember my blog post about configuring an interface bond in a Ubuntu Hyper-V guest? If not, please read it as what I did there got me thinking about setting a static MAC address on a guest NIC team in Hyper-V.

Ubuntu network bond

As you have read by now in the blog post I linked to above, we need to enable MAC Spoofing on both vNICs members of an interface bond in Ubuntu virtual machine on Hyper-V. Only then will you have network connectivity and are you able to get a DHCP address. On Ubuntu (or Linux in general), the bond interface has a generated MAC address assigned. It does not take one of the MAC addresses of the member vNICs. That is why we need MAC spoofing enabled on both member vNIC in the Hyper-V settings for this to work! In a Windows guest, you will find that the MAC address for the LBFO team gets one of the MAC addresses of its member vNICs assigned. As such, this does not require NIC spoofing. During failover, it will swap to the other one.

Setting a static MAC address on a guest NIC team in Hyper-V

In Ubuntu, you can set a chosen static MAC address on a bond and on the member interfaces inside the guest operating system. Would we be able to do the same with a NIC team in a Windows Server guest virtual machine? Well, yes! It sounds like a dirty hack inspired by Linux bonding, which might be way beyond anything resembling a supported configuration. But, if it is allowed for Linux, why not leverage the same technique in Windows?

Configuration walkthrough

We use a mix of MAC address spoofing on the member vNICs with “enable this network adapter to be part of a team in the guest operating system” checked (not actually needed in this case) and a hardcoded MAC address on the team NIC and both member NICs inside the virtual machine. The same MAC address!

Setting a static MAC address on a guest NIC team in Hyper-V
The team interface and its member all get the same static MAC address in the guest

First, note the format of the MAC address. No dashes, dots, or colons. Also, that is a lot of clicking. Let’s try to do this with PowerShell. Using Set-NetAdapter throws an error to the fact that it detects the duplicate MAC address. It protects you against what it thinks is a bad idea.

$TeamName = 'GUEST-TEAM'
Set-NetAdapter -Name $TeamName -MacAddress "14-52-AC-25-DF-74"
ForEach ($MemberNic in $TeamName){
#Get-NetAdapter (Get-NetLbfoTeamMember -Team $MemberNic).Name | Format-Table
Set-NetAdapter (Get-NetLbfoTeamMember -Team $MemberNic).Name  -MacAddress "14-52-AC-25-DF-74"
} 

Set-NetAdapter : The network address 1452AC25DF74 is already used on a network adapter with the name ‘Guest-team-member-01’ At line:2 char:1+ Set-NetAdapter -Name $TeamName -MacAddress “14-52-AC-25-DF-74″+ ~~~~~~~~~~~~~~~~~~~~~~~~~~~~~~~~~~~~~~~~~~~~~~~~~~~~~~~~~~~~~~+ CategoryInfo          : InvalidArgument: (MSFT_NetAdapter…wisetech.corp”):ROOT/StandardCimv2/MSFT_NetAdapter) [Set-NetAdapter], CimException    + FullyQualifiedErrorId : Windows System Error 87,Set-NetAdapter
Set-NetAdapter : The network address 1452AC25DF74 is already used on a network adapter with the name ‘Guest-team-member-01’
At line:5 char:1
+ Set-NetAdapter (Get-NetLbfoTeamMember -Team $MemberNic).Name  -MacAdd …
+ ~~~~~~~~~~~~~~~~~~~~~~~~~~~~~~~~~~~~~~~~~~~~~~~~~~~~~~~~~~~~~~~~~~~~~
    + CategoryInfo          : InvalidArgument: (MSFT_NetAdapter…wisetech.corp”):ROOT/StandardCimv2/MSFT_NetAdapter) [Set-NetAdapter], CimException
    + FullyQualifiedErrorId : Windows System Error 87,Set-NetAdapter

You need to use Set-NetAdapterAdvancedProperty. Mind you that the MAC address property for the team is called “MAC Address” and for the team member NIC “Network Address” just like in the GUI. Use the following code in the guest virtual machine.

$Team = Get-NetLbfoTeam -Name 'GUEST-TEAM'
$MACAddress = "1452AC25DF74"
$TeamName = $Team.Name
#Get-NetAdapterAdvancedProperty -Name $TeamName
Set-NetAdapterAdvancedProperty -Name $TeamName -DisplayName 'MAC Address' -DisplayValue $MACAddress

$TeamMemberNicNames = (Get-NetLbfoTeamMember -Team $TeamName).Name
foreach ($TeamMember in $TeamMemberNicNames){
    #Get-NetAdapterAdvancedProperty -Name $TeamMember
    Set-NetAdapterAdvancedProperty -Name $TeamMember -DisplayName 'Network Address' -DisplayValue $MACAddress
}

Let’s check our handy work with PowerShell

Setting a static MAC address on a guest NIC team in Hyper-V
Verify the team interface and its member all have the same static MAC address in the guest

Last but not least, leave the dynamically assigned MAC addressed on the vNIC team members in Hyper-V setting but do enable MAC spoofing.

Setting a static MAC address on a guest NIC team in Hyper-V
Enable MAC address spoofing

Borrowing a trick from Linux for setting a static MAC address on a guest NIC team in Hyper-V

With this setup, we do not need separate switches for each member vNIC for failover to work but it is still very much advised to do so if you want real failover. First, It sounds filthy, dirty, and rotten, but for lab, demo purposes, go on, be a devil. Secondly, can you use this in production? Yes, you can. Just mind the MAC addresses you assign to avoid conflicts. Now you can tie your backward software license key that depends on a fixed MAC address to a Windows LBFO in a Hyper-V virtual machine. Why? Because we can. Finally, I would perhaps have to say that you should not do it, but Linux does, and so can windows!