Use cases for devnodeclean.exe

Use cases for devnodeclean.exe

So what are use cases for devnodeclean.exe, and what is it? Windows creates an entry in the registry for every new device that is connected. That also goes for storage devices, including VSS shadow copies.

When you create a lot of VSS snapshots, both software (windows) or hardware (SAN) based ones that get mounted and unmounted this creates a lot of the registry entries. Normally these should get cleaned up by the process creating them. Microsoft can take care of their use cases but they cannot do this for 3rd party software as Windows cannot know the intent of that software. Hence you might end up with a registry system hive that starts to bloat. When that hive gets big enough you will notice slowdowns in shutdown and restarts. These slowdowns can become very long and even lead to failure to boot Windows.

This can happen with SAN hardware VSS provider backup software or with a backup solution that integrates with SAN hardware VSS providers. Mind you it is not limited to hardware VSS providers. It can also happen with software VSS providers. Microsoft actually had this as a bug with Hyper-V backups a long time ago. A hotfix fixed the issue by removing the registry entries the backups created.

But not all software will do this. Not even today. The better software does, but even Veeam only provided this option in VBR 9.5 Update 4. Mind you, Veeam is only responsible for what they control via storage integrations. When you leverage an off-host proxy with Hyper-V Veeam collaborates with the hardware VSS provider but does not orchestrate the transportable snapshots itself. So in that case the clean up is the responsibility of the SAN vendor’s software.

Another use case I have is file servers on a SAN being backup and protected via hardware VSS snapshots with the SAN vendors software. That also leads to registry bloat.

I never had any issues as I clean up the phantom registry entries preemptively. Veeam actually published a KB article as well on this before they fixed it in their code.

Still, if you need to clean up existing phantom registry entries you will need to use a tool call devnoceclean.exe.

Preventing registry bloat

When the software responsible doesn’t prevent registry bloat you will have to clean up the phantom registry entries in another way. Doing this manually is tedious and not practical. So, let’s forget about that option.

You can write your own code or script to take care of this issue. Cool if you can but realize you need to be very careful what you delete in the registry. Unless you really know your way around the depths of storage-related entries in the registry I suggest using a different approach, which I’ll discuss next.

Another solution is to use the Microsoft provided tool devnodeclean.exe. This tool is Microsft’s version of its example code you can find here How to remove registry information for devices that will never be used again

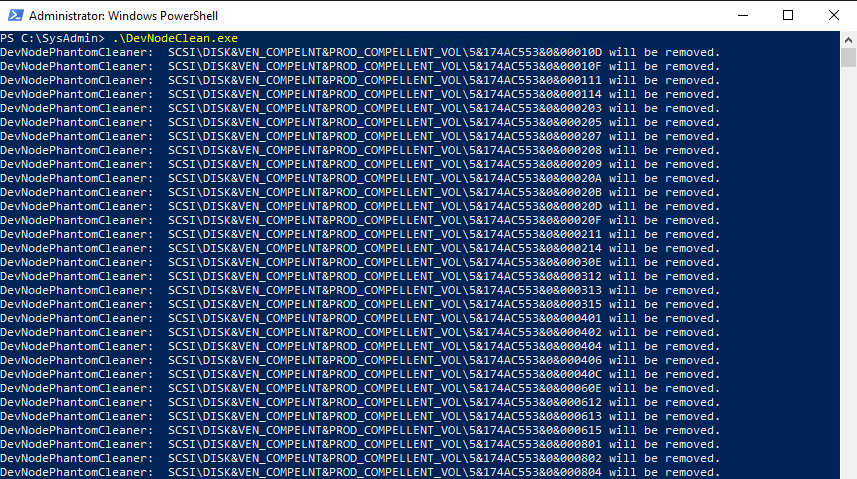
You can download that tool here. Extract it and grab the .exe that fits your OS architecture, x86, or x64 bit. I usually put in the subfolder Bin under C:\SysAdmin\Tools\DevNodeClean\ where I also create a subfolder named Logs. Remember you need to run this with elevated permissions. devnodeclean.exe /n list the entries it will remove while just running it without a switch actually removes the entries. It will work with Windows Server 2012(R2), 2016, and 2019. It can take a while if you have many thousands of entries.

Use cases for devnodeclean.exe

While you can run the tool manually in “one-off” situations normally you’ll want to run it automatically and regularly. For that, I use a PowerShell script that logs the actions and I use Task Scheduler to run it every day or week. that depends on the workload on that host.

Sample Code

Below is some sample code to get you started.

$TimeStamp = $(((get-date)).ToString("yyyyMMddTHHmmss"))
$PathToDevNodeClean = 'C:\SysAdmin\Tools\DevNodeClean'
Start-Transcript -Path "$PathToDevNodeClean\Logs\DevNodeCleanLog-$TimeStamp.txt"
Write-Output get-date ': Starting registry cleanup of phantom VSS entries'
Invoke-Expression "$PathToDevNodeClean\Bin\DevNodeClean.exe"
Write-Output get-date 'Cleaning up old log files'

$DaysToRetain = 0
$DateTime = ((Get-Date).AddDays(-$DaysToRetain))
$AllLogFilesInDevNodeClean = Get-ChildItem -Path "$PathToDevNodeClean\Logs" -Filter "DevNodeCleanLog-*.txt" -Force -File | Where-Object { $_.CreationTime -lt $DateTime }

foreach ($File in $AllLogFilesInDevNodeClean) {
    $FileName = $File.FullName
    $TimeStamp = Get-Date
    try {
        Remove-Item -Path $FileName -ErrorAction SilentlyContinue
        Write-Output "$TimeStamp > Deleting file $FileName because it was created before $DateTime"
    } 
    catch {
        Write-Output "$TimeStamp > Failed to delete $FileName It is probably in use" 
        Write-Output $TimeStamp $_.Exception.Message
    }
    finally {      
    }
}
Stop-Transcript 

Good luck with your devnodeclean.exe adventures. As with any sample code, big boy rules apply, use it at your own risk and test before letting this lose on your production systems.

This is just one example of how my long time experience with Windows storage and backups prevents problems in environments I manage or design. If you need help or have a question, reach out and we’ll try to help.

Optimize the Veeam preferred networks backup initialization speed

When Veeam preferred networks cause slow backup initialization speeds

When using preferred networks in Veeam you choose to use another than the default host network for backups and restores. In this post, we’ll discuss how to optimize the Veeam preferred networks backup initialization speed because we aim for optimal performance. TL-DR: You need to provide connectivity to the preferred networks for the Veeam Backup & Replication server. It seems a common mistake I run into every now and then. Ultimately it makes people think Veeam is slow. No, it is just a configuration mistake.

Why use a preferred network?

Backups can fill up a 1Gbps pipe very fast. Many people still use 1Gbps networking as default connectivity to the hosts. Even when they leverage 10Gbps or better it is often in a converged network setup. This means that only part of the bandwidth goes to host connectivity. Few have 10Gbps for “just” host connectivity. This means it makes sense to select a different higher bandwidth network for backup and restore traffic.

Hence for high volume, high-performance backup and restores it is smart to look for a bigger pipe to leverage. Some environments have dedicated backup networks at 10Gbps or better. But we find way more high bandwidth networks for other purposes. In Hyper-V environments, you’ll have those for SMB networking like CSV, Live Migration variants and storage replication. Hyper-Converged Infrastructure deployments use these networks for storage as well. With S2D you’ll find more and more 25/50/100Gbps. All these can be leveraged as a preferred backup network in Veeam

Setting up a preferred network

Setting up a preferred network is easy. First of all, you figure out which network to use. You then add those to the preferred networks as follows:

In file menu select “Network Traffic Rules”

Optimize the Veeam preferred network backup initialization speed

Click “Add” and specify the source IP as well as the target IP range. You can op to encrypt the traffic and /or set a bandwidth limit.

We have two SMB storage networks available, we enter both.

There is no need to have the preferred network registered in DNS. It will work fine without.

I hope it is clear that the source (Hyper-V Hosts), the target (backup repository or the extends in a Scale-Out Backup Repository) and any Off Host Proxies need connectivity to the preferred network(s). If you leverage WAN accelerators, Gateways Servers, log shipping servers than these also need access. Last but not least you should also make sure that the Veeam Backup Server (VBR) has access to the preferred networks. This is one that a lot of people seem to forget. May because it is most often a VM if it is not a shared role on the repository server or such and things do work without it.

When the VBR server has no access to the preferred networks things still work but initialization of the backup and restore jobs is a lot slower. Let’s test this.

Slow Initialization of backup and restore jobs

As a result of using preferred networks you might probably notice the following:

  • First of all, we notice a slow down in the overall initialization of the backup and restore job.
  • This manifests itself in a slow start of the actual VM backup/restore and reducing the number of simultaneous backups/restores of VMs within a job.

Without the VBR server having connectivity to the preferred networks

23:54 to complete the backup job (no connectivity to the preferred network)

Optimize the Veeam preferred networks backup initialization speed

With the VBR server having connectivity to the preferred networks. Notice how smooth and continuous the throughput is.

07:55 to complete the backup job (with connectivity to the preferred network) => 3 times as fast.

When you look into the Veeam backup logs for this job you will find at various stages attempts by the VBR server to connect to the preferred networks. If it can’t it has to wait until it times out. You see entries like:

A connection attempt failed because the connected party did not properly respond after a period of time, or established connection failed because connected host has failed to respond 10.10.110.2:2509 (System.Net.Sockets.SocketException)

Optimize the Veeam preferred network backup initialization speed
Just a small part of all the NetSocket time out you will find for every single VM in the job. Here VBR is trying to connect to one of the extends in the SOBR.

This happens for every file in the backups (config files and disks) for every extend in the Scale-Out Backup Repository (per VM backup chain). This slows down the entire backup job tremendously.

Conclusion

I always make sure that the VBR servers in my environments have preferred network connectivity. Consequently, initialization is faster for both backups and restores. Test it out for yourself! It is the first thing I check when people complain of really slow backup. Do they have preferred networks set up? Check if the VBR server has connectivity to them!

Correcting the permissions on the folder with VHDS files & checkpoints for host level Hyper-V guest cluster backups

Introduction

It’s not a secret that while guest clustering with VHDSets works very well. We’ve had some struggles in regards to host level backups however. Right now I leverage Veeam Agent for Windows (VAW) to do in guest backups. The most recent versions of VAW support Windows Failover Clustering. I’d love to leverage host level backups but I was struggling to make this reliable for quite a while. As it turned out recently there are some virtual machine permission issues involved we need to fix. Both Microsoft and Veeam have published guidance on this in a KB article. We automated correcting the permissions on the folder with VHDS files & checkpoints for host level Hyper-V guest cluster backup

The KB articles

Early August Microsoft published KB article with all the tips when thins fail Errors when backing up VMs that belong to a guest cluster in Windows. Veeam also recapitulated on the needed conditions and setting to leverage guest clustering and performing host level backups. The Veeam article is Backing up Hyper-V guest cluster based on VHD set. Read these articles carefully and make sure all you need to do has been done.

For some reason another prerequisite is not mentioned in these articles. It is however discussed in ConfigStoreRootPath cluster parameter is not defined and here https://docs.microsoft.com/en-us/powershell/module/hyper-v/set-vmhostcluster?view=win10-ps You will need to set this to make proper Hyper-V collections needed for recovery checkpoints on VHD Sets. It is a very unknown setting with very little documentation.

But the big news here is fixing a permissions related issue!

The latest addition in the list of attention points is a permission issue. These permissions are not correct by default for the guest cluster VMs shared files. This leads to the hard to pin point error.

Error Event 19100 Hyper-V-VMMS 19100 ‘BackupVM’ background disk merge failed to complete: General access denied error (0x80070005). To fix this issue, the folder that holds the VHDS files and their snapshot files must be modified to give the VMMS process additional permissions. To do this, follow these steps for correcting the permissions on the folder with VHDS files & checkpoints for host level Hyper-V guest cluster backup.

Determine the GUIDS of all VMs that use the folder. To do this, start PowerShell as administrator, and then run the following command:

get-vm | fl name, id
Output example:
Name : BackupVM
Id : d3599536-222a-4d6e-bb10-a6019c3f2b9b

Name : BackupVM2
Id : a0af7903-94b4-4a2c-b3b3-16050d5f80f

For each VM GUID, assign the VMMS process full control by running the following command:
icacls <Folder with VHDS> /grant “NT VIRTUAL MACHINE\<VM GUID>”:(OI)F

Example:
icacls “c:\ClusterStorage\Volume1\SharedClusterDisk” /grant “NT VIRTUAL MACHINE\a0af7903-94b4-4a2c-b3b3-16050d5f80f2”:(OI)F
icacls “c:\ClusterStorage\Volume1\SharedClusterDisk” /grant “NT VIRTUAL MACHINE\d3599536-222a-4d6e-bb10-a6019c3f2b9b”:(OI)F

My little PowerShell script

As the above is tedious manual labor with a lot of copy pasting. This is time consuming and tedious at best. With larger guest clusters the probability of mistakes increases. To fix this we write a PowerShell script to handle this for us.

#Didier Van Hoye
#Twitter: @WorkingHardInIT 
#Blog: https://blog.Workinghardinit.work
#Correct shared VHD Set disk permissions for all nodes in guests cluster

$GuestCluster = "DemoGuestCluster"
$HostCluster = "LAB-CLUSTER"

$PathToGuestClusterSharedDisks = "C:\ClusterStorage\NTFS-03\GuestClustersSharedDisks"


$GuestClusterNodes = Get-ClusterNode -Cluster $GuestCluster

ForEach ($GuestClusterNode in $GuestClusterNodes)
{

#Passing the cluster name to -computername only works in W2K16 and up.
#As this is about VHDS you need to be running 2016, so no worries here.
$GuestClusterNodeGuid = (Get-VM -Name $GuestClusterNode.Name -ComputerName $HostCluster).id

Write-Host $GuestClusterNodeGuid "belongs to" $GuestClusterNode.Name

$IcalsExecute = """$PathToGuestClusterSharedDisks""" + " /grant " + """NT VIRTUAL MACHINE\"+ $GuestClusterNodeGuid + """:(OI)F"
write-Host "Executing " $IcalsExecute
CMD.EXE /C "icacls $IcalsExecute"

} 

Below is an example of the output of this script. It provides some feedback on what is happening.

Correcting the permissions on the folder with VHDS files & checkpoints for host level Hyper-V guest cluster backup

Correcting the permissions on the folder with VHDS files & checkpoints for host level Hyper-V guest cluster backup

PowerShell for the win. This saves you some searching and typing and potentially making some mistakes along the way. Have fun. More testing is underway to make sure things are now predictable and stable. We’ll share our findings with you.

Storage-level corruption guard

One of the many gems in Veeam Backup & Replication v9 is the introduction of storage-level corruption guard for primary backup jobs. This was already a feature for backup copy jobs. But now we have the option of periodically scanning or backup files for storage issues.It works like this: if any corrupt data blocks are found the correct ones are retrieved from the primary storage and auto healed. Ever bigger disks, vast amounts of storage and huge amounts of data mean more chances of bit rot. It’s an industry wide issue. Microsoft tries to address this with ReFS and storage space for example where you also see an auto healing mechanism based on retrieving the needed data from the redundant copies.

We find this option on the maintenance tab of the advanced setting for the storage settings of a backup job, where you can enable it and set a schedule.

image

The idea behind this is that this is more efficient than doing periodical active full backups to protect against data corruption. You can reduce them in frequency or, perhaps better, get rid of those altogether.

Veeam describes Storage-level corruption guard as follows:

image

Can it replace any form of full backup completely? I don’t think so. The optimal use case seems to lie in the combination of storage-level corruption guard with periodic synthetic backups. Here’s why. When the bit rot is in older data that can no longer be found in the production storage, it could fail at doing something about it, as the correct data is no longer to be found there. So we’ll have to weigh the frequency of these corruption guard scans to determine what reduction if making full backups is wise for our environment and needs. The most interesting scenario to deal with this seems to be the one where we indeed can eliminate periodic full backups all together. To mitigate the potential issue of not being able to recover, which we described above, we’d still create synthetic full backups periodically in combination with the Storage-level corruption guard option enabled. Doing this gives us the following benefits:

  • We protect our backup against corruption, bit rot etc.
  • We avoid making periodic full backups which are the most expensive in storage space, I/O and time.
  • We avoid having no useful backup let in the scenario where Storage-level corruption guard needs to retrieve data from the primary storage that is no longer there.

To me this seems to be a very interesting scenario. To optimize backup times and economies. In the end it’s all about weighing risks versus cost and effort. Storage-level corruption guard gives us yet another tool to strike a better balance between those two. I have enabled it on a number of the jobs to see how it does in real life. So far things have been working out well.