Immutability of Linux files on the Veeam hardened Linux repository

Introduction

Without any doubt, I find the hardened Linux repository Veeam introduces in Veeam Backup & Replication v11 one of the most fascinating new features to get my hands on. In the ever-escalating battle with ransomware and wipers, this is a very valuable option to have in your defensive arsenal. So, I grabbed the Beta 2 and got to work in the lab over the holidays to investigate and find out some details about the Immutability of Linux files on the Veeam hardened Linux repository.

Immutability of Linux files on the Veeam hardened Linux repository

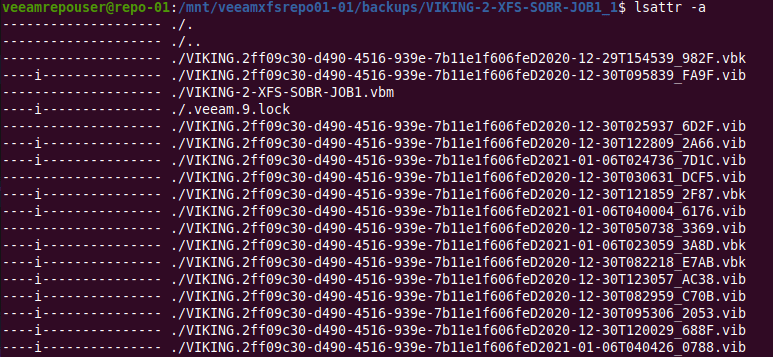
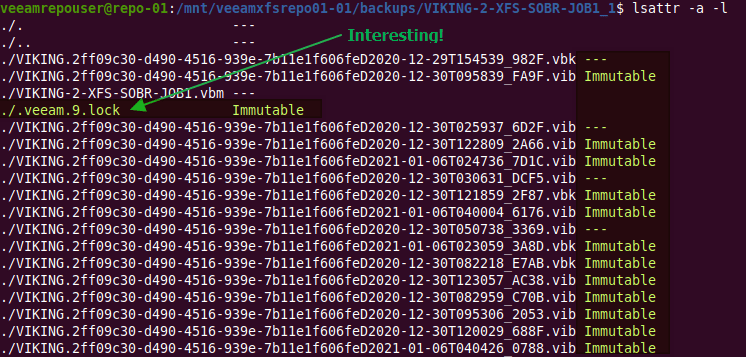
It’s quite easy to find the file attribute “i” that marks a file as immutable.

lsattr -a
Immutability of Linux files on the Veeam hardened Linux repository
lsattr -a also shows the hidden files

or

lsattr -a -l
Immutability of Linux files on the Veeam hardened Linux repository
lsattr -a -l list out the full name of the attribute.

Where is the information about the immutability actually stored? I mean, that “i” attribute is one thing but how do the Linux host and Veeam know from what time period this immutability is valid. In the end, the service has to clear it and know when to do this. Or is this only stored in the Veeam database or both?

How does it now from when till when a file must be immutable?

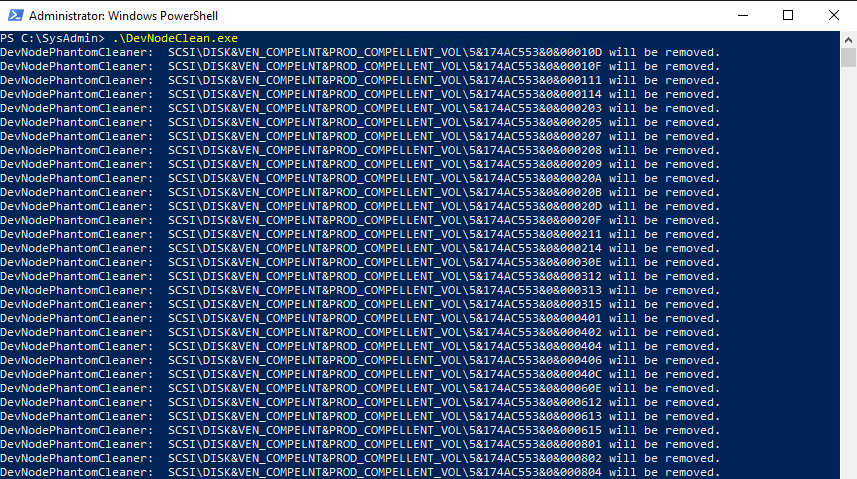
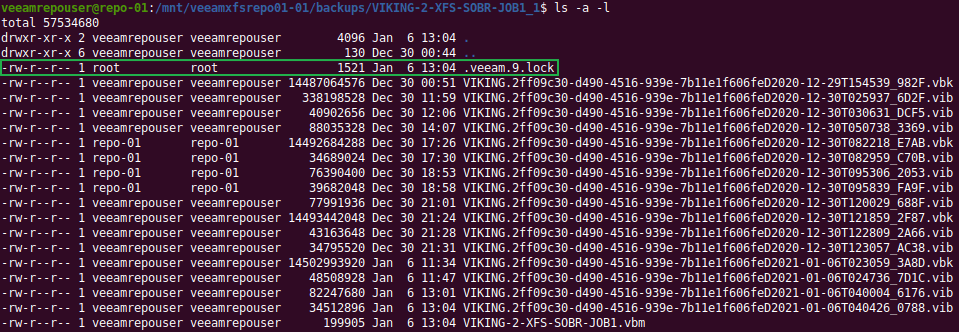
Digging around in the files and folders of the Veeam repository, I soon found the lock file “.veeam.x.lock” (see the green arrow in the image above) that is created by the veeamimmureposvc service. The owner is root, hence it is not created by the Veeam transport service. The veeamimmureposvc service is a local account with root access for managing the immutability. It only works locally and does not listen on any network port, hence it cannot be accessed remotely.

Immutability of Linux files on the Veeam hardened Linux repository
The veeamimmureposvc service controls the .veeam.x.lock file. the x is a number has increments with every backup job you run.

Let’s look inside to see if we can read something there?

cat .veeam.9.lock
the lock file is an XML file containing all the date/time stamps for every file in that backup job.

When you open that file you will find it to be an XML file. Inside you’ll see the date and time stamp for every file in the backup chains for that job. That’s cool.

But there is more. When we run “getfattr *”to look for extend file attributes we find that every Veeam created file has a one called user.immutable.until.

The backup files all have an extended file attribute called user.immutable.until.

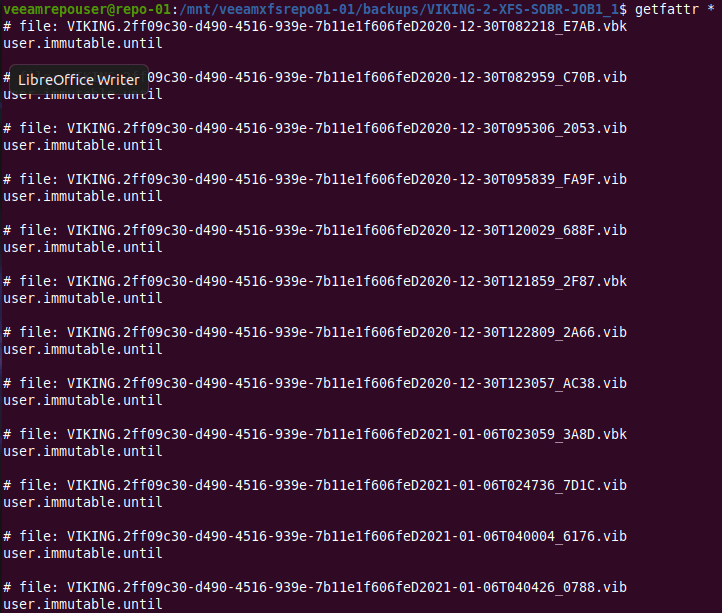
With that name, it is clear it can be of interest to us. If you look at what is in there, you’ll see it contains the date and time stamp for that file’s immutability period.

getfattr * -n user.immutable.until
Immutability of Linux files on the Veeam hardened Linux repository
The extended file attribute contains the timestamp until when that backup file is immutable!

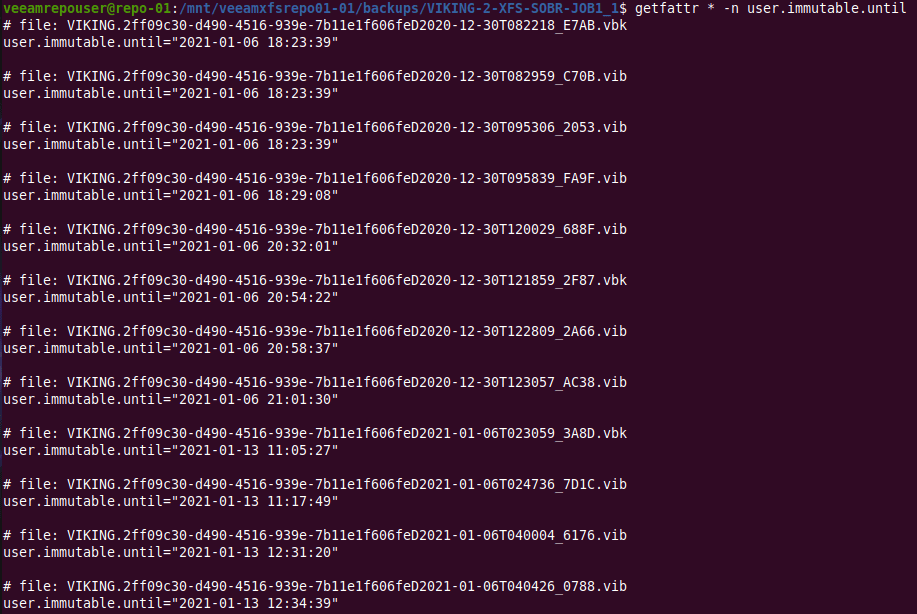
That I find interesting. Veeam saves the information twice. Is that for redundancy or as some sort of checksum? Maybe it also has to do with the fact Veeam backup files are transportable and self-contained so that information is stored as an extended file attribute.

Conclusion

So there you have it. A small piece of information on where the immutability information is stored. The most surprising thing to me was that it is actual stored twice.

I hope you fund this interesting. Poking around to figure out the how and what of things always helps me tremendously to learn and understand the technologies I want to work with. That leads to better decisions in design and implementation. It leads to both trust and confidence, which helps me decide where and when to leverage it. Finally it also, almost without, it is invaluable when supporting the technology.

Extending a Veeam Repository XFS File System

Extending a Veeam Repository XFS File System

Since diving into the Veeam Backup & Replication v11 Linux hardened repository I have started to use XFS in bite-size deployments to gain experience with it. One of the things that will certainly come in handy is extending a Veeam Repository XFS File System. In this blog post, I show to do that.

Mind you that I am doing this with a virtual machine on Hyper-V (Windows Server 2019) in the lab. Not every permutation of hardware and storage controllers you can find. But still, the procedure here will not differ that much.

Determine the size of the current disk.

sudo slblk
Extending a Veeam Repository XFS File System
Ours is the 20 TB disk, sdd, a SCSI disk.

Now take note of the bytes and sectors

sudo fdisk -l 
We just notice the size, bytes and sectors to compare after we extended disk.

Expand the disk

In the virtual machine settings I extend the virtual disk I want to grow with the required capacity.

Extending a Veeam Repository XFS File System
Let’s add 20 TB and make it 30 TB in total.

In real life that might be you growing a raid controllers’ virtual disk by adding physical disks to the raid controller, you expanding the volume on the storage array or simply adding disks to the local server and adding them to the software-based raid solution you use.

The virtual machine will pick up the extra capacity right away. For our UBUNTU 20.04.1 OS to see it up we’ll need to rescan the SCSI busses for change. In a virtual machine, this can be done via rescan-scsi-bus.sh, available scsitools that will need to be installed if not there.

Use the -s options as that will really show the resized disks.

sudo apt-get install scsitools
sudo rescan-scsi-bus.sh -s
Yup, that’s our disk on SCSI controller 1, location 0.

Now let’s check the disk size again

Yes, lsbsk shows 30 TB.
fdisk -l confirms. Note the new bytes and sector values. It has gone up.

Extend the xfs volume to use the unallocated space

Now we need our xfs volume to use the unallocated capacity in this disk. We use -d as this will grow the file system to the largest possible size, 30 TB in our case.

Note: If you run the below command with -n instead of -d, this gives you the current information on your xfs volume with extending the filesystem yet.

sudo xfs_growfs -d /mnt/veeamxfsrepo-03
Extending a Veeam Repository XFS File System
Voila. We are done.

See Ubuntu Manpage: xfs_growfs – expand an XFS filesystem for more options

Note: What I did find is that if you just expand the disk and than extend the xfs file system, it also works. It seems to just work without rescanning the disk after extending it! The disks size in df -h will show this space then as well.

Conclusion

That was it. Short and sweet. There is not much to it once you know how to do it. One thing to remember is that you cannot shrink an XFS file system. So, as always, start smaller and grow when needed. Always leave spare capacity to work with when needed. Yes, even in 2021 this is advice to live by in the storage world. For Veeam this means that multiple smaller repositories or extents give you more wiggle room than fewer very large ones. Leave capacity in reserve, either in a spare repository/extend or unallocated. This, especially combined with a scale-out backup repository in Veeam will allow you to work your self out of most capacity pickles you might find your self in.

Use cases for devnodeclean.exe

Use cases for devnodeclean.exe

So what are use cases for devnodeclean.exe, and what is it? Windows creates an entry in the registry for every new device that is connected. That also goes for storage devices, including VSS shadow copies.

When you create a lot of VSS snapshots, both software (windows) or hardware (SAN) based ones that get mounted and unmounted this creates a lot of the registry entries. Normally these should get cleaned up by the process creating them. Microsoft can take care of their use cases but they cannot do this for 3rd party software as Windows cannot know the intent of that software. Hence you might end up with a registry system hive that starts to bloat. When that hive gets big enough you will notice slowdowns in shutdown and restarts. These slowdowns can become very long and even lead to failure to boot Windows.

This can happen with SAN hardware VSS provider backup software or with a backup solution that integrates with SAN hardware VSS providers. Mind you it is not limited to hardware VSS providers. It can also happen with software VSS providers. Microsoft actually had this as a bug with Hyper-V backups a long time ago. A hotfix fixed the issue by removing the registry entries the backups created.

But not all software will do this. Not even today. The better software does, but even Veeam only provided this option in VBR 9.5 Update 4. Mind you, Veeam is only responsible for what they control via storage integrations. When you leverage an off-host proxy with Hyper-V Veeam collaborates with the hardware VSS provider but does not orchestrate the transportable snapshots itself. So in that case the clean up is the responsibility of the SAN vendor’s software.

Another use case I have is file servers on a SAN being backup and protected via hardware VSS snapshots with the SAN vendors software. That also leads to registry bloat.

I never had any issues as I clean up the phantom registry entries preemptively. Veeam actually published a KB article as well on this before they fixed it in their code.

Still, if you need to clean up existing phantom registry entries you will need to use a tool call devnoceclean.exe.

Preventing registry bloat

When the software responsible doesn’t prevent registry bloat you will have to clean up the phantom registry entries in another way. Doing this manually is tedious and not practical. So, let’s forget about that option.

You can write your own code or script to take care of this issue. Cool if you can but realize you need to be very careful what you delete in the registry. Unless you really know your way around the depths of storage-related entries in the registry I suggest using a different approach, which I’ll discuss next.

Another solution is to use the Microsoft provided tool devnodeclean.exe. This tool is Microsft’s version of its example code you can find here How to remove registry information for devices that will never be used again

You can download that tool here. Extract it and grab the .exe that fits your OS architecture, x86, or x64 bit. I usually put in the subfolder Bin under C:\SysAdmin\Tools\DevNodeClean\ where I also create a subfolder named Logs. Remember you need to run this with elevated permissions. devnodeclean.exe /n list the entries it will remove while just running it without a switch actually removes the entries. It will work with Windows Server 2012(R2), 2016, and 2019. It can take a while if you have many thousands of entries.

Use cases for devnodeclean.exe

While you can run the tool manually in “one-off” situations normally you’ll want to run it automatically and regularly. For that, I use a PowerShell script that logs the actions and I use Task Scheduler to run it every day or week. that depends on the workload on that host.

Sample Code

Below is some sample code to get you started.

$TimeStamp = $(((get-date)).ToString("yyyyMMddTHHmmss"))
$PathToDevNodeClean = 'C:\SysAdmin\Tools\DevNodeClean'
Start-Transcript -Path "$PathToDevNodeClean\Logs\DevNodeCleanLog-$TimeStamp.txt"
Write-Output get-date ': Starting registry cleanup of phantom VSS entries'
Invoke-Expression "$PathToDevNodeClean\Bin\DevNodeClean.exe"
Write-Output get-date 'Cleaning up old log files'

$DaysToRetain = 0
$DateTime = ((Get-Date).AddDays(-$DaysToRetain))
$AllLogFilesInDevNodeClean = Get-ChildItem -Path "$PathToDevNodeClean\Logs" -Filter "DevNodeCleanLog-*.txt" -Force -File | Where-Object { $_.CreationTime -lt $DateTime }

foreach ($File in $AllLogFilesInDevNodeClean) {
    $FileName = $File.FullName
    $TimeStamp = Get-Date
    try {
        Remove-Item -Path $FileName -ErrorAction SilentlyContinue
        Write-Output "$TimeStamp > Deleting file $FileName because it was created before $DateTime"
    } 
    catch {
        Write-Output "$TimeStamp > Failed to delete $FileName It is probably in use" 
        Write-Output $TimeStamp $_.Exception.Message
    }
    finally {      
    }
}
Stop-Transcript 

Good luck with your devnodeclean.exe adventures. As with any sample code, big boy rules apply, use it at your own risk and test before letting this lose on your production systems.

This is just one example of how my long time experience with Windows storage and backups prevents problems in environments I manage or design. If you need help or have a question, reach out and we’ll try to help.

BNA 14.4.1 upgrade to DELLEMC CMCNE 14.4.4

Introduction

What is a BNA 14.4.1 upgrade to DELLEMC CMCNE 14.4.4 you might ask? If you are managing a Fibre Channel fabric it is quite common to have Brocade switches running. In that case, I hope you have moved on from the Java web client to the free version of Broadcom Network Assistant (BNA). The free client was not the best end-user experience and gave us a lot of hassle just to keep running. See Manage Your Brocade Fibre Channel Switch with recent Java & browser versions.

BNA works better in a modern environment. It offers more functionality and provides for better and easier user experience. BNA itself is on the way out (EOL 2022) and will be replaced with SANNav as the Java runtime sage is reaching a point where just about the entire world has decided it is unsustainable as a future approach to management tools.

But that will take a while and we need a basic free tool to get the job done. Sure older versions still work but staying up to date is a good thing. On top of that, one of the most annoying things about BNA was the lack of support for Windows Server 2016/2019. Well BNA 14.4.4 solved that issue. So let’s upgrade! Well,l it turns out we need to do an upgrade from BNA 14.4.1 upgrade to DELLEMC CMCNE 14.4.4. Let me explain that.

Finding Brocade Network Analyzer 14.4.4

On the Brocade site, the downloads for BNA 14.4.4 are darn near impossible to find or you don’t have access to them. And if you google for that you’ll find a lot of people trying but failing to find it. It is also there that you will find the information that BNA will be replaced.

The good news is that as a DELL customer you can normally download the OEM branded version of this software. In the past, this used to be found at https://portal.broadcom.com/web/support/dell but that is no longer there. Today in the DELLEMC world, this is called Connectrix Manager – Converged Network Edition.

We are looking for version 14.4.4 and yes on the DELL website (you need to create an acount to login) you will find it at https://www.dell.com/support/home/us/en/04/product-support/product/connectrix-manager-converged-network-edition/drivers. You want 14.4.4 as it supports Windows Server 2016/2019 but also because it fixes some issues with 14.4.3.

BNA 14.4.2 upgrade to DELLEMC CMCNE 14.4.4
Connectrix Manager – Converged Network Edition 14.4.4

So we download it and we start our upgrade process. 14.4.4 fixed an issue with 14.4.3 that causes issues with importing an existing config by the way. So use 14.4.4.

The install process in pictures

Run the installer
BNA 14.4.1 upgrade to DELLEMC CMCNE 14.4.4
Click Next
Accept the EULA
Accept default install path or choose a custom one
BNA 14.4.1 upgrade to DELLEMC CMCNE 14.4.4
If you’re happy with your choice, click install to continue
Be patient while the setup runs.
BNA 14.4.1 upgrade to DELLEMC CMCNE 14.4.4
Done! Leave the checkbox marked to launch the CMCNE Configuration

The upgrade process in pictures

BNA 14.4.1 upgrade to DELLEMC CMCNE 14.4.4
The wizard will run you through the upgrade process. For an existing installation, you will accept to leave everything as it was. This depends on your needs.
BNA 14.4.1 upgrade to DELLEMC CMCNE 14.4.4
Be patient.
Be even more patient
Click next to continue with the data migration process.
Select the appropriate license.
I accept the defaults
I have no preference
Change if needed, otherwise, go with the defaults
If your company policy allows it, you can opt into the improvement program.
BNA 14.4.1 upgrade to DELLEMC CMCNE 14.4.4
Yup, all looks fine, click Next
Kick of the migration. Pay attention to the remark about the services window that must be closed. Also, note that the client might not start immediately as the service has to be up and running first.
BNA 14.4.1 upgrade to DELLEMC CMCNE 14.4.4
Migrating and initializing the database
Just cleaning up here.
Log in! Note you might want to wait a while to make sure the service has started.
Success! Now you can also upgrade your virtual machine from W2K12R2 to W2K19.

That’s it. You performed a BNA 14.4.1 upgrade to DELLEMC CMCNE 14.4.4

Upgrade to Windows Server 2019

Finally, we upgrade the virtual machine OS to Windows Server 2019. With 14.4.4 this is possible and we can get rid of the legacy OS we had to introduce or keep around just to run BNA. Good news all around.

Success, we have 14.4.4 running on our Windows Server 2019 management virtual machine.

Conclusion

You can become happy consultants or customers. By installing BNA 14.4.4 you keep your network fabric management software up to date. Last but not least, you can upgrade the OS version of the virtual machines running it to Windows Server 2019. This will keep us going for a couple of years in a modern, secure and capable environment until the successor is clear and available to all. I hope this helps some of you out.