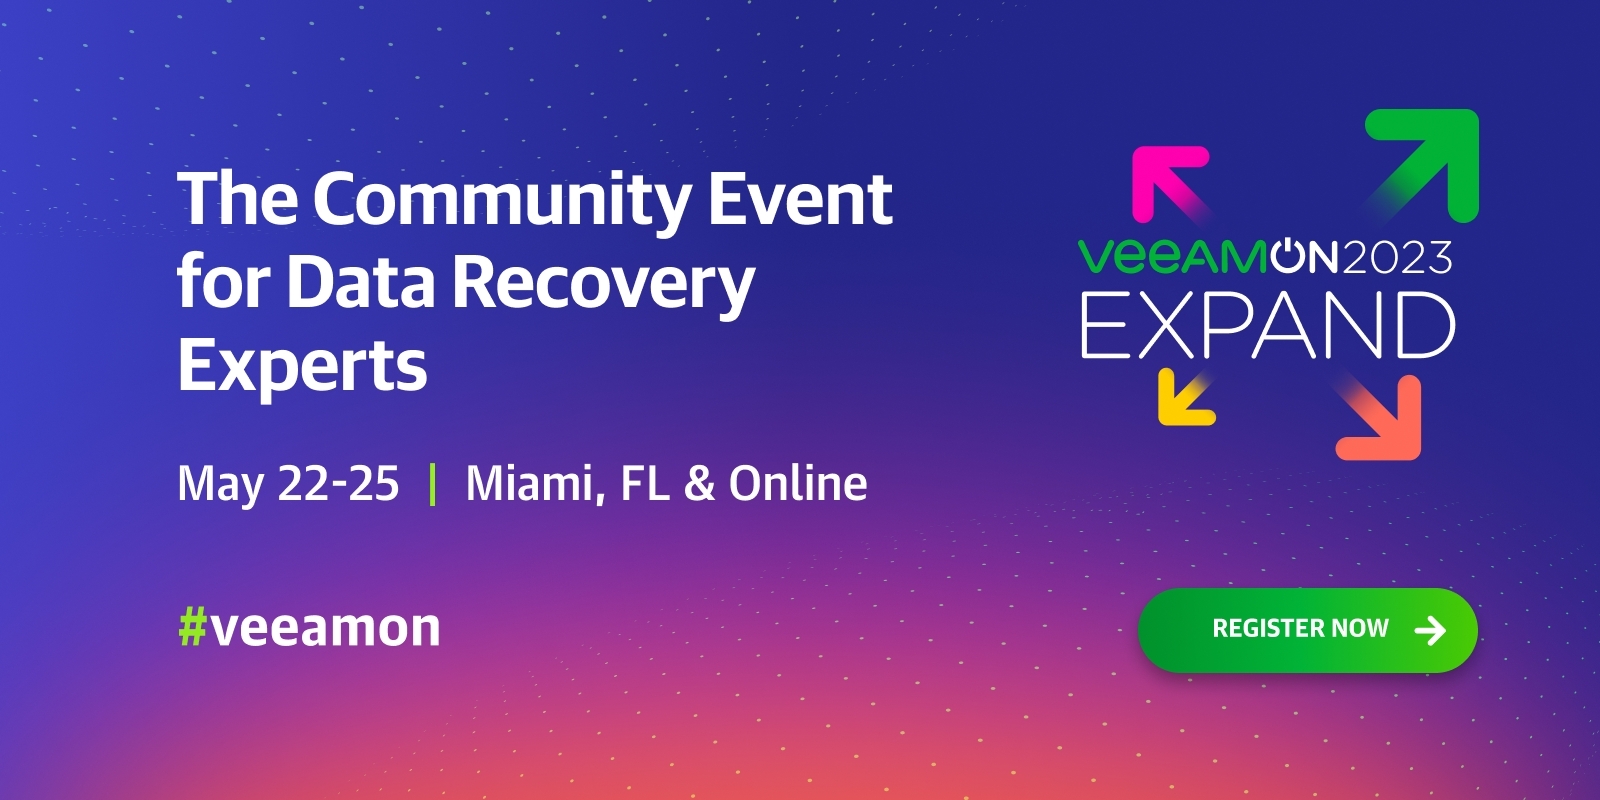
VeeeamOn 2023 – The Community Event for Data Recovery Experts is in less than 50 days. During May 22nd -25th 2023, Veeam is organizing a hybrid event in Miami, Florida, USA. You can attend in person or online. This is “The Community Event for Data Recovery Experts” so if you fall into that target group, try to be there!
The high-level agenda is already available as well as the speakers list. A detailed agenda and schedule will be available any moment now. As you can see the content is real world actionable content. You will learn concepts, get tips, gain a deeper understanding of the challenges you face. Next to that you will learn how to address those challenges from industry experts and fellow professionals. Yes, it is not just vendor driven. The event speakers include partners, fellow IT professionals at customers sharing their knowledge and expertise with you!
This is truly a community event, and it will help you expand your on-prem, hybrid, cloud and security skills when it comes to data recovery. You will learn to build better solutions while growing your professional network in the global community.
VeeamOn is really special!
What sets Veeam apart is how accessible their top talent and leadership is. I have experienced it firsthand. That’s why I have found memories of the times I attend VeeamOn or other Veeam events. Parts of that is the conversations I had with Anton Gostev, Danny Allen, Rick Vanover and their team members. All solid technologists with a no nonsense, straight talk attitude when it comes to our business and technical challenges. This is pretty unique and shows how much they are involved in guiding Veeam on the best possible course to serve their customers as well as possible! I would say it is a privilege, but to Veeam each of their customers truly matters. How do I know? I am one and Veeam is a beacon of light and hope for other vendors to follow.
Call to action
Register now for VeeeamOn 2023 – The Community Event for Data Recovery Experts and do not miss out! Because I am a Veeam Vanguard and as gift to my readers and followers Veeam provided me with this discount code VOMIAMI1002. Using it will give you a 100$ discount when registering. I really hope you can make it, if not in person, then at least online. The good news is that Veeam got pretty good at organizing online events and makes those interactive as well. I wish you a great conference!
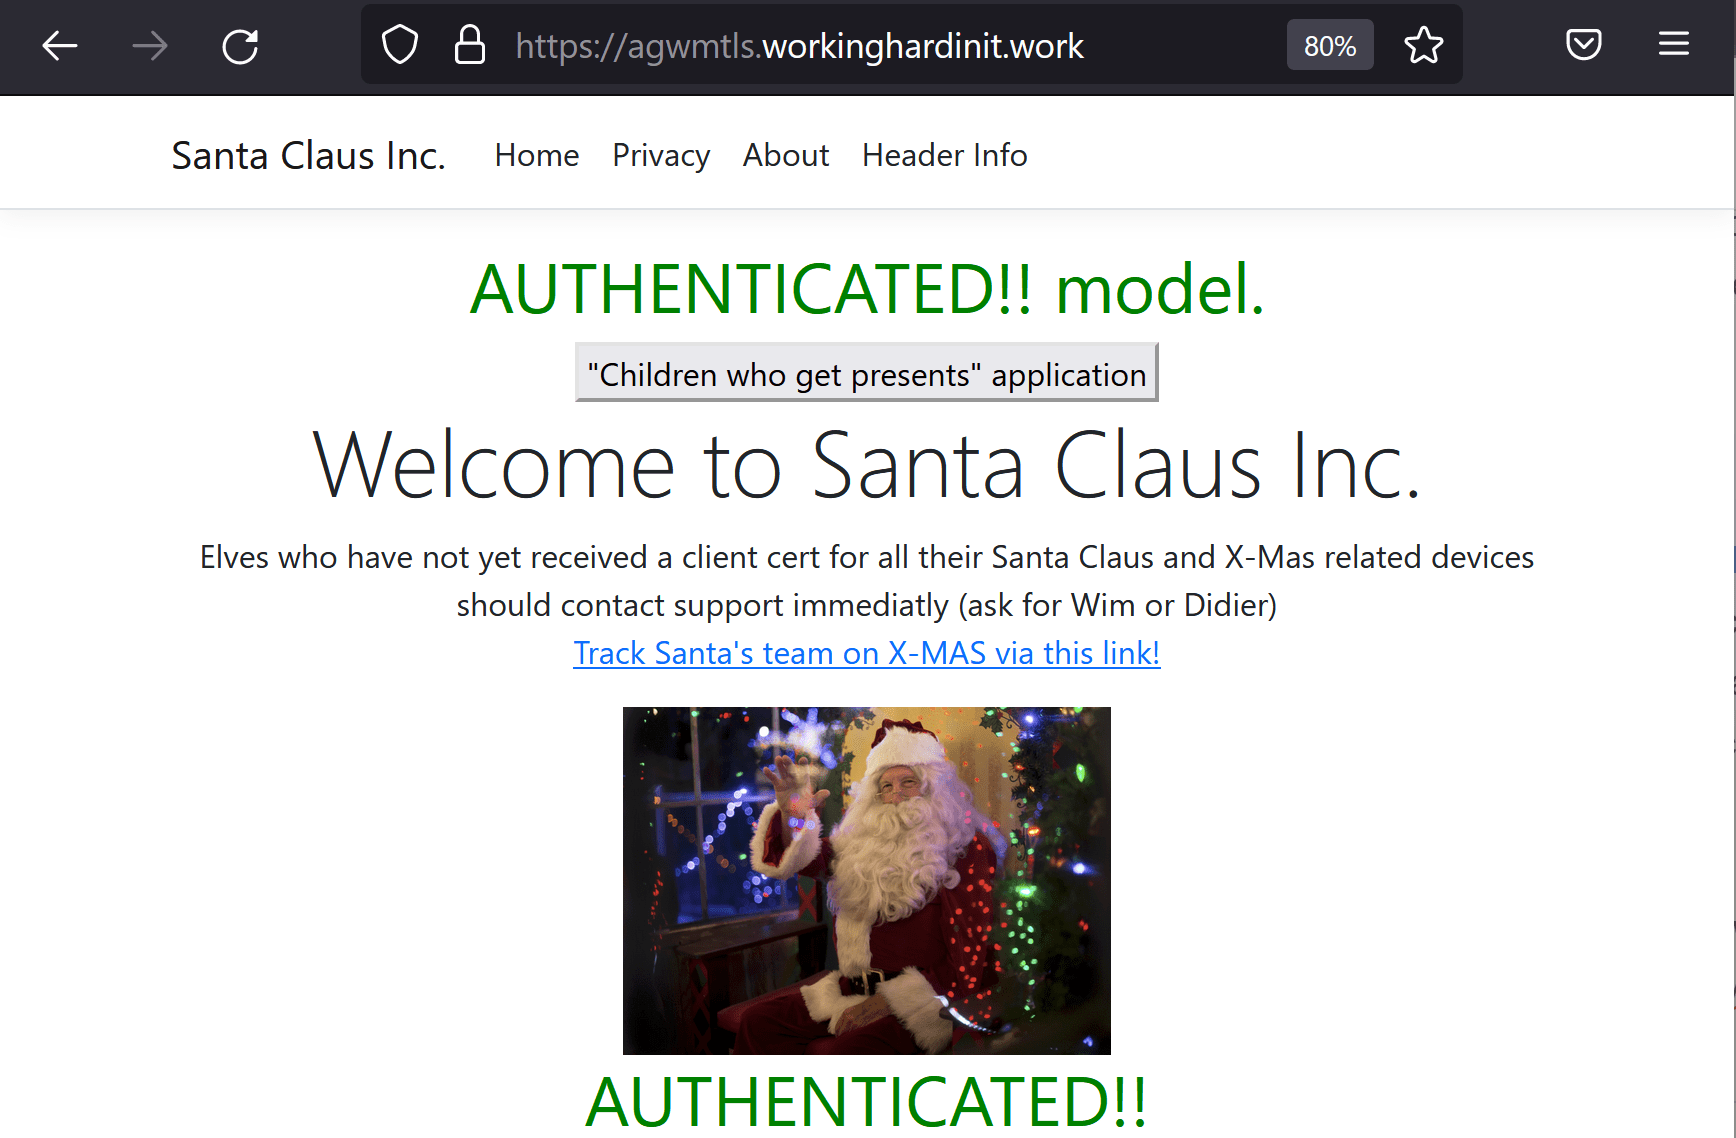
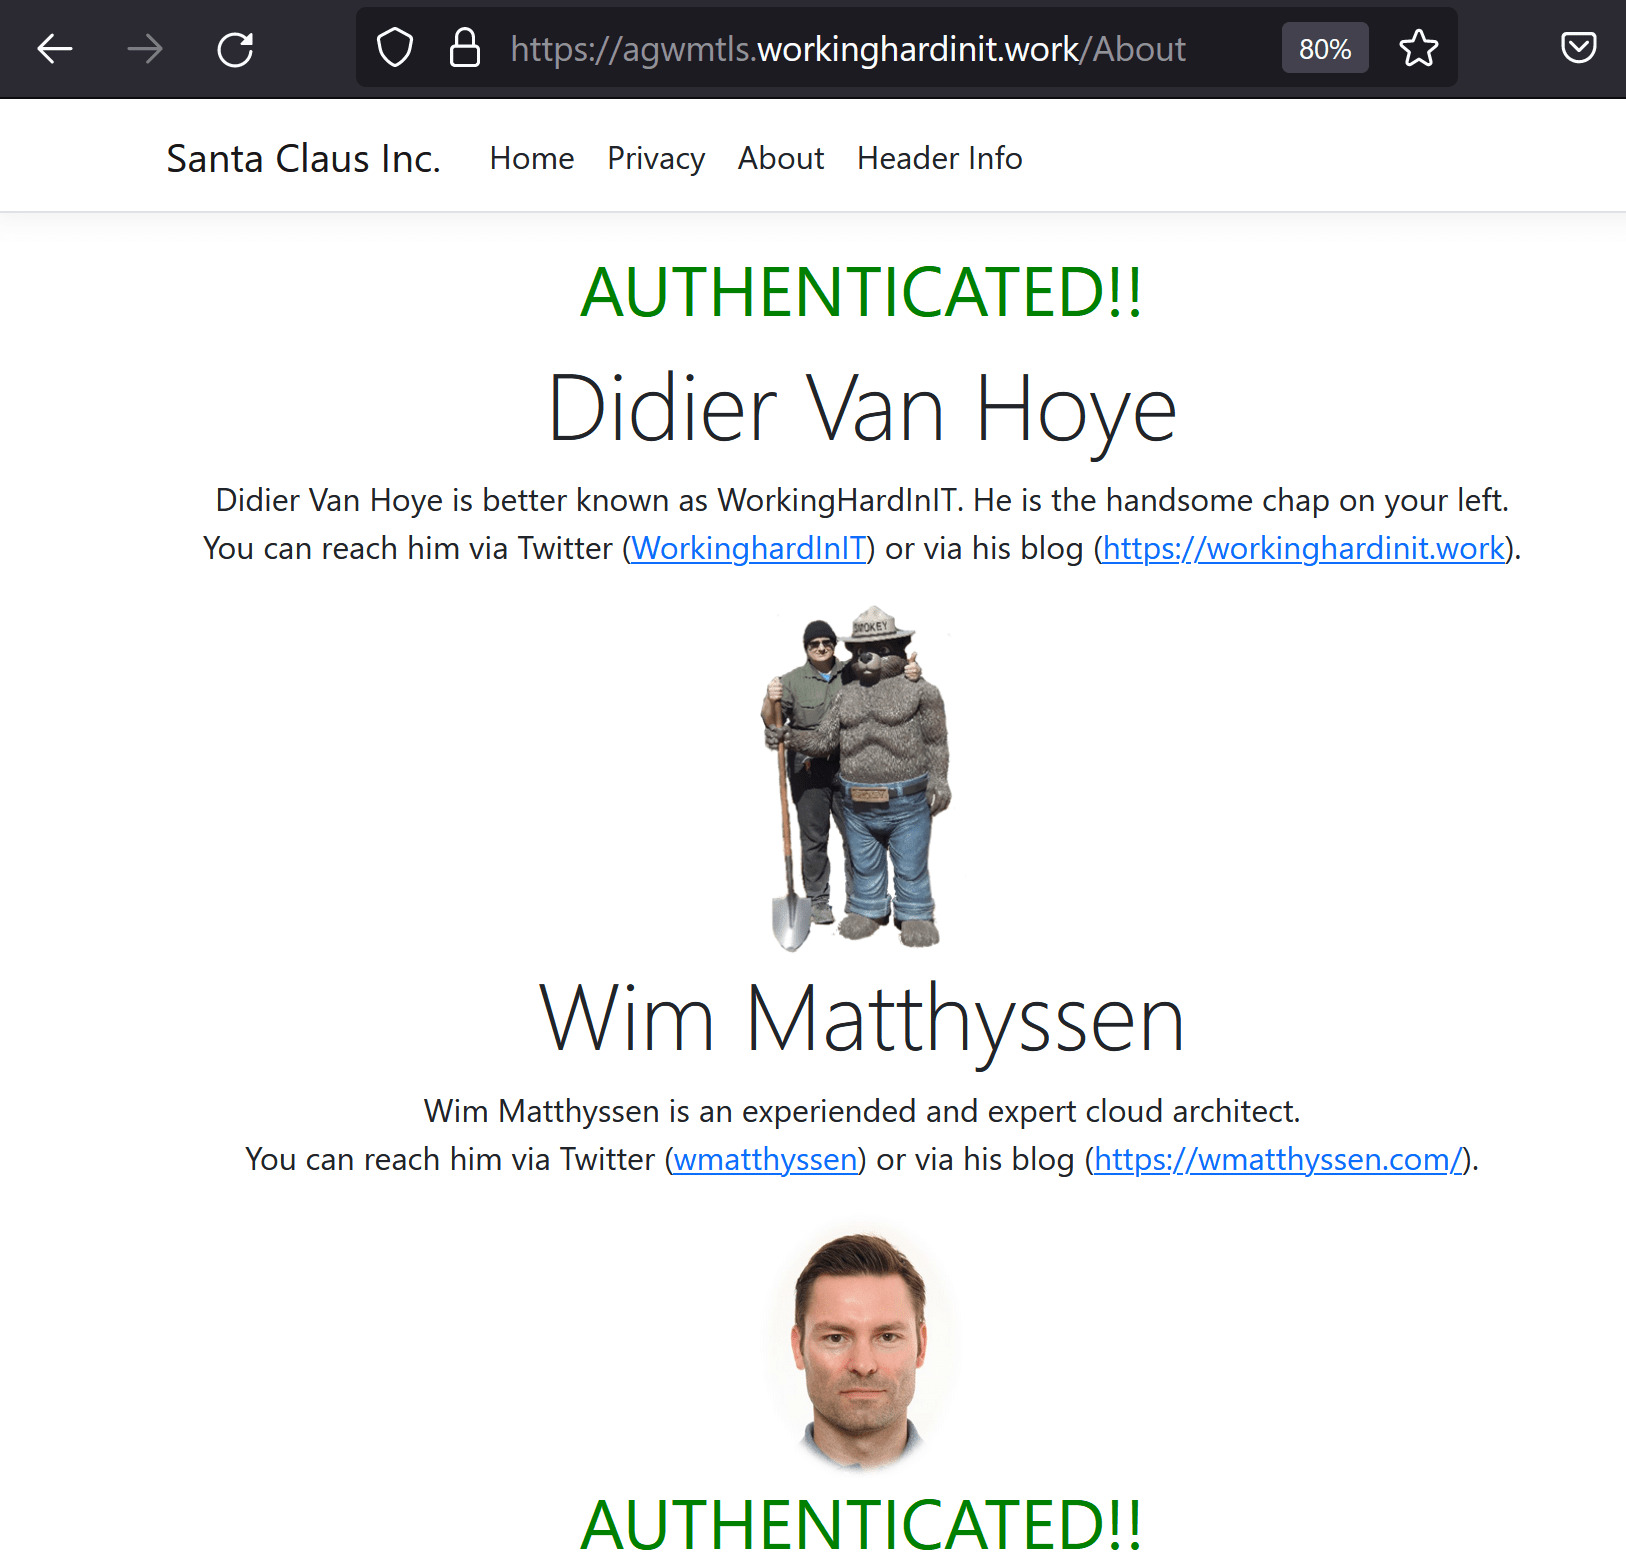
Wim Matthyssen and I are presenting on implementing mTLS with Azure AppGateway & AppService web application. The idea to present this subject came from a practice session Wim and I were doing on DELL Interactive Touch screens for white boarding. While testing out the hardware we were drawing various networking scenarios, many with private endpoints and that led to showing a mTLS solution I had helped work out recently for some projects. As we had to figure out some details to get this to work, we figured it would be worth presenting about.
So next weekend, December 18th at 11:00-12:00 UTC, this presentation will go live. We hope you will enjoy it and that our finding help you out in your own endeavors. Wim and I would be honored to have you watch.
Use DNS Application Directory Partitions with conditional forwarders
Before I explain how to use DNS Application Directory Partitions with conditional forwarders, we need to set the stage. We will shortly revisit how DNS name resolution is set up and configured for hybrid Azure environments. Then it will help to understand why DNS Application Directory Partitions are useful in such scenarios.
Active Directory Domain Services extended to Azure
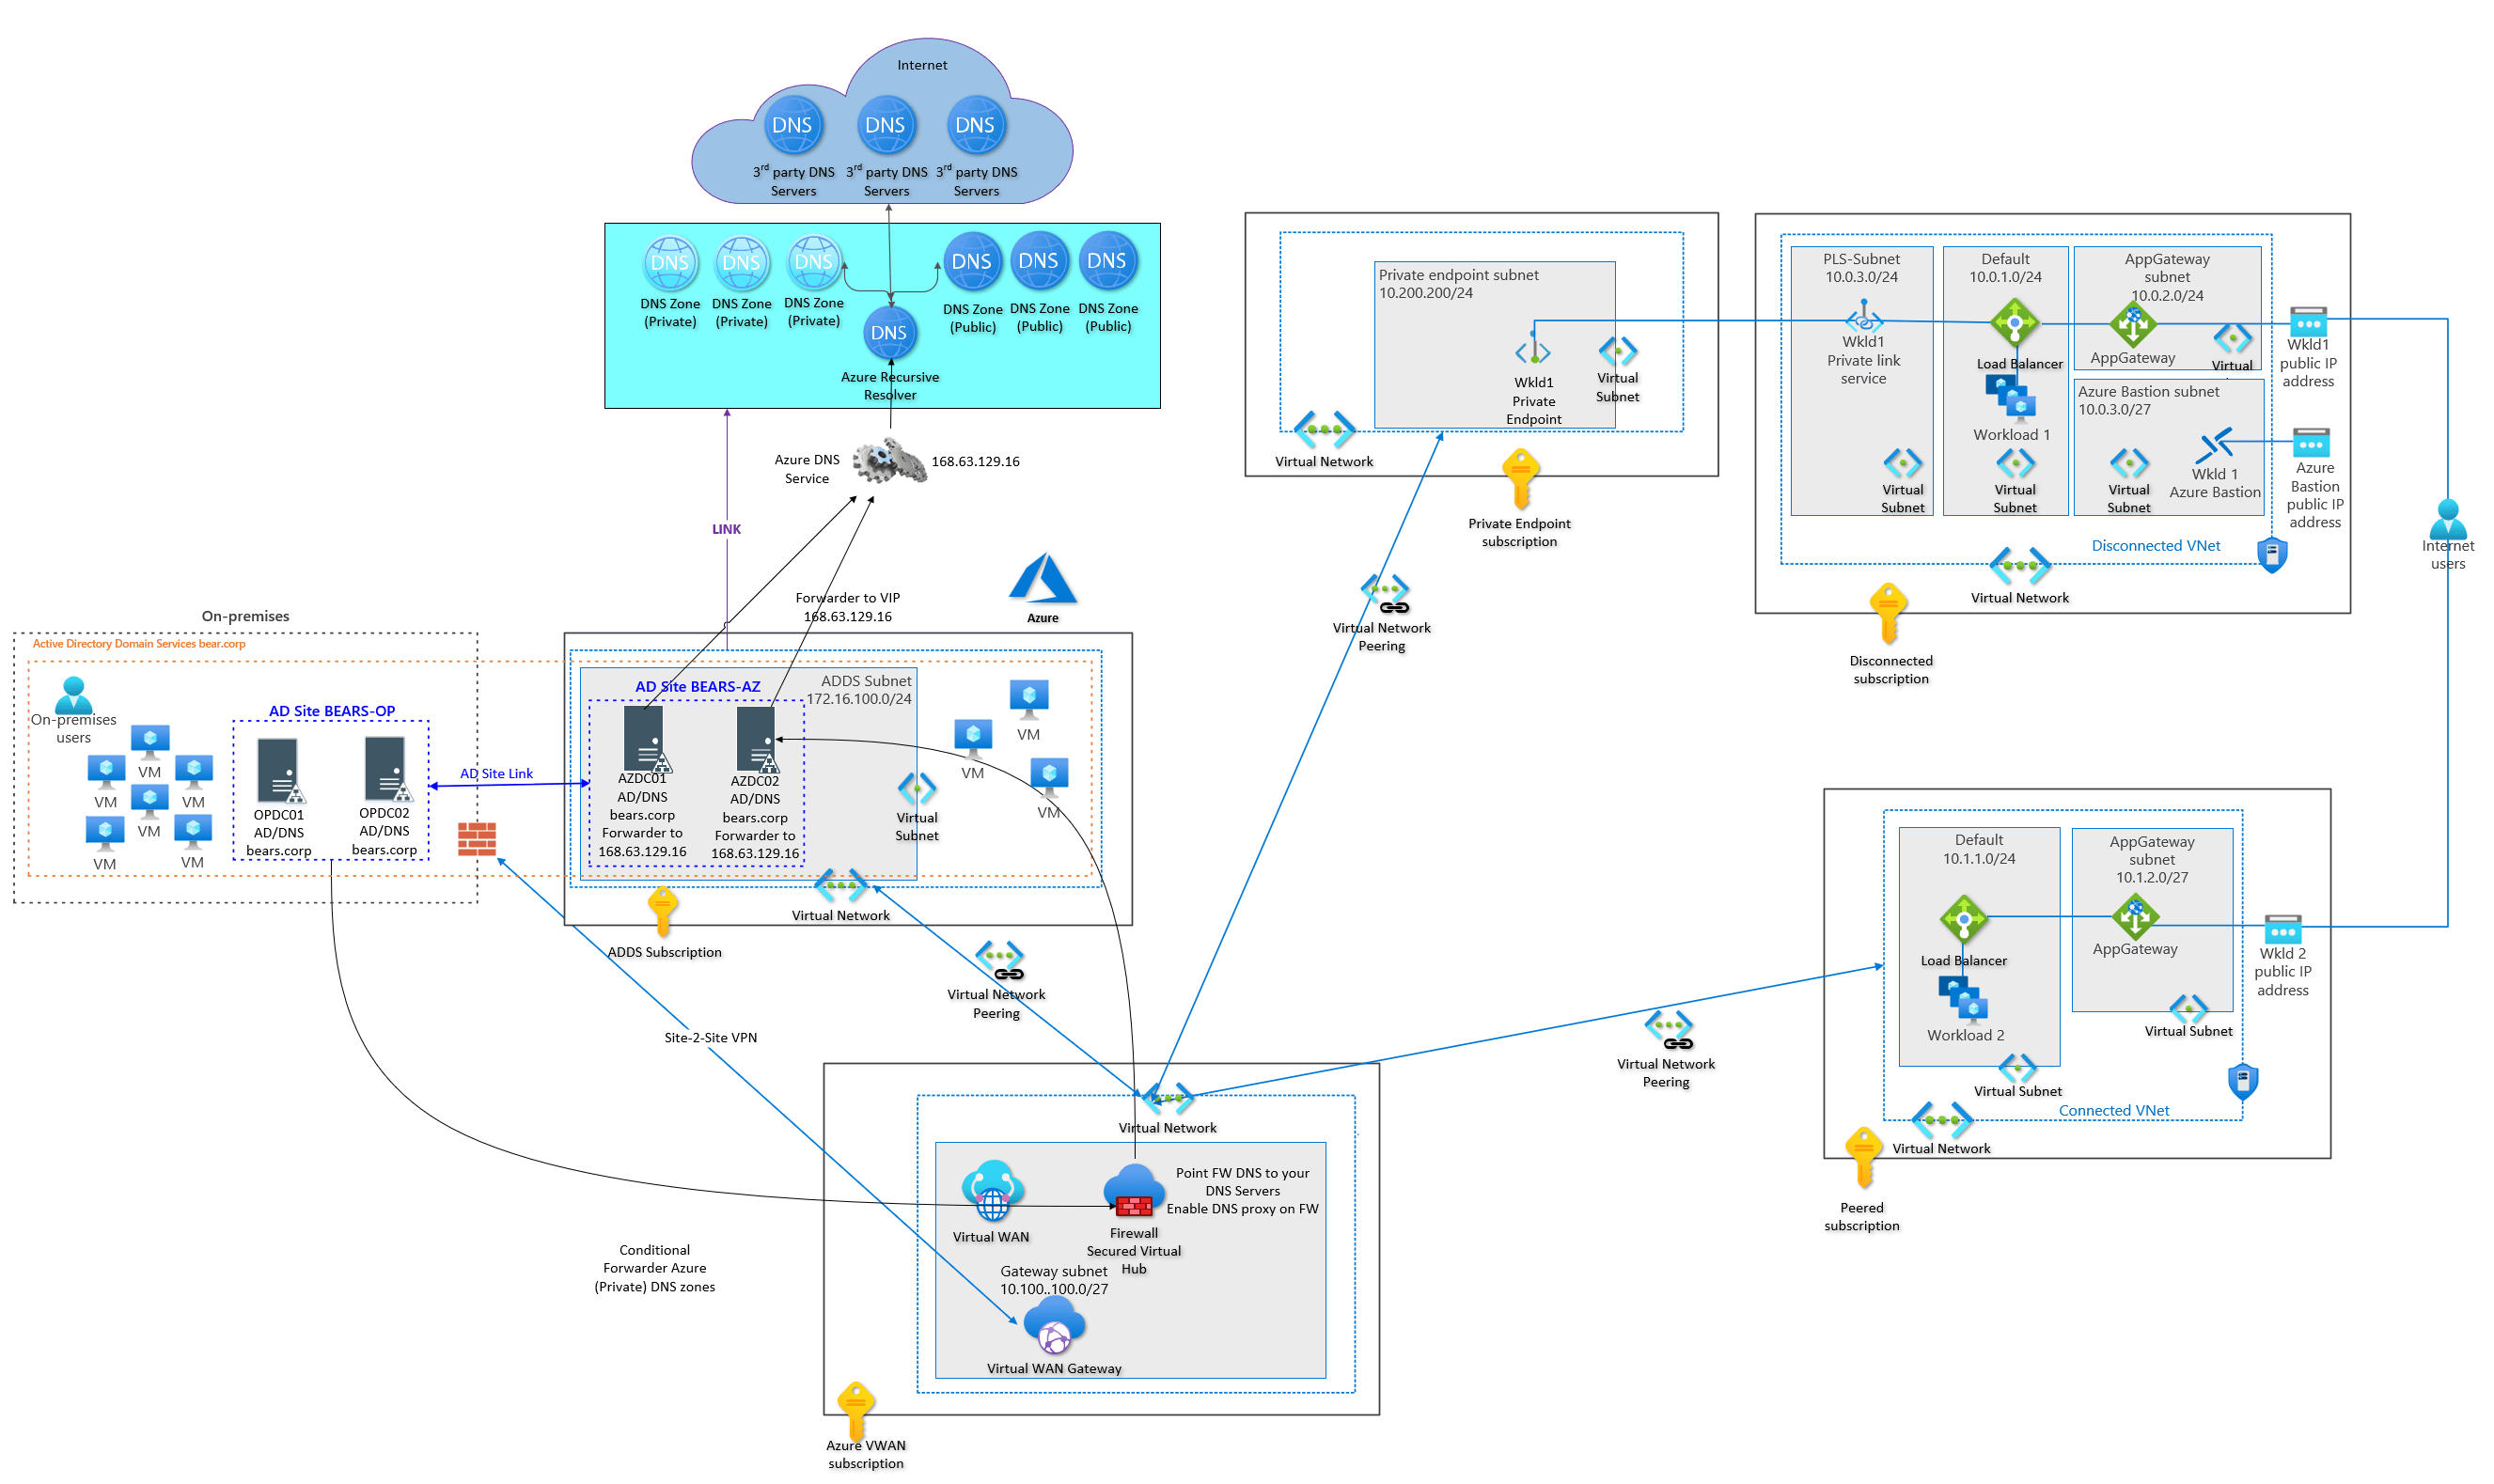
In the context of this article, an Azure hybrid environment is where you have Active Directory Domain Services (ADDS) extended to Azure. I.e., you have a least one AD site on-premises and at least one AD Site in Azure, with connectivity between the two all set up via ExpressRoute or a Site-to-Site VPN, firewall configured, etc. In most cases, the DNS servers for the ADDS environment are AD integrated. Which is what we want for this scenario.
You must have DNS name resolution sorted out effectively and efficiently in such an environment. Queries from on-premises to Azure need to be resolved, and queries from Azure to on-premises.
Regarding resolving private endpoints in Azure and potentially other private DNS zones in Azure, we need to leverage conditional forwarders. That means we must create all the public DNS zones as conditional forwarders on the on-premises domain controllers. We point these at our custom DNS servers in Azure or our Azure Firewall DNS proxy that points to our custom DNS servers in Azure. The latter is the better option if that is available. Those custom DNS Servers will most likely be our AD/DNS server in Azure. These will forward the queries to azure VIP 168.63.129.16, which will let Azure DNS handle the actual name resolution.
Conditional forwarders on-premises
There are two attention points in this scenario. First, the conditional forwarders should only exist on the on-premises DC/DNS servers. That is normal. The DC/DNS servers in Azure can just forward the queries to the Azure VIP, which will have the AD recursive DNS service query the private DNS zones and provide an answer. That is why we forward the on-prem queries to them directly or via the firewall DNS proxy.
Secondly, less frequent, but more often than you think, ADDS on-premises does not translate into a single Azure tenant or deployment. You can have multiple AD Sites in Azure for the same on-prem ADSS environment. That happens via different business units, mergers, and acquisitions, politics, life, or whatever.
Example on-prem / Azure ADDS environment with Azure FW DNS proxy.
Both attention points mean that we must ensure that the on-prem conditional forwarders only live on the DC/DNS servers that forward to the correct custom DNS services in Azure. Some DC/DNS servers on-premises might send their queries to Azure AD site 1 and others to Azure AD site 2, which might live in separate tenants or Azure deployments.
But another option might be handy if you have 10 on-premises Active Directory Sites and 5 Azure Active Directory Sites. That option is called DNS partitioning. You can create your own Active Directory partitions, To those, you add the desired DC/DNS servers. You can now create your conditional forwarders, store them in Active Directory and replicate them to their respective custom partition. That leaves the flexibility to keep the conditional forwarders out of the Azure DC/DNS servers and enables different conditional forwarders configurations per on-premises Active Directory Site.
DNS Application Directory Partitions
To create the DNS application directory partitions, you can use PowerShell or the ‘dnscnd’ command line tool. I will use Powershell here. If you want to use the command line, look at How to create and apply a custom application directory partition on an Active Directory-integrated DNS zone on how to do this.
The command above did two things. It created the application directory partition and registered the DNS server on which you ran the script. You can test that with Get-DnsServerDirectoryPartition -Name “OP-BLUE-ADDS-SITE” or Get-DnsServerDirectoryPartition -Name “OP-BLUE-ADDS-SITE” -ComputerName ‘DC01’ if you specify the computer name.
By the way, if you run just Get-DnsServerDirectoryPartition, you will see all partition info for the current node or the node you specify.
Register the second DC/DNS server in this partition with the following command.
Note that the Get-DnsServerDirectoryPartition only shows the registered DNS server for the node you are running it on or the one you specify. You do not get a list of all registered servers.
Now go ahead and store some zones in Active Directory and replicate to the BLUE partition on one of the DC/DNS servers you will see the ZoneCount go up on both. Just wait for replication to do its job or force replication to happen.
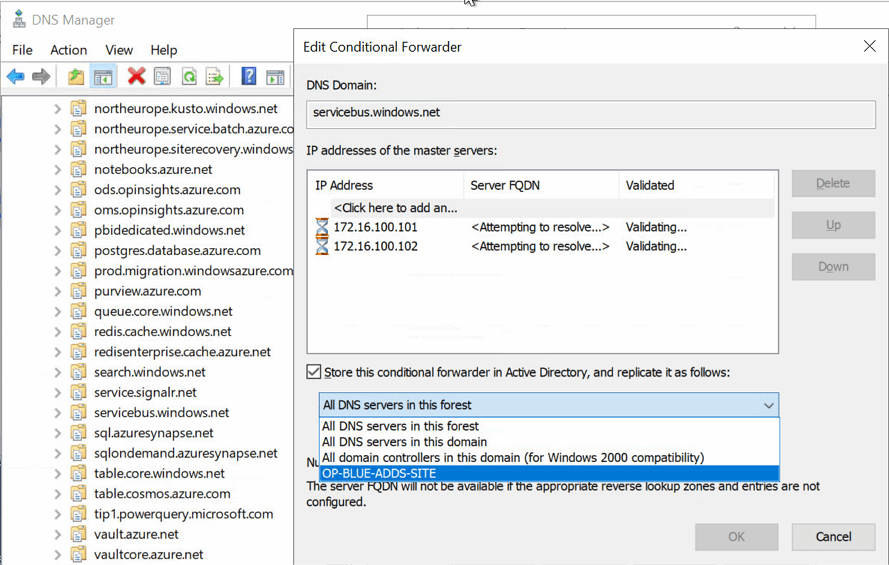
Storing the conditional forwarder in your DNS application directory partition
When you create the conditional forwarder zones for the private endpoints, you can store them in Active Directory and replicate them to their respective partitions. Just select the correct partition in the drop-down list. You will only see the partition for which your DC/DNS server has been registered, not every existing partition.
Select the correct DNS application directory partition in the drop-down list
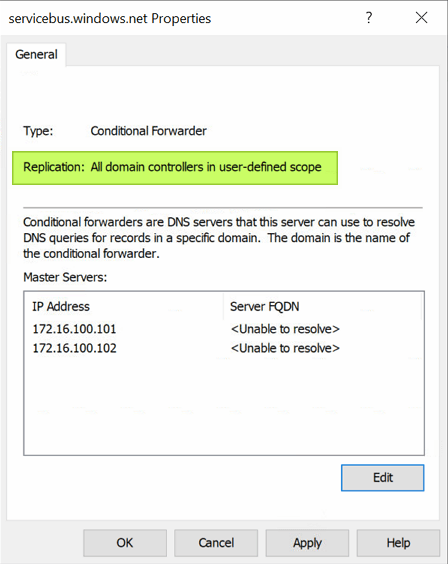
When done, the properties for the conditional forwarder will show that the zone is stored in Active Directory and replicated to all domain controllers in a user-defined scope.
Conditional forwarder replicated to all DCs in a user-defined scope
Create a partition for any collection of DC/DNS servers that you want to have their Azure private endpoint DNS zones sent to a specific Azure deployment. So depending on your situation, that might be one or more.
As I mentioned, the custom partition will not even be offered on any DC/DNS server that has not enlisted for that zone. This protects against people selecting the wrong custom partition for their environment.
Conclusion
That’s it. You now have one more option on your tool belt when configuring on-premises to Azure name resolution in hybrid scenarios. The fun thing is that I have never seen more people learn about using DNS Application Directory Partitions with conditional forwarders now they have to design and configure DNS for hybrid on-premises/Azure ADDS environments. Maybe you learned something new today. If so, I am happy you did.
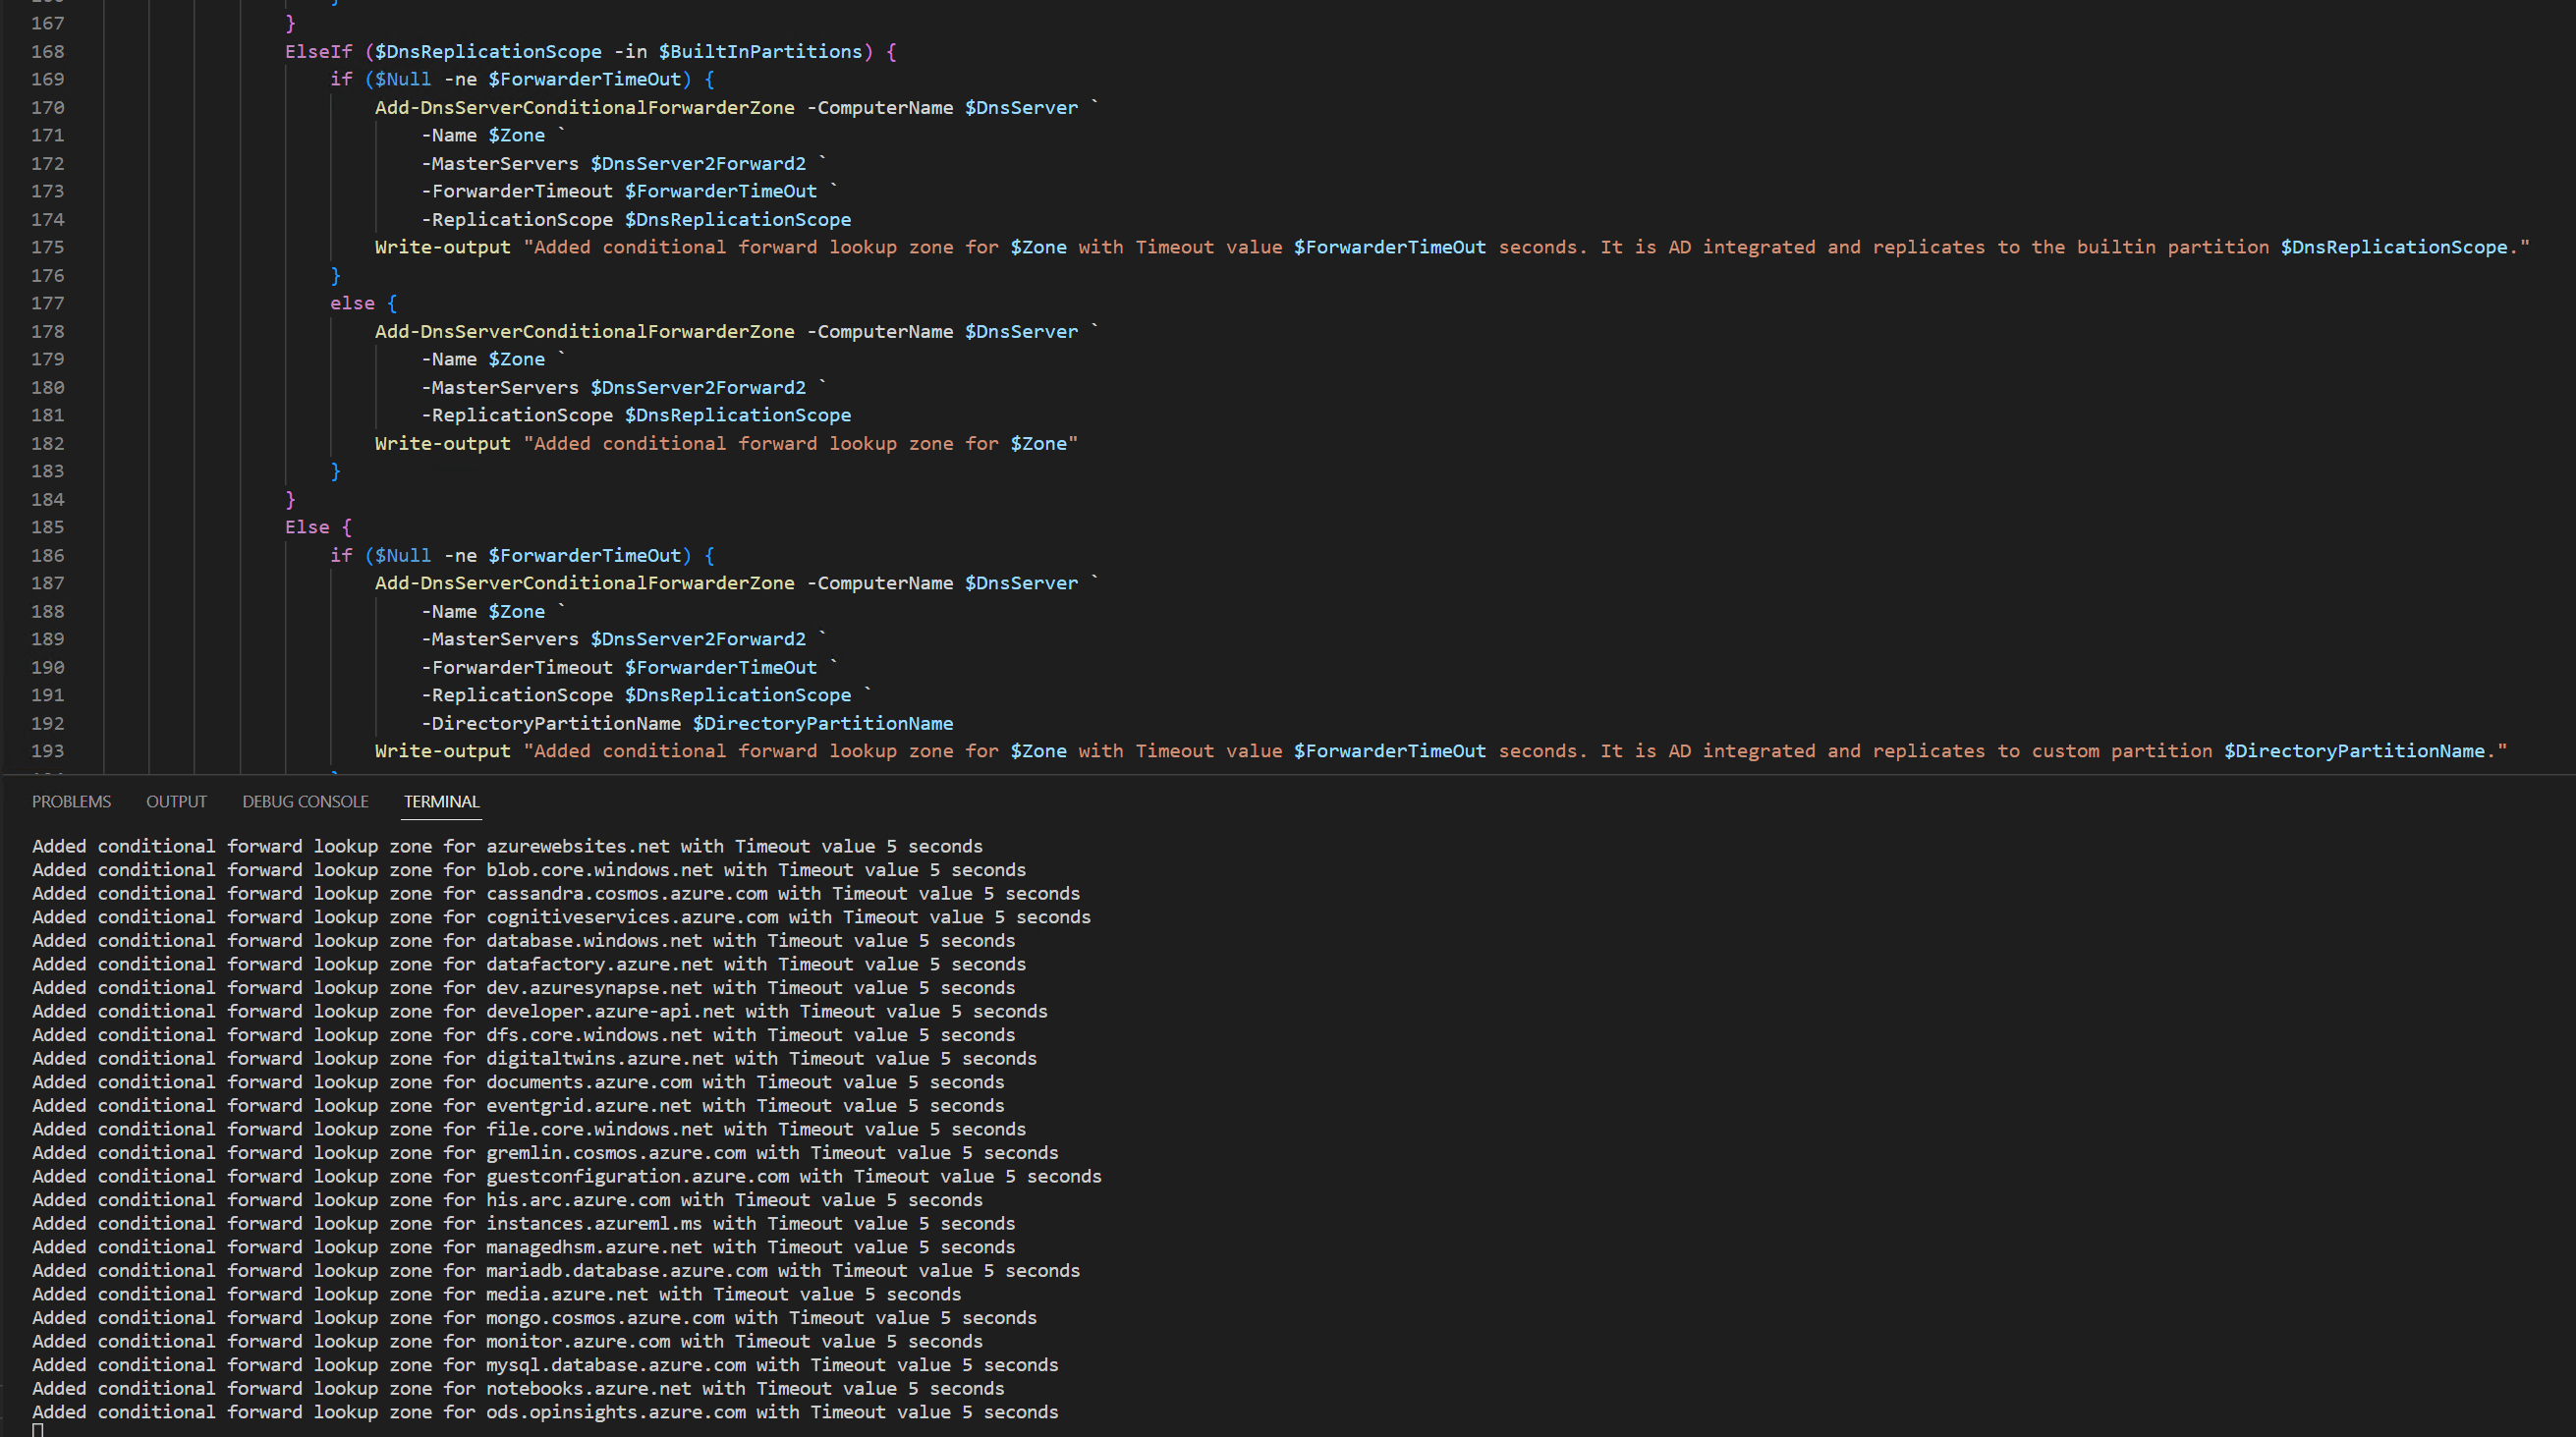
I recently wrote a PowerShell script to maintain Azure Public DNS zone conditional forwarders. If you look at the list is quite long. Adding these manually is tedious and error-prone. Sure you might only need a few, but hey, I think and prepare long term.
Some background on DNS and private endpoints
When using private endpoints in Azure correct DNS name resolution is essential. While Azure can do a lot of things for you under the hood it is important to wrap your head around name resolution in Azure, for all your public, private, and custom DNS requirements. In the end, you need a DNS solution that is maintainable and works for current and future use cases. Your peaceful IT existence will fall apart fast without the ability to correctly resolve the private endpoint IP addresses to their fully qualified domain name (FQDN).
That in itself is a big subject I will not dive into right now. I will say that host files (if applicable) are OK for testing but not a maintainable solution, except for the smallest environments. In Azure, you can link virtual networks to Private DNS zones to resolve DNS queries for private endpoints. As an alternative, you can use your own custom DNS Server(s) with a forwarder to Azure’s VIP 168.63.129.16 and, at least on-premises conditional forwarders.
The latter is a requirement to resolve DNS queries for Azure resources with private endpoints for on-premises. At least until Azure DNS Private Resolver becomes generally available. That will be the way forward in the future if you otherwise have no need for custom DNS servers.
Please note that name resolution for private endpoints uses the public DNS zones. This allows existing Microsoft Azure services with DNS configurations for a public endpoint to keep functioning when accessed from the internet. Azure will intercept queries that originate from Azure or connected on-premises locations and reply with the private IP address of private endpoints. This configuration must be overridden to connect using your private endpoint.
On-premises DNS Servers
While your custom DNS servers in Azure can forward queries they are not authoritative for to the Azure VIP 168.63.129.16, on-premises servers cannot reach that IP address. They need to send the DNS queries for private Azure resources to a custom DSN Server in Azure via conditional forwarding. The Azure custom DNS server will forward the query to 168.63.129.16.
Example on-prem / Azure ADDS environment with Azure FW DNS proxy
PowerShell script to maintain Azure Public DNS zone conditional forwarders
Below you will find the code for the script. I created a CSV file with all the Azure public DNS Conditional forwarder zones. Zones with placeholders for regions, partitions, or SQL instances will be generated. For that, you need to provide the correct parameters. if not these are ignored.
Adding all Azure public DNS conditional forwarders to an on-premises DNS server
Another attention point is the fact that you can opt to store the zones in Active Directory or not. If so you can specify in what builtin or custom partition.
There are examples in the script TestAzurePublicDNSZoneForwardersScript.ps1 on how to use it. You will need at least one playground DNS server or better, 2 AD integrated DC/DNS servers for testing.
That’s it. I can extend the PowerShell script to maintain Azure Public DNS zone conditional forwarders with extra options when adding or updating conditional forwarders. Right now, for its current role, it does what I need. I do not plan to add an option to update the “store this conditional forwarder in Active Directory” setting as this has a bug.
See Bug when changing the “store this conditional forwarder in active directory” setting for more info. The gist is that it makes changing the setting causes DNS queries for the conditional forwarder to fail. We avoid that issue by removing and adding the conditional forwarders again. In many (most?) use cases so far, the default setting of not storing the conditional forwarder in Active Directory is what I need, so the script has no option to change that default setting until I might need it.