ConvertFrom-Json is not serializable

Introduction

While writing Bicep recently, I was stumped by the fact that my deployment kept failing. I spent a lot of time troubleshooting many possible ideas on what might be causing this. As JSON is involved and I am far from a JSON syntax guru, I first focused on that. Later I moved to how I use JSON in Bicep and PowerShell before finally understanding the problem was due to the fact that ConvertFrom-Json is not serializable.

Parameters with Bicep

When deploying resources in Azure with Bicep, I always need to consider who has to deliver or maintain the code and the parameters. It has to be somewhat structured, readable, and understandable. It can’t be one gigantic listing that confuses people to the point they are lost. Simplicity and ease of use rule my actions here. I know when it comes to IaC, this can be a challenge. So, when it comes to parameters, what are our options here?

  • I avoid hard-coding parameters in Bicep. It’s OK for testing while writing the code, but beyond that, it is a bad idea for maintainability.
  • You can use parameter files. That is a considerable improvement, but it has its limitations.
  • I have chosen the path of leveraging PowerShell to create and maintain parameters and pass those via objects to the main bicep file for deployment. That is a flexible and maintainable approach. Sure, it is not perfect either, but neither am I.

Regarding Bicep and PowerShell, we can also put parameters in separate files and read those to create parameters. Whether this is a good idea depends on the situation. My rule of thumb is that it is worth doing when things become easier to read and maintain while reducing the places where you have to edit your IaC files. In the case of Azure Firewall Policy Rules Collection Groups, Rules collections, and Rules, it can make sense.

Bicep and JSON files

You can read file content in Bicep using. With the json() function, you can tell Bicep that this is JSON. So far, so good. The below is perfectly fine and works. We can loop through that variable in a resource deployment.

var firewallChildRGCs = [

    json(loadTextContent('./AFW/Policies/RGSsAfwChild01.json'))

    json(loadTextContent('./AFW/Policies/RGSsAfwChild02.json'))

    json(loadTextContent('./AFW/Policies/RGSsAfwChild03.json'))

]

However, I am not entirely happy with this. While I like it in some aspects, it conflicts with my desire not needing to edit a working Bicep file once it is in use. So what do I like about it?

It keeps Bicep clean and concise and limits the looping to iterate over the Rules Collection Groups, thus avoiding the nested looping for Rules collections and Rules. Why is that? Because I can do this

@batchSize(1)

resource firewallChildPolicyWEUColGroups 'Microsoft.Network/firewallPolicies/ruleCollectionGroups@2022-07-01' = [for (childrcg, index) in firewallChildRGCs: {

  parent: firewallChildPolicyWEU

  name: childrcg.name

  dependsOn: [firewallParentPolicyWEUColGroups]

  properties: childrcg.properties

}]

As you can see, I loop through the variable and pass the JSON into the properties. That way, I create all Rule Collections and Rules without needing to do any nested looping via “helper” modules to get this done.

The drawback, however, is that the loadTextContent function in Bicep cannot use dynamic parameters or variables. As a result, the paths to the files need to be hard coded into the Bicep file. That is something we want to avoid. But until that is possible, it is a hard restriction. That is because parameters are evaluated during runtime (bicep deployment), whereas loadTextContent in Bicep happens while compiling (bicep build). So, in contrast to the early previews of Bicep, where you “transpiled” the Bicep manually, it is now done for you automatically before the deployment. You think this can work, but it does not.

PowerShell and JSON files

As mentioned above, I chose to use PowerShell to create and maintain parameters, and I want to read my JSON files there. However, it prevents me from creating large, long, and complex to maintain PowerShell objects with nested arrays. Editing these is not straightforward for everyone. On top of that, it leads to the need for nested looping in Bicep via “helper” modules. While that works, and I use it, I find it more tedious with deeply nested structures and many parameters to supply. Hence I am splitting it out into easier-to-maintain separate JSON files.

Here is what I do in PowerShell to build my array to pass via an Object parameter. First, I read the JSON filers from my folder.

$ChildFilePath = "../bicep/nested/AfwChildPoliciesAndRules/*"
$Files = Get-ChildItem -File $ChildFilePath -Include '*.json' -exclude 'DONOTUSE*.json'
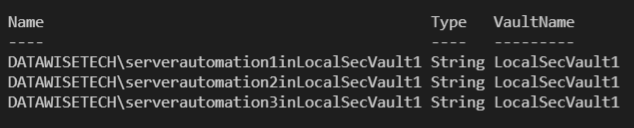
$Files
$AfwChildCollectionGroupsValidate = @() # We use this with ConvertFrom-Json to validate that the JSON file is OK, but cannot use this to pass as a param to Bicep
    $AfwChildCollectionGroups = @()
    Foreach ($File in $Files) {
    try{
        $AfwChildCollectionGroupsValidate += (Get-Content $File.FullName -Raw) | ConvertFrom-Json
        # DO NOT PUT JSON in here - the PSCustomObject is not serializable and passing this param to Bicep will than be empty!
        $AfwChildCollectionGroups += (Get-Content $File.FullName -Raw) # A string is serializable!
        }
        Catch
        {
        write-host -ForegroundColor Red "ConvertFrom-Json threw and error. Check your JSON in the RCG/RC/R files"
        Exit
        }
    }

I can then use this to roll out the resources, as in the below example.

// Roll out the child Rule Collection Group(s)

var ChildRCGs = [for (rulecol, index) in firewallChildpolicy.RuleCollectionGroups: {

  name: json(rulecol).name

  properties: json(rulecol).properties

}]

Initially, the idea was that by using ConvertFrom-Json I would pass the JSON to Bicep as a parameter directly.

$AfwChildCollectionGroups += (Get-Content $File.FullName -Raw) | ConvertFrom-Json

So not only would I not need to load the files in Bicep with a hard-coded path, I would also not need to use json() function in Bicep.

// Roll out the child Rule Collection Group(s)
var ChildRCGs = [for (rulecol, index) in firewallChildpolicy.RuleCollectionGroups: {
  name: rulecol.name
  properties: rulecol.properties
}]

However, this failed on me time and time again with properties not being found and what not. Below is an example of such an error.

Line |
  30 |          New-AzResourceGroupDeployment @params -DeploymentDebugLogLeve …
     |          ~~~~~~~~~~~~~~~~~~~~~~~~~~~~~~~~~~~~~~~~~~~~~~~~~~~~~~~~~~~~~
     | 2:46:20 PM - Error: Code=InvalidTemplate; Message=Deployment template validation failed: 'The template variable 'ChildRCGs' is not valid: The language expression property 'name' doesn't exist, available properties are ''.. Please see    
     | https://aka.ms/arm-functions for usage details.'.

It did not make sense at all. That was until a dev buddy asked if the object was serializable at all. And guess what? ConvertFrom-Json creates a PSCustomObject that is NOT serializable.

You can check this quickly yourself.

((Get-Content $File.FullName -Raw) | ConvertFrom-Json).gettype().IsSerializable

Will print False

While

((Get-Content $File.FullName -Raw)).gettype().IsSerializable

Will print True

With some more testing and the use of outputs, I can even visualize that the parameter remained empty! The array contains three empty {} where I expected the JSON.

ConvertFrom-Json is not serializable

I usually do not have any issues with this in my pure PowerShell scripting. But here, I pass the object from PowerShell to Bicep, and guess what? For that to work, it has to be serializable. Now, when I do this, there are no warnings or errors. It just seems to work until you use the parameter and get errors that, at first, I did not understand. But the root cause is that in Bicep, the parameter remained empty. Needless to say, I wasted many hours trying to fix this before I finally understood the root cause!

As you can see in the code, I still use ConvertFrom-Json to test if my JSON files contain any errors, but I do not pass that JSON to Bicep as that will not work. So instead, I pass the string and still use the json() function in Bicep.

Hence, this blog post is to help others not make the mistake I made. It will also help me remember ConvertFrom-Json is not serializable.

Create virtual machines for a Veeam hardened repository lab

Introduction

In this blog post, I will give you a script to create virtual machines for a Veeam hardened repository lab.

Create virtual machines for a Veeam hardened repository lab
The script has just created two virtual machines for you

Some of you have asked me to do some knowledge transfer about configuring a Veeam hardened repository. For lab work virtualization is your friend. I hope to show you some of the Ubuntu Linux configurations I do. When time permits I will blog about this and you can follow along. I will share what I can on my blog.

Running the script

Now, if you have Hyper-V running on a lab node or on your desktop or laptop you can create virtual machines for a Veeam hardened repository lab with the PowerShell script below. Just adjust the parameters and make sure you have the Ubuntu 20.04 Server ISO in the right place. The script creates the virtual machine configuration files under a folder with the name of the virtual machine in the path you specify in the variables The VM it creates will boot into the Ubuntu setup and we can walk through it and configure it.

Pay attention to the -version of the virtual machine. I run Windows Server 2022 and Windows 11 on my PCs so you might need to adjust that to a version your Hyper-V installation supports.

Also, pay attention to the VLAN IDs used. That suits my lab network. It might not suit yours. Use VLAN ID 0 to disable the VLAN identifier on a NIC.

Clear-Host
$VMPrefix = 'AAAA-XFSREPO-0'
$Path = "D:\VirtualMachines\"
$ISOPath = 'D:\VirtualMachines\ISO\ubuntu-20.04.4-live-server-amd64.iso'
$NumberOfCPUs = 2
$Memory = 4GB
$vSwitch = 'DataWiseTech'
$NumberOfVMs = 2
$VlanIdTeam = 2
$VlanIDSMB1 = 40
$VlanIdSMB2 = 50
$VmVersion = '10.0'

ForEach ($Counter in 1..$NumberOfVMs) {
    $VMName = $VMPrefix + $Counter
    $DataDisk01Path = "$Path$VMName\Virtual Hard Disks\$VMName-DATA01.vhdx"
    $DataDisk02Path = "$Path$VMName\Virtual Hard Disks\$VMName-DATA02.vhdx"
    Write-Host -ForegroundColor Cyan "Creating VM $VMName in $Path ..."
    New-VM -Name $VMName -path $Path -NewVHDPath "$Path$VMName\Virtual Hard Disks\$VMName-OS.vhdx" `
        -NewVHDSizeBytes 65GB -Version 10.0 -Generation 2 -MemoryStartupBytes $Memory -SwitchName $vSwitch| out-null

    Write-Host -ForegroundColor Cyan "Setting VM $VMName its number of CPUs to $NumberOfCPUs ..."
    Set-VMProcessor –VMName $VMName –count 2

    Write-Host -ForegroundColor Magenta "Adding NICs LAN-HOST01, LAN-HOST02, SMB1 and SMB2 to $VMName"
    #Remove-VMNetworkAdapter -VMName $VMName -Name 'Network Adapter'

    Rename-VMNetworkAdapter -VMName $VMName -Name 'Network Adapter' -NewName LAN-HOST-01
    #Connect-VMNetworkAdapter -VMName $VMName -Name LAN -SwitchName $vSwitch
    Add-VMNetworkAdapter -VMName $VMName -SwitchName DataWiseTech -Name LAN-HOST-02 -DeviceNaming On
    Add-VMNetworkAdapter -VMName $VMName -SwitchName $vSwitch -Name SMB1 -DeviceNaming On
    Add-VMNetworkAdapter -VMName $VMName -SwitchName $vSwitch -Name SMB2 -DeviceNaming On
    
    Write-Host -ForegroundColor Magenta "Assigning VLANs to NICs LAN-HOST01, LAN-HOST02, SMB1 and SMB2 to $VMName"
    Set-VMNetworkAdapterVlan -VMName $VMName -VMNetworkAdapterName LAN-HOST-01 -Access -VLANId $VlanIdTeam
    Set-VMNetworkAdapterVlan -VMName $VMName -VMNetworkAdapterName LAN-HOST-02 -Access -VLANId $VlanIdTeam  
    Set-VMNetworkAdapterVlan -VMName $VMName -VMNetworkAdapterName SMB1 -Access -VLANId $VlanIdSMB1
    Set-VMNetworkAdapterVlan -VMName $VMName -VMNetworkAdapterName SMB2 -Access -VLANId $VlanIdSmb2

    Set-VMNetworkAdapter -VMName $VMName -Name LAN-HOST-01 -DhcpGuard On -RouterGuard On -DeviceNaming On -MacAddressSpoofing On -AllowTeaming On
    Set-VMNetworkAdapter -VMName $VMName -Name LAN-HOST-02 -DhcpGuard On -RouterGuard On -MacAddressSpoofing On -AllowTeaming On
    Set-VMNetworkAdapter -VMName $VMName -Name SMB1 -DhcpGuard On -RouterGuard On -MacAddressSpoofing Off -AllowTeaming off
    Set-VMNetworkAdapter -VMName $VMName -Name SMB2 -DhcpGuard On -RouterGuard On -MacAddressSpoofing Off -AllowTeaming off

    Write-Host -ForegroundColor yellow "Adding DVD Drive to $VMName"
    Add-VMDvdDrive -VMName $VMName -ControllerNumber 0 -ControllerLocation 8 

    Write-Host -ForegroundColor yellow "Mounting $ISOPath to DVD Drive on $VMName"
    Set-VMDvdDrive -VMName $VMName -Path $ISOPath

    Write-Host -ForegroundColor White "Setting DVD with $ISOPath as first boot device on $VMName"
    $DVDWithOurISO = ((Get-VMFirmware -VMName $VMName).BootOrder | Where-Object Device -like *DVD*).Device
    
    Set-VMFirmware -VMName $VMName -FirstBootDevice $DVDWithOurISO `
    -EnableSecureBoot On -SecureBootTemplate MicrosoftUEFICertificateAuthority

    Write-Host -ForegroundColor Cyan "Creating two data disks and adding them to $VMName"
    New-VHD -Path $DataDisk01Path -Dynamic -SizeBytes 150GB | out-null
    New-VHD -Path $DataDisk02Path -Dynamic -SizeBytes 150GB | out-null

    Add-VMHardDiskDrive -VMName $VMName -ControllerNumber 0 `
    -ControllerLocation 1 -ControllerType SCSI  -Path $DataDisk01Path

    Add-VMHardDiskDrive -VMName $VMName -ControllerNumber 0 `
    -ControllerLocation 2 -ControllerType SCSI  -Path $DataDisk02Path

    $VM = Get-VM $VMName 
    write-Host "VM $VM  has been created" -ForegroundColor green
    write-Host ""
}

Conclusion

In conclusion, that’s it for now. Play with the script and you will create virtual machines for a Veeam hardened repository lab in no time. That way you are ready to test and educate yourself. Don’t forget that you need to have sufficient resources on your host. Virtualization is cool but it is not magic.

Some of the settings won’t make sense to some of you, but during the future post, this will become clear. These are specific to Ubuntu networking on Hyper-V.

I hope to publish the steps I take in the coming months. As with many, time is my limiting factor so have patience. In the meanwhile, you read up about the Veeam hardened repository.

SecretStore local vault extension

What is the SecretStore local vault extension

The SecretStore local vault extension is a PowerShell module extension vault for Microsoft.PowerShell.SecretManagement. It is a secure storage solution that stores secret data on the local machine. It is based on .NET cryptography APIs, and works on Windows, Linux, macOS thanks to PowerShell Core.

The secret data is stored at rest in encrypted form on the file system and decrypted when returned to a user request. The store file data integrity is verified using a cryptographic hash embedded in the file.

The store can be configured to require a password or operate password-less. Requiring a password adds to defense-in-depth since password-less operation relies solely on file system protections. Password-less operation still encrypts data, but the encryption key is stored on file and is accessible. Another configuration option is the password timeout, which by default is 15 minutes for automation purposes you can use Unlock-SecretStore to enter the password for the current PowerShell session for the duration of the timeout period.

Testing the SecretStore local vault extension

Below you will find a demonstration script where I register a vault of the type secret store. This is a local vault extension that creates its data and configuration files in the currently logged-in user scope. You specify the vault type to register by the ModuleName parameter.

$MySecureVault1 = 'LocalSecVault1'
#Register Vault1 in secret store
Register-SecretVault -ModuleName Microsoft.PowerShell.SecretStore -Name 
$MySecureVault1 -DefaultVault

#Verify the vault is there
Get-SecretVault

#Add secrets to Vault 1
Set-Secret -Name "DATAWISETECH\serverautomation1in$MySecureVault1" -Secret "pwdserverautom1" -Vault $MySecureVault1
Set-Secret -Name "DATAWISETECH\serverautomation2in$MySecureVault1" -Secret "pwdserverautom2" -Vault $MySecureVault1
Set-Secret -Name "DATAWISETECH\serverautomation3in$MySecureVault1" -Secret "pwdserverautom3" -Vault $MySecureVault1

#Verify secrets
Get-SecretInfo

Via Get-SecetInfo I can see the three secrets I added to the vault LocalSecVault1

SecretStore local vault extension
SecretStore local vault extensionThe three secrets I added to vault LocalSecVault1

The configuration and data are stored in separate files. The file location depends on the operating system. For Windows this is %LOCALAPPDATA%\Microsoft\PowerShell\secretmanagement\localstore. For Linux and MacOS it is $HOME/.secretmanagement/localstore/

SecretStore local vault extension
The localstore files

As you can see this happens under the user context. Support for all users or machine-wide context or scope is a planned future capability, but this is not available yet.
Access to the SecretStore files is via NTFS file permissions (Windows) or access control lists (Linux) limiting access to the specific user/owner.

Multiple Secret stores

It is possible in SecretManagement to register an extension vault multiple times. The reason for this is that an extension vault may support different contexts via the registration VaultParameters.

At first, it might seem that this means we can create multiple SecretStores but that is not the case. The SecretStore vault currently operates under the scope of the currently logged-on user at a very specific path. As a result, it confused me when I initially tried to create multiple SecretStores. I could see all the secrets of the other stores. Initially, that is what I thought happend. Consequenlty, I had a little security scare.. In reality, I just register different vault names to the same SecretStore as there is only one.

$MySecurevault2 = 'LocalSecVault2'
$MySecureVault3 = 'LocalSecVault3'

#Register two more vaults to secret store
Register-SecretVault -ModuleName Microsoft.PowerShell.SecretStore -Name $MySecurevault2 -DefaultVault
Register-SecretVault -ModuleName Microsoft.PowerShell.SecretStore -Name $MySecureVault3 -DefaultVault

#Note that all vaults contain the secrets of Vault1
Get-SecretInfo
 
#Add secrets to Vault 2
Set-Secret -Name "DATAWISETECH\serverautomation1in$MySecureVault2" -Secret "pwdserverautom1" -Vault $MySecureVault2
Set-Secret -Name "DATAWISETECH\serverautomation2in$MySecureVault2" -Secret "pwdserverautom2" -Vault $MySecureVault2
Set-Secret -Name "DATAWISETECH\serverautomation3in$MySecureVault2" -Secret "pwdserverautom3" -Vault $MySecureVault2

#Note that all vaults contain the secrets of Vault1 AND Vault 2
Get-SecretInfo
SecretStore local vault extension
Note that every registered local store vault beasically sees the same SecretStore as they all point to the same files.

Now, if you think, that multiple SecretStores per user scope are a good idea there is an open request to support this: Request: Multiple instances of SecretStore · Issue #58 · PowerShell/SecretStore (github.com).

KeePass SecretManagement extension vault

KeePass SecretManagement extension vault

The SecretManagement and SecretStore can work with SecretManagement extension vault modules. These can be found in the PowerShell Gallery using the “SecretManagement” search tag. Some example are:

I use KeePass and as such, the KeePass SecretManagement extension vault is the one I will demonstrate. First of all, install the module. Note that I chose to use the most recent beta version, which is 0.9.2-beta0008 at the time of writing this blog post.

Install-Module -Name SecretManagement.KeePass -AllowPrerelease

Naturally, if you haven’t installed SecretManagement and SecretStore modules yet, you must now really do that to be able to play with them.

Install-Module Microsoft.PowerShell.SecretManagement, Microsoft.PowerShell.SecretStore

Now that has been taken care of we can start testing the KeePass SecretManagement extension vault.

Using the KeePass SecretManagement extension vault

I created a demo KeePass .kdbx file in which I stored some example user names with their passwords. This file has a master password. You can also use a key or the Windows user account if you want to do so.

Our demo .kdbx file

Now I will register the KeePass file as a Vault

Register-KeePassSecretVault -Name 'WorkingHardInITKeePassVault' -Path 'C:\SysAdmin\Authentication\workinghardinit.kdbx' -UseMasterPassword
KeePass SecretManagement extension vaultRegister the KeePass Vault

As you can see this prompts you for the KeePass Master Pasword.

Keepass Master Password
Enter the Keepass Master password for: C:\SysAdmin\Authentication\workinghardinit.kdbx
Password for user Keepass Master Password:

Now that is done, I will unlock the KeePass secret vault so I can use it in automation without being prompted for it. By default, it remains unlocked for 900 seconds (15 minutes). This is configurable.

Unlock-KeePassSecretVault -Name 'WorkingHardInITKeePassVault'
Unlock the KeePass Vault, by entering the store password and, if not opened yes the KeePass master password
$FCcreds = Get-Secret -Name 'FC Switch 01'  -Vault 'WorkingHardInITKeePassVault'
$FCSwitchUser = $FCcreds.GetNetworkCredential().UserName
$FCSwitchPwd  =$FCcreds.GetNetworkCredential().Password
write-Host -foregroundcolor Green "FC Swicth 01 username $FCSwitchUser has $FCSwitchPwd for its password"
KeePass SecretManagement extension vault
We grab the username for the FC Switch 01 entry in the KeePass secret Vault.

Note that the entry for the secret is a network credential. As result, we can use the properties of the credential object to obtain the username and password in plain text. That is to say, we can (and should) use the credentials directly. You do not need to show or use the password in plain text. I did this here to show you that we got the correct values back.

Credentials ready to use.

Updating and adding secrets

Currently, updating the secrets with is not supported.

Let’s hope that theu allow updating and document using the hash table to enter metadata better in the future.

We need to first remove the existing one for now and re-enter the information. We’ll see how this evolves

Remove-Secret -Name 'FC Switch 01' -Vault 'WorkingHardInITKeePassVault'
$FCcreds = Get-Credential -UserName 'fcadmin'
Set-Secret -Name 'FC Switch 01' -Secret $FCcreds -Vault 'WorkingHardInITKeePassVault'

Finally, the good news is that there is also a PowerShell KeePass module that you can use for that sort of work. So you have the means in PowerShell to do so. See Getting Started · PSKeePass/PoShKeePass Wiki (github.com).

Conclusion

That was fun, was it not? The SecretManagement and SecretStore modules are going places. I hope this helps and happy scripting!