Introduction
Readers of my blog and other articles will know that I am a strong advocate of immutable backups, and Veeam delivers this functionality through its Linux Hardened Repository. I have several articles on how to set this up, secure it, add MFA, extend and repair XFS volumes, and more. I have designed and run many successful deployments in production.
- https://www.starwindsoftware.com/blog/veeam-hardened-linux-repository-part-1/
- https://www.starwindsoftware.com/blog/veeam-hardened-linux-repository-part-2/
- https://www.starwindsoftware.com/blog/veeam-hardened-linux-repository-part-3/
- https://www.starwindsoftware.com/blog/dell-r740xd2-configuration-for-veeam-harde ned-repositories/
- https://www.starwindsoftware.com/blog/customized-duo-mfa-for-veeam-hardened-repositories-part-i/
- https://www.starwindsoftware.com/blog/customized-duo-mfa-for-veeam-hardened-repositories-part-2/
- https://blog.workinghardinit.work/2021/01/18/immutability-of-linux-files-on-the-veeam-hardened-linux-repository/
In my latest designs, I have introduced a process flow to ensure that backups are not only immutable but also undeletable. The way to do this is to disallow root/sudo access to key personnel who are not involved in daily operations, and who must agree to allow and grant access under the 4-eyes principle. Why? To ensure no one, accidentally or otherwise, makes preventable, bad decisions.
Still, I notice that many people are hesitant to use it, as the perceived complexity of Linux deters them. Veeam has been addressing this perception, which is partially real and partially driven by fear, by providing the Veeam Hardened Repository ISO to simplify deployment and maintenance. Today, we will be looking into that
The Veeam Hardened Repository ISO
The Veeam Hardened Repository ISO (abbreviated to VHRISO on the forums) is a preconfigured, bootable ISO image based on the Rocky Linux distribution, developed and maintained by Veeam. It delivers a Managed Hardened Repository solution designed to simplify deployment and enhance security for backup infrastructures.
This solution caters to the masses to provide better security for all:
- Minimize the need for Linux expertise during the setup process.
- Provide a hardened operating system with advanced security configurations applied by default.
- Ensure secure and compliant backup storage aligned with industry standards.
Security Foundation
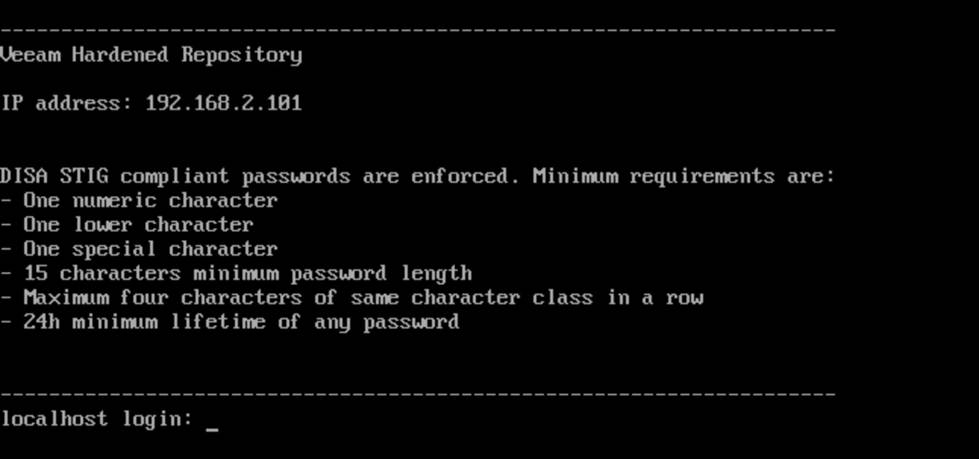
The operating system embedded in VHRISO is pre-hardened using guidelines from the Security Technical Implementation Guides (STIGs), maintained by the Defense Information Systems Agency (DISA) for Rocky Linux. All this ensures that even if immutability is enabled, misconfigurations are less likely to compromise the system.
Support Status
As of October 29, 2024, VHRISO transitioned from Community Preview to Experimental Support status. That means that production use is officially supported.
You can open support cases for issues, except those related to the ISO Installer and Configurator Tool, which fall under experimental SLA terms.
Only unmodified versions of VHRISO deployed on compliant hardware are eligible for support.
Veeam announced that it will integrate the standalone ISO into the platform in the next release of Veeam Backup & Replication, V13.
The main points of that announcement are:
- Veeam will integrate the standalone ISO into the platform via the new “Just Enough OS” (JeOS) ISO, which will enable deployment of various backup roles, including the hardened repository.
- Centralized Updates: JeOS will manage and update the OS and Veeam components across all backup infrastructure roles, simplifying maintenance with automatic patching during scheduled windows.
- Easier Provisioning: V13 removes the need for complex passwords in setting up a hardened repository. It will use thumbprint verification and a temporary PIN code for repairing with backup servers.
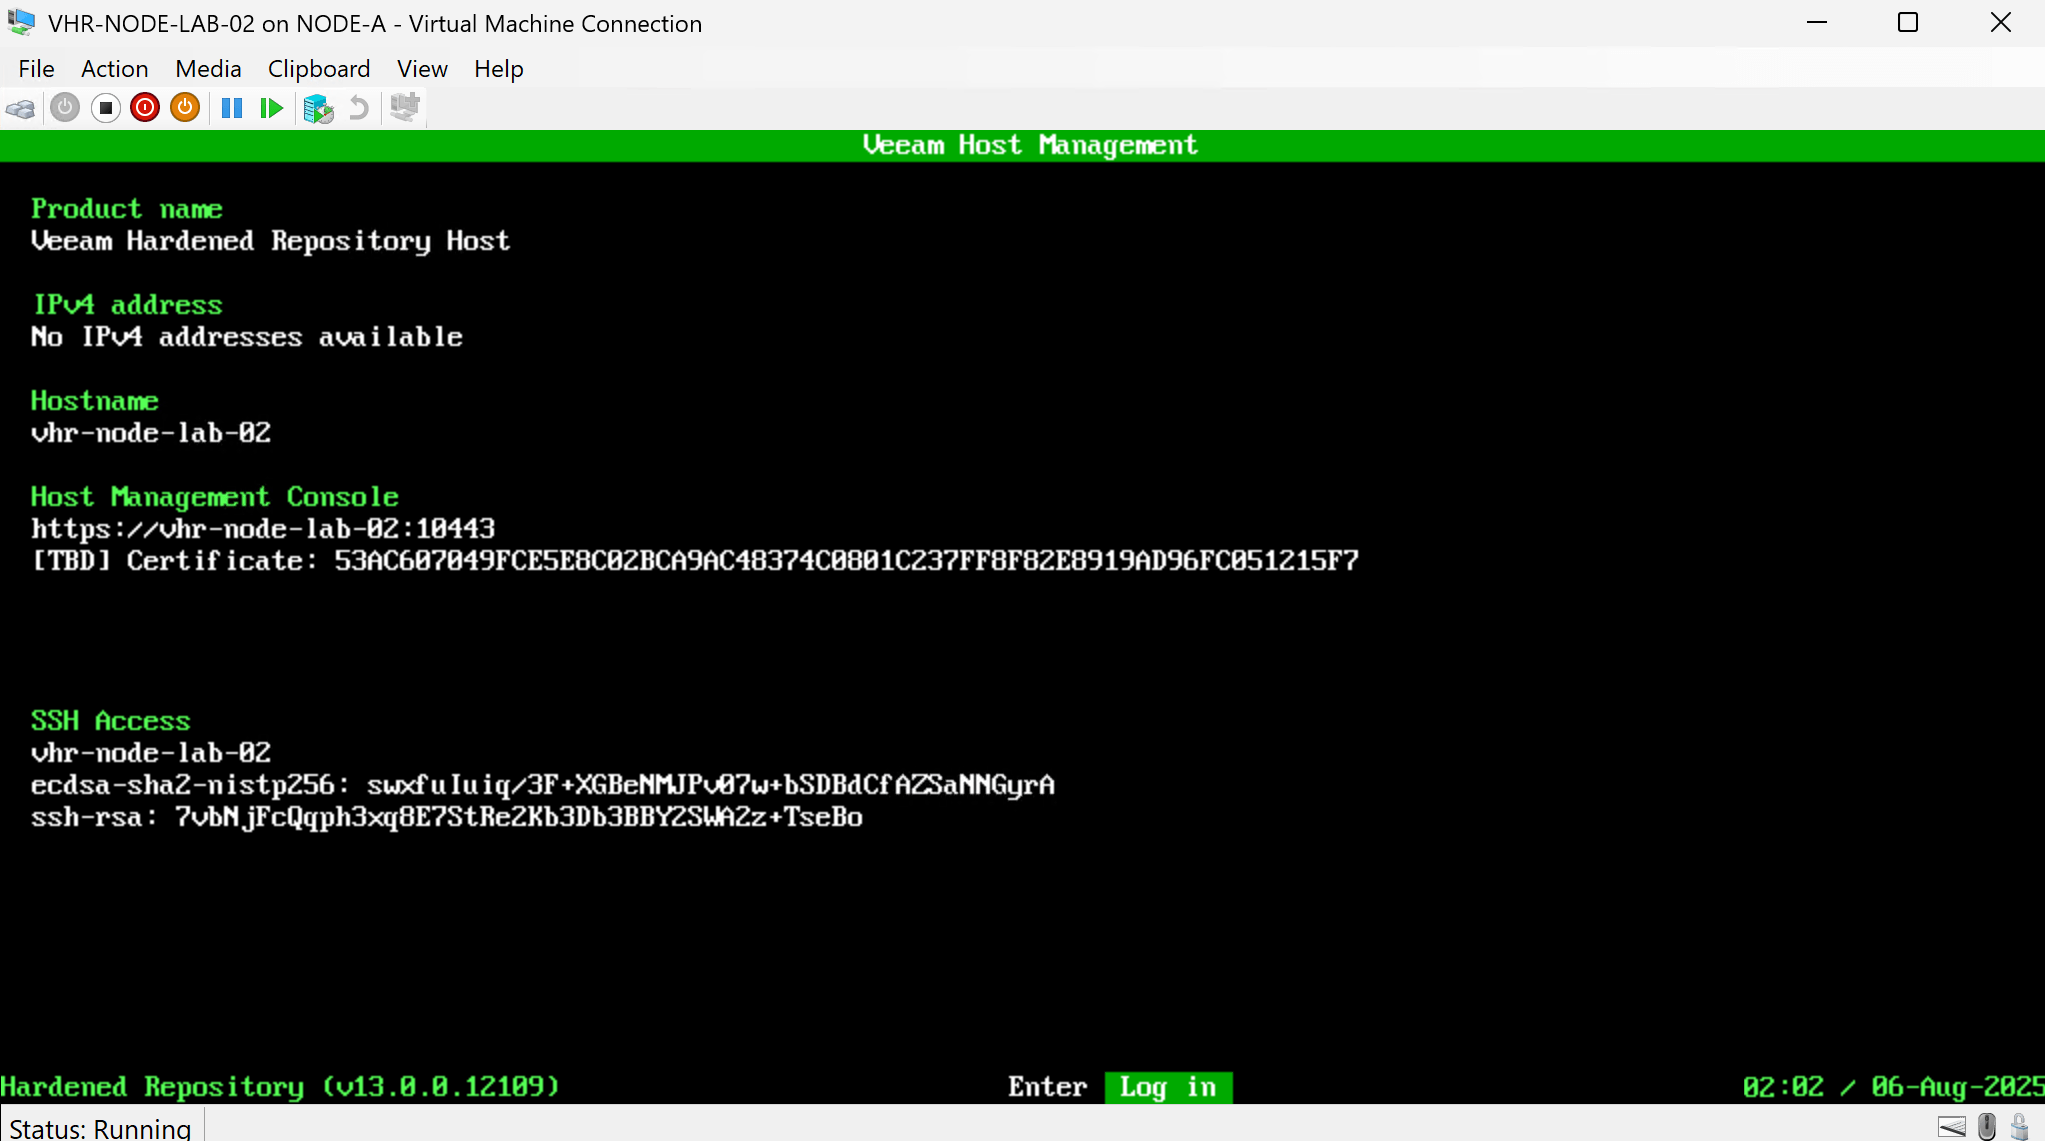
- Host Management Web UI: A new web interface will provide an easy-to-use management tool for JeOS and Veeam settings, with security safeguards to minimize exposure.
- Full Support for Managed Repositories: Managed hardened repositories deployed from the V13 JeOS ISO will now be fully supported, moving beyond experimental status.
See Anton Gostev’s announcement here: https://www.linkedin.com/posts/askgostev_weve-been-getting-many-questions-about-our-activity-7312464807171923969-q1YR/
Latest Release
On January 29, 2025, Veeam released Build 2.0.0.8, available via:
You can find it in the Veeam Customer Portal https://www.veeam.com/download_add_packs/vmware-esx-backup/hardened-repository/
Trial Downloads section under: Additional Downloads > Extensions and Other > Veeam Hardened Repository ISO
System Requirements
To ensure compatibility and optimal performance, you must meet the following prerequisites:
Software Requirements
- Veeam Backup & Replication version 12.2 or later
Hardware Requirements
- You must use hardware from the Red Hat compatibility list or the Certified Quality and Independent organization certified hardware list
- Enable UEFI Secure Boot
- Do NOT install third-party security software
- Only hardware RAID controllers are supported
- Software RAID, Intel VMD VROC, and FakeRAID are not supported
- RAID controllers must have write-back cache enabled
- Use internal or direct-attached storage only
Storage Configuration
- Minimum of two storage volumes:
- One for the OS (≥100 GB)
- One or more for data (must be larger than OS volume)
- The smallest disk must be identifiable (e.g., 100 GB + 101 GB is valid; 2x 100 GB + 1x 200 TB is invalid)
- Recommended: Dual-parity RAID configuration
Network Requirements
- Standard backup repository ports must be open
- You must allow direct or HTTP proxy access to repository.veeam.com on port 443 for:
- OS and security updates
- GPG key renewal (failure to update will require complete OS reinstallation)
Security Best Practices
- Secure the Baseboard Management Controller (BMC) port using firewalls and strong credentials
- Avoid deploying VHRISO on virtual machines due to:
- Increased attack surface via hypervisor
- Risk of backup inaccessibility during host outages
New Features in Build 2.0.0.8
- Repair Mode: Reinstall the OS while preserving data partitions.
- Live Boot: Built-in diagnostics and performance testing.
- Zero-Touch Installation: Fully automated deployment using Kickstart.
- IPv6 DHCP Support: Enhanced connectivity options.
- Enhanced Ping Limits: Rate-limited pings for better troubleshooting.
- Improved Workflow: Clearer installation steps and safeguards against accidental disk formatting.
Conclusion
The Veeam Hardened Repository ISO aims to provide hardened and immutable repositories in as many deployments as possible. I think they are making progress in achieving this goal. I believe that every Veeam Backup Fabric deployment, whether small or large, should have hardened repositories with immutable backup copies. That is my more recent stance. I used to do it for at least one copy, as that worked out well with refresh projects, but I want to end up with all repositories and backup data copies being immutable and stored on a hardened repository.
I am currently building a lab for the Veeam Hardened Repository ISO to gain experience with it and be well-prepared for the arrival of Veeam Backup & Replication V13. I hope to share some information on that later.