Mind the UNMAP Impact On Performance In Certain Scenarios

The Problem

Recently we’ve been trouble shooting some weird SQL Server to file backup issues. They started failing on the clock at 06:00 AM. We checked the NICs, the switches, the drivers, the LUNs, HBAs, … but it was all well. We considered over stressed buffers as the root cause or spanning tree issues but the clock steadiness of it all was weird. We tried playing with some time out parameters but with little to no avail. Until the moment it hit me, the file deletions that clean up the old backups!We had UNMAP enabled recently on the SAN.

Take a look at the screenshot below an note the deletion times underlined in red. That’s with UNMAP enabled. Above is with UNMAP disabled. The Backup jobs failed waiting for the deletion process.

image

This is a no issues if your backup target is running something prior to Windows Server 2012. if not, UNMAP is disabled by default. I know about the potential performance impact of UNMAP when deleting or more larger files due to the space reclamation kicking in. This is described here Plan and Deploy Thin Provisioning under the heading “Consider space reclamation and potential performance impact”. But as I’m quite used to talking about many, many terabytes of data I kind of forget to think of 500 to 600GB of files as “big” Embarrassed smile. But it seemed to a suspect so we tested certain scenarios and bingo!

Solutions

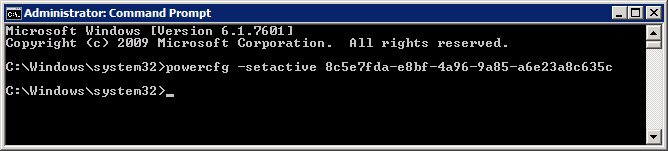
  1. Disable the file-delete notification that triggers real-time space reclamation. Find the following value HKEY_LOCAL_MACHINESYSTEMCurrentControlSetControlFileSystemDisableDeleteNotification and set it to 1.

    Note that: This setting is host wide, so for all LUNs. Perhaps that server has many other roles or needs to server that could benefit from UNMAP. If not this is not an issue.  It is however very efficient in avoiding issues. You can still use the Defragment and Optimize Drives tool to perform space reclamation on-demand or on a scheduled basis.

  2. Create LUNs that will have high deltas in a short time frame as fully provisioned LUNs (aka thick LUNs). As you do this per LUN and not on the host it allows for more fine grained actions than disabling UNMAP.  It makes no sense to have UNMAP do it’s work to reclaim the free space that deleting data created when you’ll just be filling up that space again in the next 24 hours in an endless cycle. Backup targets are a perfect example of this. This avoid the entire UNMAP cycle and you won’t mind as it doesn’t make much sense and fixes you issue. The drawback is you can’t do this for an existing volumes. So it has some overhead & downtime involved depending on the SAN solution you use. It also means that you have to convince you storage admins to give you fully provisioned LUNs, which might or might not be easy depending on how things are organized.

Conclusion

UNMAP has many benefits both in the physical and virtual layer. As with all technologies you have to understand its capabilities, requirements, benefits and draw backs. Without this you might run into trouble.

Follow Up on Power Options for Performance When Virtualizing

So some people asked where they can find and configure those power settings we were talking about in a previous blog Consider CPU Power Optimization Versus Performance When Virtualizing. So in this blog entry, I’ll do a quick run-through of this. As I can get my hands on some DELL servers from two different generations (G10/G11), the screenshots are of those servers.

Let’s first look at CPUz screenshots from a DELL PE2950 III where we see to different P-States. So here we see the fluctuation between CPU Power. This CPU knows SpeedStep but not TurboBoost for example.

By default/normally SpeedStep is enabled in the BIOS and Windows 2008 R2 has the “Balanced” power plan as a default. So this shows up something like this.

This means you can play around and set the power plan in Windows. So far so good. Naturally, when your PCU doesn’t support fancy power there not much Windows can do for you on that front. Depending on the CPU you can also enable features like C-Sate (core parking), P-states (SpeedStep), and TurboBoost in the BIOS. Where exactly and what it is called depends a bit on the hardware /BIOS you’re running and the CPUs that are in there. When you disable all power saving settings in the BIOS or set the for maximum performance you can’t use it in Windows anymore. That’s when you’ll see something like this:

So on a Windows 2008 R2 Server, you’ll note that the Power Options in the GUI are disabled when BIOS options are set to maximum performance. Note that when you install the Hyper-V role it turns Standby & Hibernation off. No need for that, unless it’s you demo machine/laptop and then you can turn it back on (see Hibernate and Sleep with Hyper-V Role Enabled). But Microsoft does state that P-states (SpeedStep) are supported and can be used, but it needs to be enabled in the BIOS for this.

To demonstrate the settings let’s look at the BIOS of a DELL R710 this looks like what you see in the picture below. You disable SpeedStep by setting the option for CPU Power and Performance Management to “Maximum Performance”. For DELL G11 hardware you can find more information on the available options in the article Best Practices in Power Management. I suggest you search for the documentation for the servers you have at hand to see what the vendors have to offer in advice on settings and how to set them.

Possible Values here are:

Static MAX Performance
DBPM Disabled ( BIOS will set P-State to MAX) Memory frequency = Maximum Performance Fan algorithm = Performance

OS Control
Enable OS DBPM Control (BIOS will expose all possible P states to OS) Memory frequency = Maximum Performance Fan algorithm = Power

Active Power Controller
Enable DellSystem DBPM (BIOS will not make all P states available to OS) Memory frequency = Maximum Performance Fan algorithm = Power

Custom
CPU Power and Performance Management: Maximum Performance | Minimum Power | OS DBPM | System DBPM Memory Power and Performance Management: Maximum Performance |1333Mhz |1067Mhz |800Mhz| Minimum Power Fan Algorithm Performance | Power

And since I’m a nice guy for all you people running a bit older hardware like a PE2950 III there it is called “Demand-Based Power Management” under the CPU Information and you actually disable it.

Now when you’re running Hyper-V and you disabled SpeedStep or “Cool’n’Quiet” you’ll see something like this in the GUI:

There is nothing to configure so it’s greyed out but it doesn’t really reflect your intentions. There can change this using the GUI if the fact the faded out options are not reflecting what you configured in the BIOS  annoys you or you can use powercfg to make them less “contradictionary”. All you need to do is run the following line from the command prompt: “powercfg -setactive 8c5e7fda-e8bf-4a96-9a85-a6e23a8c635c” …

… and immediately you’ll see the greyed out GUI reflect a bit more what you actually set in the BIOS. Mind you this is cosmetics, but hey, we’re inclined that way by evolution.

As stated above you can also use the “Change settings that are currently unavailable” to enable the radio buttons for “High performance” but do note again that if you didn’t enable the operating system to control the power it’s cosmetics.

So now when you think you have this figured out and you’re gazing at CPUz to watch the results you might still see some differences. Aha, well there is still Turbo Boost (no, not that turbo button on your 1990’s PC)  seen in the DELL R710 BIOS as Turbo Mode (AMD offers similar functionality in Turbo Core)that we left enabled under “Processor Information” in the BIOS. This means that sometimes, when the CPU can use an extra power boost, it will get it, on top of the full power it has now by default since we configured it for Maximum Performance.

So Turbo Mode will sometimes cause you to see a higher frequency than what your CPU’s specification says it has in CPUz as in the left picture below. Without Turbo Boost it looks more like the specs (right picture below)

And voila, that was a quick overview of where to see & do what. I don’t have access to more modern HP kit right now so the BIOS screenshots are from 2 different generations DELL Servers, but you’ll figure it out for your hardware I’m sure. Hope this clarifies certain things to you all. I know there is a lot more to all this, how it works, how many P-states there are but I’m not a CPU engineer or a hardcore overclocker. I’m just a systems engineer trying to get the most out of his hardware in a realistic way.