IMPORTANT UPDATE: Microsoft released Azure AD Connect 2.1.1.0 on March 24th, 2022 which fixes the issue described in this blog post). You can read about it here Azure AD Connect: Version release history | Microsoft Docs The fun thing is they wrote a doc about how to fix it on March 25th, 2022. The best option is to upgrade to AD Connect 2.1.1.0 or higher.
IMPORTANT UPDATE 2: Upgrade to version 2.1.15.0 (or higher) as that version also addresses LocalDB corruption issues!
Introduction
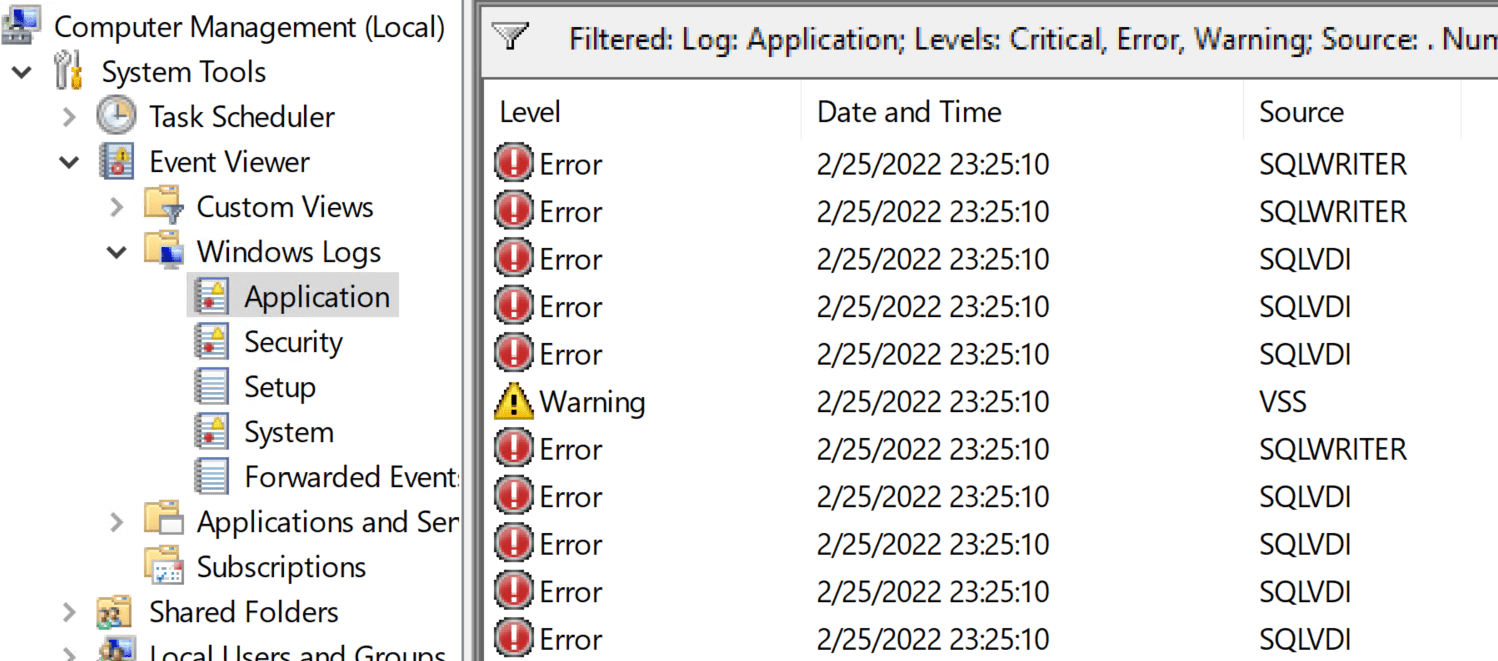
On Windows Server 2019 and Windows Server 2022 running AD Connect v2, I have been seeing an issue since October/November 2021 where Microsoft Azure AD Sync service fails to start – event id 528. It does not happen in every environment, but it does not seem to go away when it does. It manifests clearly by the Microsoft Azure AD Sync service failing to start after a reboot. If you do application-consistent backups or snapshots, you will notice errors related to the SQL Server VSS writer even before the reboot leaves the Microsoft Azure AD Sync service in a bad state. All this made backups a candidate for the cause. But that does not seem to be the case.
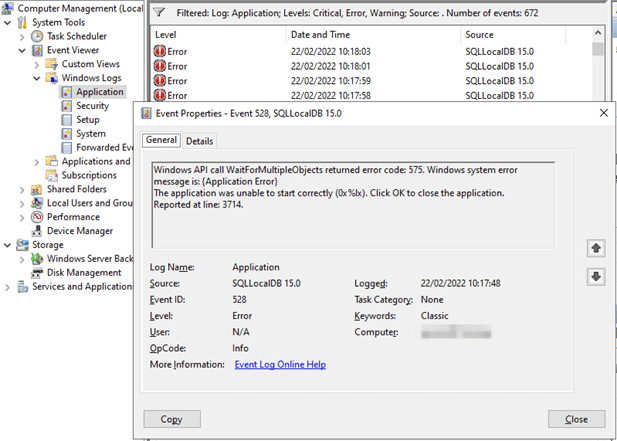
In the application event log, you’ll find Event ID 528 from SQLLocalDB 15.0 with the below content.
Windows API call WaitForMultipleObjects returned error code: 575. Windows system error message is: {Application Error}
The application was unable to start correctly (0x%lx). Click OK to close the application.
Reported at line: 3714.
Getting the AD Connect Server operational again
So, what does one do? Well, a Veeam Vanguard turns to Veeam and restores the VM from a restore point that a recent known good AD Connect installation.
But then the issue comes back
But then it comes back. Even worse, the AD Connect staging server suffers the same fate. So, again, we restore from backups. And guess what, a couple of weeks later, it happens again. So, you rebuild clean AD Connect VMs, and it happens again. We upgraded to every new version of AD Connect but no joy. You could think it was caused by failed updates or such, but no.
The most dangerous time is when the AD Connect service restarts. Usually that is during a reboot, often after monthly patching.
Our backup reports a failure with the application consistent backup of the AD Connect Server, often before Azure does so. The backup notices the issues with LocalDB before the AD Sync Service fails to start due to the problems.
However, if you reboot enough, you can sometimes trigger the error. No backups are involved, it seems. That means it is not related to Veeam or any other application consistent backup. The backup process just stumbles over the LocalDB issue. It does not cause it. The error returns if we turn off application-consistent backups in Veeam any way. We also have SAN snapshots running, but these do not seem to cause the issue.
We did try all the tricks from an issue a few years back with backing up AD Connect servers. See https://www.veeam.com/kb2911 but even with the trick to prevent the unloading of the user profile
COM+ application stops working when users logs off – Windows Server | Microsoft Docs we could not get rid of the issue.
So backups, VSS, it seems there is a correlation but not causation.
What goes wrong with LocalDB
After a while, and by digging through the event and error logs of a server with the issue, we find that somehow, the model.mdf and model.ldf are toast for some inexplicable reason on a pseudo regular basis. Below you see a screenshot from the C:\Windows\ServiceProfiles\ADSync\AppData\Local\Microsoft\Microsoft SQL Server Local DB\Instances\ADSync2019\Error.log. Remember your path might differ.
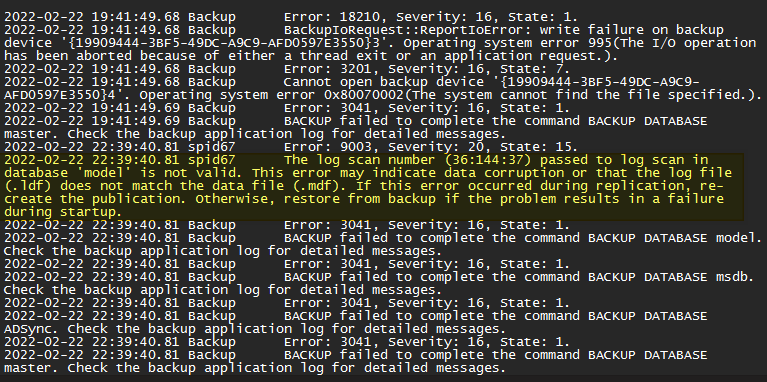
You’ll find entries like “The log scan number (37:218:29) passed to log scan in database ‘model’ is not valid. This error may indicate data corruption or that the log file (.ldf) does not match the data file (.mdf).”
Bar restoring from backup, the fastest way to recover is to replace the corrupt model DB files with good ones. I will explain the process here because I am sure some of you don’t have a recent, good know backup.
Sure, you can always deploy new AD Connect servers, but that is a bit more involved, and as things are going, they might get corrupted as well. Again, this is not due to cosmic radiation on a one-off server. Now we see it happen sometime three weeks to a month apart, sometimes only a few days apart.
Manual fix by replacing the corrupt model dd files
Once you see the SQLLocalDB event ID 528 entries in the application logs when your Microsoft Azure AD Sync service fails to start, you can do the following. First, check the logs for corruption issues with model DB. You’ll find them. To fix the problem, do the following.
Disable the Microsoft Azure AD Sync service. To stop the service that will hang in “starting” you will need to reboot the host. You can also try and force kill ADSync.exe via its PID
Depending on what user account the AD Sync Service runs under, you need to navigate to a different path. If you run under NT SERVICE\ADSync you need to navigate to
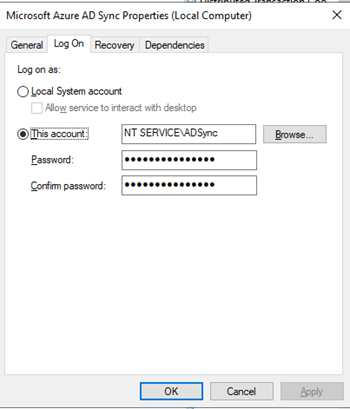
C:\Windows\ServiceProfiles\ADSync\AppData\Local\Microsoft\Microsoft SQL Server Local DB\Instances\ADSync2019
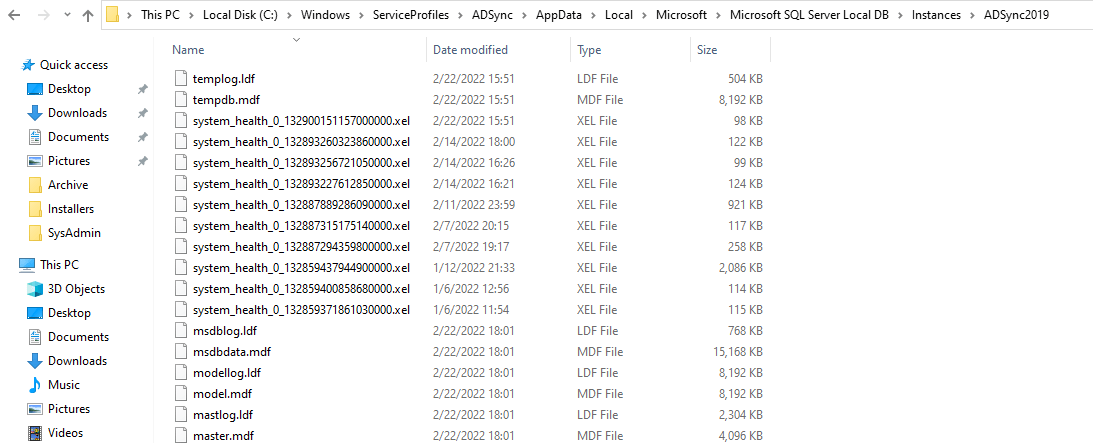
If you don’t use the default account but another one, you need to go to C:\Users\ YOURADSyncUSER\AppData\Local\Microsoft\Microsoft SQL Server Local DB\Instances\ADSync2019
Open a second explorer Windows and navigate to C:\Program Files\Microsoft SQL Server\150\LocalDB\Binn\Templates. From there, you copy the model.mdf and modellog.ldf files and paste those in the folder you opened above, overwriting the existing, corrupt model.mdf and model.ldf files.
You can now change the Microsoft Azure AD Sync service back to start automatically and start the service.
If all goes well, the Microsoft Azure AD Sync service is running, and you can synchronize to your heart’s content.
Conclusion
If this doesn’t get resolved soon, I will automate the process. Just shut down or kill the ADSync process and replace the model.mdf and model.ldf files from a known good copy.
Here is an example script, which needs more error handling but wich you can run manually or trigger by monitoring for event id 528 or levering Task Scheduler. As always run this script in the lab first. Test it, make sure you understand what it does. You are the only one responsible for what you run on your server! Once you are done testing replace Write-Host with write-output or turn it into a function and use cmdletbinding and param to gain write-verbose if you don’t want all the output/feedback. Bothe those options are more automation friendly.
cls
$SQLServerTemplates = "C:\Program Files\Microsoft SQL Server\150\LocalDB\Binn\Templates"
$ADConnectLocalDB = "C:\Windows\ServiceProfiles\ADSync\AppData\Local\Microsoft\Microsoft SQL Server Local DB\Instances\ADSync2019"

Write-Host -ForegroundColor Yellow "Setting ADSync startup type to disabled ..."
Set-Service ADSync -StartupType Disabled

Write-Host -ForegroundColor Yellow "Stopping ADSync service  ..."
Stop-Service ADSync -force

$ADSyncStatus = Get-Service ADSync

if ($ADSyncStatus.Status -eq 'Stopped'){
    Write-Host -ForegroundColor Cyan "The ADSync service has been stopped  ..."
}
else {
    if ($ADSyncStatus.Status -eq 'Stopping' -or $ADSyncStatus.Status -eq 'Starting'){

        Write-Host -ForegroundColor Yellow "Setting ADSync startup type to disabled ..."
        Set-Service ADSync -StartupType Disabled

        Write-Host -ForegroundColor Red "ADSync service was not stopped but stuck in stoping or starting ..."
        $ADSyncService = Get-CimInstance -class win32_service | Where-Object name -eq 'ADSync'
        $ADSyncProcess = Get-Process | Where-Object ID -eq $ADSyncService.processid

        #Kill the ADSync process if need be ...
        Write-Host -ForegroundColor red "Killing ADSync service processs forcfully ..."
        Stop-Process $ADSyncProcess -Force

        #Kill the sqlserver process if need be ... (in order to be able to overwrite the corrupt model db files)
        Write-Host -ForegroundColor red "Killing sqlserver process forcfully ..."
         $SqlServerProcess = Get-Process -name "sqlservr" -ErrorAction SilentlyContinue
         if($SqlServerProcess){
        Stop-Process $SqlServerProcess -Force}

        }
    }

$ADSyncStatus = Get-Service ADSync
if ($ADSyncStatus.Status -eq 'Stopped'){

    Write-Host -ForegroundColor magenta "Copy known good copies of model DB database to AD Connect LocaclDB path file ..."
    Copy-Item "$SQLServerTemplates\model.mdf" $ADConnectLocalDB

    Write-Host -ForegroundColor magenta "Copy known good copy of model DB log file to AD Connect LocaclDB path ..."
    Copy-Item "$SQLServerTemplates\modellog.ldf" $ADConnectLocalDB


    Write-Host -ForegroundColor magenta "Setting ADSync startup type to automatic ..."
    Set-Service ADSync -StartupType Automatic

    Write-Host -ForegroundColor magenta "Starting ADSync service ..."
    Start-Service ADSync
}

$ADSyncStatus = Get-Service ADSync
if ($ADSyncStatus.Status -eq 'Running' -and $ADSyncStatus.StartType -eq 'Automatic'){
    Write-Host -ForegroundColor green "The ADSync service is running ..."
}
else {
    Write-Host -ForegroundColor Red "ADSync service is not running, something went wrong! You must trouble shoot this"
}
That fixes this cause for when Microsoft Azure AD Sync service fails to start – event id 528. For now, we keep an eye on it and get alerts from the AD Connect health service in Azure when things break or when event id occurs on the AD Connect servers. Let’s see if Microsoft comes up with anything.
IMPORTANT UPDATE: Microsoft released Azure AD Connect 2.1.1.0 on March 24th 2022 which fixes the issue described in this blog post). You can read about it here Azure AD Connect: Version release history | Microsoft Docs The fun thing is the wrote a doc about how to fix it on March 25th 2022. The best option is top upgrade to AD Connect 2.1.1.0 or higher.
PS: I am not the only one seeing this issue Azure AD Sync Connect keeps getting corrupted – Spiceworks