This is part 2 in series on Windows Network Load Balancing. Part 1 can be found here: https://blog.workinghardinit.work/2010/07/01/reflections-on-getting-windows-network-load-balancing-to-work-part-1/
On Default Gateways, Routing & Forwarding.
Here’s a bullet list of what people tend to trip over when configuring NLB network settings.
- No support for multiple Default Gateways that are on multiple subnets
- The default gateway does not have to be empty on the NLB NIC
- The Private and the NLB NIC can be on separate or the same subnets
- You can have multiple Default Gateways if they are on the same subnet
- Don’t forget about static routes where and when needed.
- Beware of the strong host model in Windows 2008 (R2) for both IPv4 & IPv6 (WK3 it was only for IPv6)
- Mind the order of the connections in Adapters and Bindings.
Now let’s address the subjects in this list.
No support for multiple Default Gateways that are on multiple subnets
When using IP addresses from different subnets you cannot have a default gateway on every NIC because that will cause routing issues. This is not different for the NIC’s used in Windows NLB. So you can have only one NIC with a Default Gateway and if the other NICs need to route somewhere you need to add static persistent routes. Those routes must be persistent or they will not survive a reboot of the server. In the figure below you see a classic two NIC NLB cluster with the Default Gateway Empty on the NLB NIC. This could be a valid setup for an intranet. You can add routes for the subnet in the company that need to be able to talk to the NLB Cluster and you’re golden. The Private NIC gets a default gateway and acts like any other NIC in your network.

In this example we have the Default Gateway on the Private NICs they can route internally and to the internet. If you need traffic to & from the internet form the NLB NIC you could enable forwarding on the NLB NIC or enable weak host behavior which can be done more atomic than what you achieve by enabling forwarding. If you only need to route internally we could use the same approach of enabling forwarding instead of adding static persistent routes for the NLB NIC. But then you don’t isolate & protect traffic that neatly and it will route to everywhere the default gateway can get.
So we prefer to play with static persistent routes in this case. We’ll briefly look at some examples now. If you only need to route internally (i.e. to reach the database or a client PC) from the NLB NIC we add the needed static persistent routes on the NLB NICs using the route command.
In order for the NLB NICs to reach the database with strong host model and no forwarding enabled:
Route add -p 10.30.0.0 mask 255.255.0.0 10.10.0.1
To reach the client PC’s:
Route add -p 10.20.0.0 mask 255.255.0.0 10.10.0.1
(Using route print you can look at the routes and using route delete you can get rid of them.)
Or by using netsh, (it’s advised to use netsh from Windows 2008 on)
netsh interface ipv4 add route 10.30.0.0/16 “NLB NIC” 10.10.0.1
netsh interface ipv4 add route 10.20.0.0/16 “NLB NIC” 10.10.0.1
(you can look at the routing table by using netsh interface ipv4 show route, with netsh interface ipv4 delete route you get ridd of then, see http://technet.microsoft.com/en-us/library/cc731521(WS.10).aspx for more information.
You could also connect to the database over the PRIVATE NIC and then you don’t need that route. If you can configure it like that it’s a good solution. But all situations differ.
You can also play with the weakhost / stronghost model behaviour:
netsh interface ipv4 set interface Private NIC weakhostsend=enabled
netsh interface ipv4 set interface Private NIC weakhostreceive=enabled
netsh interface ipv4 set interface NLB NIC weakhostsend=enabled
netsh interface ipv4 set interface NLB NIC weakhostreceive=enabled
Now don’t just blindly enable on every NIC you can find on the server. Test what you really need and use only that. I leave that as an exercise to the readers. It really depends on the situation and needs for your particular situationJ. Keep in mind that when you enable weakhostsend and weakhostreceive on every NIC this reverts your Windows 2008 servers back to Windows 2003 behavior and this might not be needed or wanted. So just enable what you need for optimal security.
Naturally enabling forwarding will do the trick as well, as this creates a weak host model. Depending on how many NICs you use and how traffic must flow you might have to do it on more than one NIC, normally the one(s) without a default gateway.
netsh interface ipv4 set interface “NLB NIC” forwarding=enabled
If you want to see the configuration of the NIC you can run:
netsh interface ipv4 show interface l=verbose
That will produce something like below:
Interface Local Area Connection Parameters
IfLuid : ethernet_5
IfIndex : 3
State : connected
Metric : 10
Link MTU : 1500 bytes
Reachable Time : 21500 ms
Base Reachable Time : 30000 ms
Retransmission Interval : 1000 ms
DAD Transmits : 3
Site Prefix Length : 64
Site Id : 1
Forwarding : disabled
Advertising : disabled
Neighbor Discovery : enabled
Neighbor Unreachability Detection : enabled
Router Discovery : dhcp
Managed Address Configuration : enabled
Other Stateful Configuration : enabled
Weak Host Sends : disabled
Weak Host Receives : disabled
Use Automatic Metric : enabled
Ignore Default Routes : disabled
Advertised Router Lifetime : 1800 seconds
Advertise Default Route : disabled
Current Hop Limit : 0
Force ARPND Wake up patterns : disabled
Directed MAC Wake up patterns : disabled
The default gateway does not have to be empty on the NLB NIC
It is not a hard requirement to leave the Default Gateway on the NLB NIC empty and put it on the private NIC. You can set it on the NLB NIC and leave the private NIC’s gateway empty instead. An example of this you can see in the demo. This is the best choice in my opinion when you need the NLB NIC to route to destinations you don’t know how to reach, i.e. the internet, so for public websites. The prime function of the default gateway is exactly to help with that. When you don’t know where to send it, send it to the Default Gateway. If you need to reach other internal subnets from the Private NIC, just use static routes. Don’t use the NLB NIC as that is internet facing in this case. You can see an example of this in the figure below. Also in this case you’ll find that you do not have to enable forwarding on the NIC using netsh, as the NIC that has to answer to the unknown IP Address has the Default Gateway. This setup works great for example in a managed domain environment for internet access where the NLB NICs are internet facing and the private NIC is for management, Active Directory, Backups, etc.

In this example we have the Default Gateway on the NLB NICs so it can route internet traffic. Any routes needed in the Private NIC subnet are added as persistent static routes. An example of this is to reach the database server.
As traffic from the Private range is never supposed to go via the NLB Public range and vice versa we do not need to care about forwarding or strong host /weak host models. We can keep traffic nicely separated and that is a good thing. If you build this on Windows 2008(R2) just like you did on Windows 2003 it would work out of the box and you might not even know about a change in default behavior from weak host model to strong host model.
To get the PRIVATE NIC to reach the database server you’d add static routes and be done with it.
Add needed static persistent routes using the route command:
Route add -p 10.20.0.0 mask 255.255.0.0 172.16.2.1
Or by using netsh, (it’s advised to use netsh from Windows 2008 on)
netsh interface ipv4 add route 10.20.0.0/16 “PRIVATE NIC” 172.16.2.1
No requirement to have different subnets for Private and NLB NICs / Multiple Gateways When the subnets are the same
There is no requirement to have different subnets for every NIC. Sometimes I read that this is a requirement on forums when someone is having issues but it’s not. You can also experiment with multiple Default Gateways if they are on the same subnet (WARNINGS APPPLY*)

So here you can play with giving every NIC a default gateway (same subnet, so no issues), with static persistent routes, with enabling forwarding and weak host / strong host configuration. I tend to use only one gateway and use static persistent routes. If I need to relay I’ll go for weak host minimal configuration or revert to forwarding.
WARNINGS APPLY*: When you start having multiple NIC’s for multiple NLB Clusters on the same NLB nodes, things can get a bit complicated and unpredictable. So I prefer only to use a default gateway on both NICs when you have two NIC , one for private (management) traffic and one for the NLB cluster traffic. Once you have multiple NIC’s for multiple NLB clusters (1 private NIC + 2 or more NLB cluster NICs) you can no longer play this game safely, even if they are all on the same subnet, without running into trouble I have experienced. You can get an event id 18 “NLB cluster [X.X.X.X]: NLB detected duplicate cluster subnets. This may be due to network partitioning, which prevents NLB heartbeats of one or more hosts from reaching the other cluster hosts. Although NLB operations have resumed properly, please investigate the cause of the network partitioning” . Also in this situation you can’t have a default gateway on the management NIC and one on one of the NLB NIC’s without a default gateway on the second NLB NIC. Forget that. You can get issues with a node remaining in “converging” forever and what’s worse the NLB cluster will send traffic to all nodes so 1/x connections will fail. Rebooting one node might help but once you reboot ‘m both you run the risk of this happening and you really don’t want that. Once you dealing with multiple cluster IP addresses on multiple separate NIC’s you’d better stick to one default gateway on one of the NIC’s and nowhere else. This kind of makes me wonder if it’s pure luck that it works with 2 cluster NICs or not, with multiple and with reboots of the nodes I know we run into trouble and that’s no good.
It’s also smart not to mix static routes with forwarding to achieve the same thing. And please have the exact same configuration on very particular NIC on every node. Not one node with NLB NIC 1 routing via static routes and the other node using forwarding on NLB NIC 1. That’s asking for inconsistent behavior.
We’ll briefly look at some examples now.
If you only need to route internally (i.e to reach the database or a client PC) we add the needed static persistent routes on the NLB NICs using the route command.
In order for the NLB NICs to reach the database with strong host model and no forwarding enabled:
Route add -p 10.30.0.0 mask 255.255.0.0 10.10.0.1
To reach the client PC’s:
Route add -p 10.20.0.0 mask 255.255.0.0 10.10.0.1
(Using route print you can look at the routes and using route delete you can get rid of them.)
Or by using netsh, (it’s advised to use netsh from Windows 2008 on)
netsh interface ipv4 add route 10.30.0.0/16 “NLB NIC” 10.10.0.1
netsh interface ipv4 add route 10.20.0.0/16 “NLB NIC” 10.10.0.1
(you can look at the routing table by using netsh interface ipv4 show route, with netsh interface ipv4 delete route you get ridd of then, see http://technet.microsoft.com/en-us/library/cc731521(WS.10).aspx for more information.
You can also just enter the default gateway on the NLB NICs as well. All NICs are on the same subnet this will cause no issues. Just remember that traffic will also go to where ever that gateway routes, even to the internet.
We already know we can play with the weakhost / stronghost model:
netsh interface ipv4 set interface Private NIC weakhostsend=enabled
netsh interface ipv4 set interface Private NIC weakhostreceive=enabled
netsh interface ipv4 set interface NLB NIC weakhostsend=enabled
netsh interface ipv4 set interface NLB NIC weakhostreceive=enabled
Again don’t just blindly enable on every NIC you can find on the server. Test what you really need and use only that. I leave that as an exercise to the readers. As I’ve said before, it really depends on the situation and needs for your particular situation. Keep in mind that when you enable weakhostsend and weakhostreceive on every NIC this will just revert your Windows 2008 server into Windows 2003 behavior and this might not be needed or wanted. So just enable what you need for optimal security.
There is a very good explanation of strong and weak host behavior by “The Cable Guy” at http://technet.microsoft.com/en-us/magazine/2007.09.cableguy.aspx I strongly advise you to go take a look.
And naturally enabling forwarding will do the trick in this scenario as well, as this creates a weak host model. Depending on how many NICs you use and how traffic must flow you might have to do it on more than one NIC, normally the one(s) without a default gateway.
netsh interface ipv4 set interface “NLB NIC” forwarding=enabled
When & Why Use Three NICs or more?
NLB supports using multiple network adapters to configure separate clusters. This allows for configuring multiple independent clusters on each host. We used to have only virtual clusters meaning that you could configure multiple clusters on a single network adapter. Anyone who ever had to trouble shoot some networking or configuration issues on a production NLB will appreciate the ability to limit interruptions and problems to one cluster instead of 2 or more. As an example of this I had to trouble shoot a CAS/HUB Exchange Implementation two node NLB implementation. The NLB Cluster of the CAS role had this very issue, but since it was running on its own cluster with a separate NIC the HUB role NLB cluster has no issues what so ever. Another good reason to use more NIC is to separate traffic, for example FTP versus HTTP on the same NLB Cluster.
One of the worst things that can happen is that an issue messes up the proper functioning of the NLB itself. That way even if the virtual IP remains available no host or only some of the hosts get network traffic. That means the cluster is unavailable or is only partially responding. This is a bad situation to be in and can be hard to trouble shoot. Since it’s a high availability technology you can bet someone is looking over your shoulder that has a vested interest in getting that resolved as soon as possible.
Mind the order of the connections in Adapters and Bindings
Make sure the PRIVATE NIC that is to be used for private network traffic (DNS, AD, RDP, …) is listed first. That prevent any issues (speed, functionality) of those services and you experience will be much better. This is illustrated in the figures below. LAN-HUB is the PRIVATE NIC here. The others are for NLB (yup it’s an Exchange 2010 setup).

Conclusion & recapitulation
I’ll finish with some closing musings on single & multiple default gateway and getting/sending network traffic where it needs to go.
When you enter a gateway on the second, third and so on NIC next to the one on the first NIC you’ll get a warning:
—————————
Microsoft TCP/IP
—————————
Warning – Multiple default gateways are intended to provide redundancy to a single network (such as an intranet or the Internet). They will not function properly when the gateways are on two separate, disjoint networks (such as one on your intranet and one on the Internet). Do you want to save this configuration?
—————————
Yes No
—————————
This will not work reliable when you have multiple subnets. This is why you use static persistent routing entries. Depending on your needs you can also use forwarding or the weak host model and even combine those with static persistent routes if needed of desired. Now the above also means that if you have multiple NICs with IP addresses on the same subnet you can indeed enter a Default Gateway on all of them.
If you don’t have or cannot have a Default Gateway filled in you are left with two options. If you know what needs to go where you can add static routes, which is basically telling the NIC the IP of a gateway to send traffic to for a certain destination. This is assuming you can reach that IP and that the traffic is not from a source/ to a destination that has no route defined and firewall allow for it, etc.
If you have no route or you can’t specify one (i.e. you can’t predict where traffic will have to go) you have one other option left and that is to route the traffic via the NIC that does have a Default Gateway. This used to work out of the box on Windows 2003 and earlier, but it doesn’t work out of the box since Windows 2008 (R2). That is because by default NICs in Windows 2008(R2) operate in a strong host model. So it will not receive or send traffic destined for some other IP than itself or send traffic originating somewhere else than itself. For that you’ll need to set the NIC properties to weak host send and receive or you need to enable forwarding. Actually forwarding is disabled by default on Windows 2003 as well. The big difference is that Windows 2003 operates in a weak host manner (send/receive) as opposed to Windows 2008 (R2) strong host mode. By enabling forwarding we put the Windows 2008 server in weak host mode and as such it works (see RFC1122). On the internet you’ll find both solutions, but the link between the two is often never made. Using weak host receiving and weak host sending allows for more atomic, custom configurations than forwarding.
Contact me via the web site or leave a comment if you have any questions or suggestions.
Post Script / Side Note because someone asked J
Basically you can have multiple gateways on a server but only one default gateway. You can add more than one default gateway on the same NIC but then they will only be used when the default gateway filled out in is not available, it will then try the next one and so forth. You can add multiple gateways to a single NIC or one or more to multiple NICs but that can, get messy very quickly. Whether it is wise to provide gateway redundancy in such a manner is another discussion. See also KB article http://support.microsoft.com/kb/157025. Be mindful of the extra configurations you’ll need (Dead Gateway Detection). This is a rather uncommon scenario on a windows server. You can use it for redundancy or when you want the traffic to go to a certain default gateway instead of another when it is available (so separate traffic for example for cost or to reduce the traffic load).
And then there’s adding a default gateway that’s on another subnet than the IP address of the NIC. In that case you get this warning:
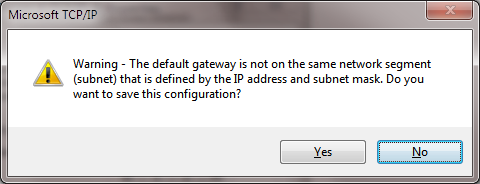
—————————
Microsoft TCP/IP
—————————
Warning – The default gateway is not on the same network segment (subnet) that is defined by the IP address and subnet mask. Do you want to save this configuration?
—————————
Yes No
—————————
All pretty cool stuff you can do to mess with peoples head and understanding of what’s going on (it can work if the router on the local subnet has a route the subnet where that default gateway lives and PROXY ARP is working … but we’re not going to turn this into a networking course or pretty soon we’ll be installing RRAS and turn the server into a router. |
![]()


