The Veeam hardened repository
Just a quick blog post to let you all know I will be presenting on the Veeam hardened repository in Veeam Backup & Replication v11. I will do this at the TechNine user group meeting on March the 23rd. It is the world premiere of this presentation, so grab your seat and be able to tell your grandchildren you were there!
There is a tremendous amount of new and enhanced capabilities in v11, both small and big ones. But this one stands out because no matter who you are, a small business or a fortune 500 global enterprise, we are all at risk from ransomware and wipers. And guess what, the Veeam hardened repository gives you yet another option in your arsenal to make sure you can recover from such a disaster.
And end to end solution
In VBR v11 Veeam now offers complete end to end immutability for all your backup copies if you desire to do so. You can bring your own storage and so it leaves you the flexibility and freedom of choice you are used to with Veeam.
Like many of you, I like to stay up to date with new technology and implement it to solve real-world problems. Often coo tech is very forward-looking and foundational. This translates into “it is very early days yet”, “the code exists but you cannot use it yet”.

Well, this is not something that shows you the promises of tomorrow and then leaves you to go back empty-handed. That always feels like a bit of a letdown when you are dealing with your real-world, real-time issues. The Veeam hardened repository is available now to help address the challenges you are facing today! It doesn’t get any better than that. I will show you the cookie, you can have the cookie and you can eat the cookie! Want to play with it yourself? You can, right now with the free community edition of Veeam Backup & Replication v11!
Register!
What do you need to do? Register of cause! Do it right here. Make sure you show up in time and stay around for an interactive discussion afterward. We start at 20:00 on March 23rd, 2021. And yes it is all virtual as we plan to get rid of the coronavirus first and then get together in real life again.

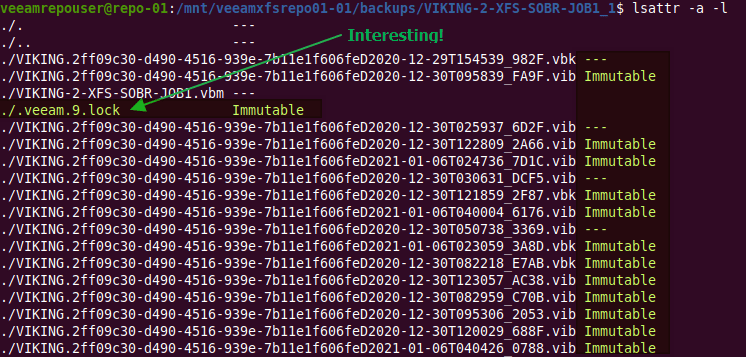
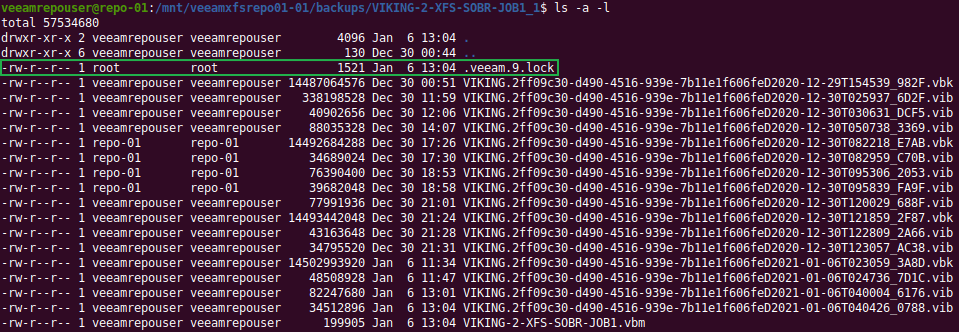
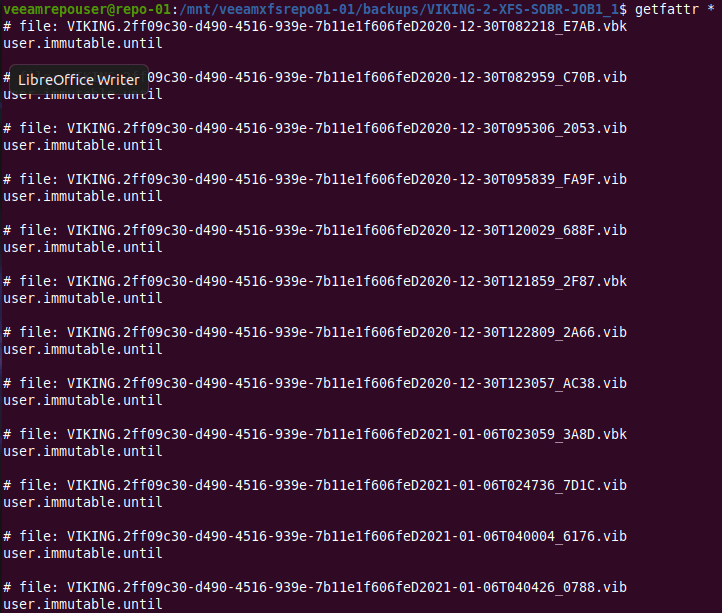
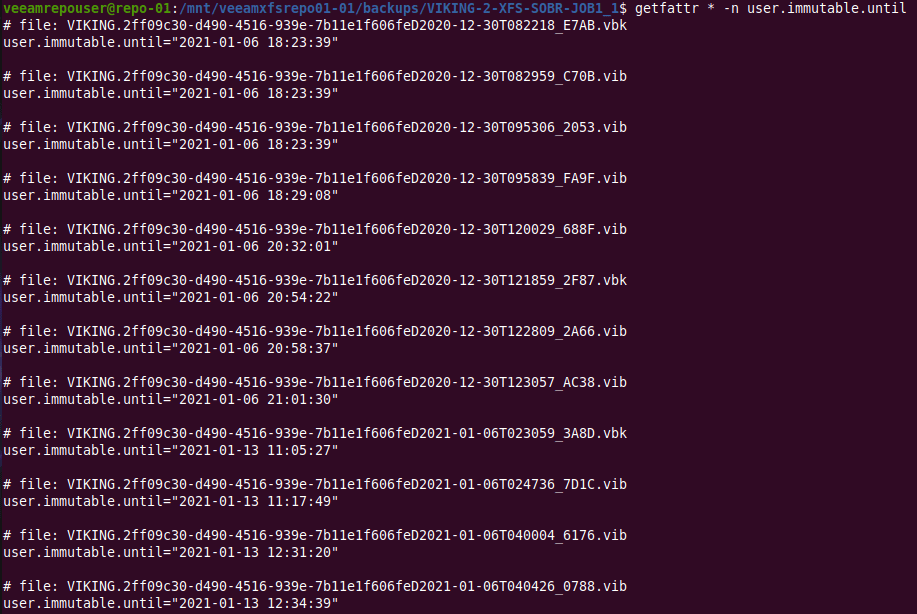
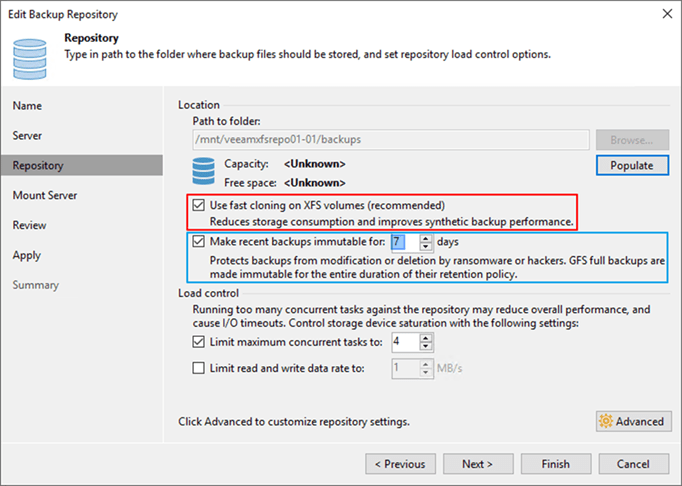
I will explain why you need it, how to set it up, and I will dive under the hood to show how it gets the job done. You can now protect your hypervisor and supported backups end to end with immutability in the hardened repository, giving you the extra security and protection you might need to recovery from a ransomware event. There will be demos! You can read up on it here but I will go behind the scenes with you!