
Introduction
I use Storage spaces in various environments for several use cases, even with clients (see Move Storage Spaces from Windows 8.1 to Windows 10). In this blog post, we’ll walk through replacing a failed disk in a stand-alone Storage Spaces with Mirror Accelerated Parity. have a number of DELL R740XD stand-alone servers with a ton of storage that I use as backup targets. See A compact, high capacity, high throughput, and low latency backup target for Veeam Backup & Replication v10 for a nice article on a high-performance design with such servers. They deliver the repositories for the extents in Veeam Backup & Replication Scale-out Backup Repositories. They have MVME’s for the performance tier in Storage Spaces with Mirror Accelerated Parity.
Even with the best hardware and vendor, a disk can fail and yes, it happened to one of our NVME drives. Reseating the disk did not help and we were one disk shot in device manager. So yes the disk was dead (or worse the bus where it was seated, but that is less likely).
Replacing a failed disk in a stand-alone Storage Spaces with Mirror Accelerated Parity
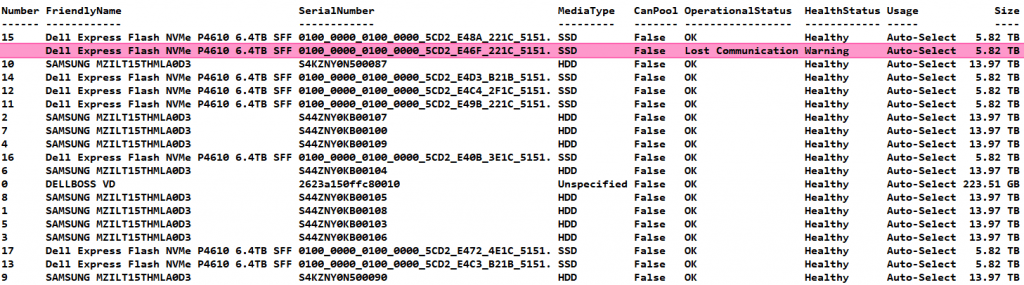
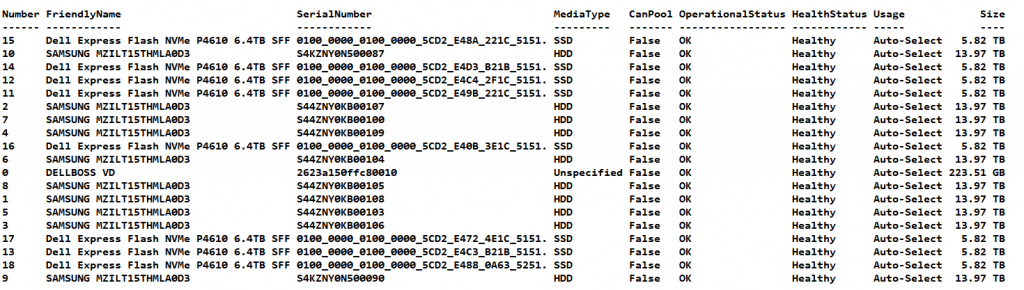
So let’s take a look by running
Get-PhysicalDisk
I immediately see that we have an NVME that has lost communication, it is gone and also no longer displays a disk number. It seems to be broken.
That means we need to get rid of it in the storage spaces pool so we can replace it.
Getting rid of the failed disk properly
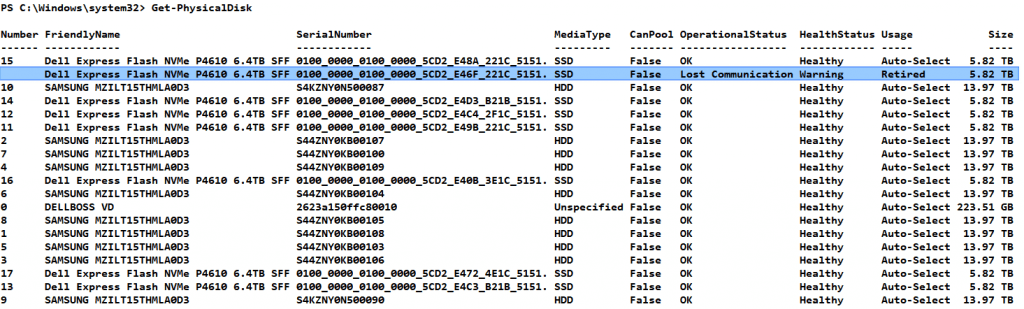
I put the disk that lost communication into a variable
$ProblemDisk = Get-PhysicalDisk | where-object OperationalStatus -like *lost*

We than retire the problematic disk
$ProblemDisk | Set-PhysicalDisk -Usage retired
We then run Get-PhysicalDisk again and yes, we see the disk was retired.
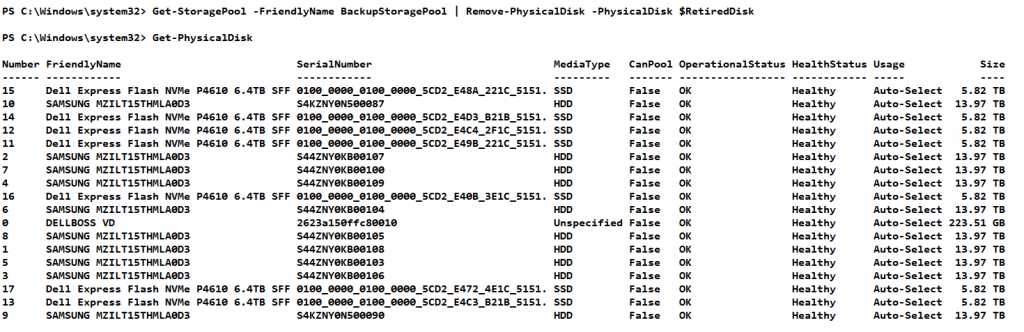
Now grab that retired disk and save it to a parameter by running
$RetiredDisk = Get-PhysicalDisk | where-object Usage -like *Retired*

Now remove the retired disk from the storage pool by running
Get-StoragePool -FriendlyName BackupStoragePool | Remove-PhysicalDisk -PhysicalDisk $RetiredDisk
Let this complete and check again with Get-PhysicalDisk, you will see the problematic disk has gone. Note that there are only 7 NVME disks left.
It does not show an unrecognized disk that is still visible to the OS somehow. So we cannot try to reset it to try to get it back into action. We need to replace it and so we request a replacement disk with DELL support and swap them out.
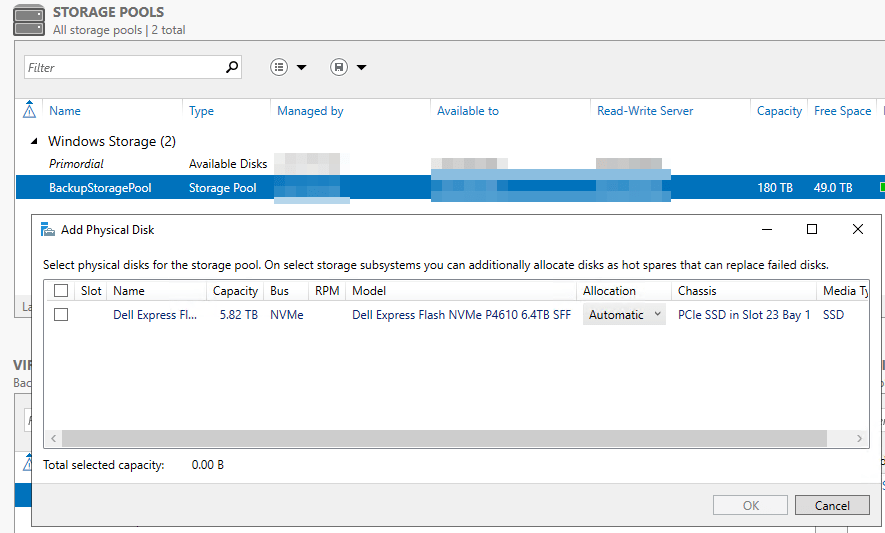
Putting the new disk into service
Now we have our new disk we want it to be added to the storage pool. You should now see the new disk in Disk Manager as online and not initialized. Or when you select Add Physical Disk in the storage pool in Server Manager.
But we were doing so well in PowerShell so let’s continue there. We will add the new disk to the storage pool. Run
$DiskToAddToPool = Get-PhysicalDisk | where-object  Canpool -eq True

Get-StoragePool -FriendlyName BackupStoragePool | Add-PhysicalDisk -PhysicalDisk $DiskToAddToPool
When you run Get-PhysicalDisk again you will see that there are no disks left that can be pooled, meaning they are all in the storage pool. And we have 8 NMVE disks agaibn Good!
Now run
Optimize-StoragePool -FriendlyName BackupStoragePool
And let it run. You can check up on its progress via this little script.
while(1 -eq 1) {
Get-storagejob
write-host 'Wait'
start-sleep -seconds 10
}
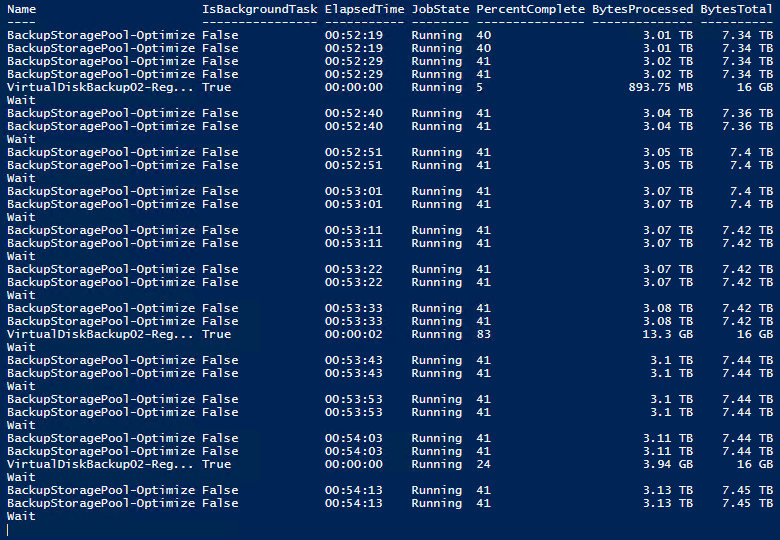
That’s it. All is well again and rebalanced. It also ensures the storage capacity contributed by the replaced disk will be available in the performance tier when I want to create an extra virtual disk. Storage Spaces at its best giving me the opportunity to leverage NVMe with other disks while maximizing the benefits of ReFS.
For more info on stand-alone storage space and PowerShell, you can find more info in Deploy Storage Spaces on a stand-alone server
Conclusion
As you have seen replacing a failed disk in a stand-alone Storage Spaces with Mirror Accelerated Parity is not too hard to do. You just need to wrap your head around how storage spaces work and investigate the commands a little. For that I recommend practicing on a Virtual Machine.