Introduction
In Windows Server 2012 R2 Failover Clustering we have 2 types of witness:
- Disk witness: a shared disk that can be seen by all cluster nodes
- File Share Witness (FSW): An SMB 3 file share that is accessible by all cluster nodes
Since Windows Server 2012 R2 the recommendation is to always configure a witness. The reason for this is that thanks to dynamic quorum and dynamic witness. These two capabilities offer the best possible resiliency without administrator intervention and are enabled by default. The cluster dynamically assigns a quorum vote to node when it’s up and removes it when it’s down. Likewise, the witness is given a vote when it’s better to have a witness, if you’re better off without the witness it won’t get a vote. That’s why Microsoft now advises to always set a witness, it will be managed automatically. The result of this is that you’ll get the best possible uptime for a cluster under any given circumstance.
This is still the case in Windows Server 2016 but Failover clustering does introduce a new option witness option: cloud witness.
Why do we need a cloud witness?
For certain scenarios such a cluster without shared storage and especially when a stretched cluster is involved you’ll have to use a FSW. It’s a great solution that works as well as a disk witness in most cases. Why do I say most? Well there is a scenario where a disk witness will provide better resiliency, but let’s not go there now.
Now the caveat here is that you’ll need to place the FSW in a 3rd independent site. That’s a hard order for many to fulfill. You can put in on the desktop of the receptionist at a branch office or on a virtual machine on the cluster itself but it’s “suboptimal”. Ideally the FSW is independent and high available not dependent on what it’s supposed to support in achieving quorum.
One of the other workarounds was to extend AD to Azure, deploy a SOFS Cluster with an non CA file share on a cluster of VMs in Azure and have both other sites have access to it over VPN or express route. That works but in a time of easy, fast, cheap and good solutions it’s still serious effort, just for a file share.
As Microsoft has more and more use cases that require a FSW (site aware stretched clusters, Storage Spaces Direct, Exchange DAG, SQL Availability Groups, workgroup or multi domain clusters) they had to find a solution for the growing number of customers that do not have a 3rd site but do need a FSW. The cloud idea above is great but the implementation isn’t the best as it’s rather complex and expensive. Bar using virtual machines you can’t use Azure file services in the cloud as those are primarily for consumption by applications and the security is done via not via ACLing but access keys. That means the security for the Cluster Name Object (CNO) can’t’ be set. So even when you can expose a cloud file to on premises to Windows 2016 (any OS that supports SMB 3 actually) by mapping it via NET USE the cluster GUI can’t set the required security for the cluster nodes so it will fail. And no you can’t set it manually either. Just to prove this I tried it for you to save you the trouble. Do NOT even go there!
So what is possible? Well come Windows Server 2016 Failover Clustering now has a 3rd type of witness. The cloud witness. Functionally wise it’s like a FSW. The big difference it’s a dedicated, cloud based solution that mitigates the need and costs for a 3rd data center and avoids the cost of the workarounds people came up with.
Implementing the cloud witness
In your Azure subscription you create a storage account, for this purpose I’ve create one named democloudwitness in my resource group RG-Demo. I’m using a separate storage account to keep thing tidy and separated from my other demo storage accounts.
A storage account gets two Access keys and two connection strings. The reason for this is that we you need to regenerate the keys you can have your workloads use the other one this can be done without down time.
In Azure the work is actually already done. The rest will happen on premises on the cluster. We’ll configure the cluster with a witness. In PowerShell this is a one liner.
If you get an error, make sure the information is a correct and you can reach Azure of HTTPS over the internet, VPN or Express Route. You normally do not to use the endpoint parameter, just in the rare case you need to specify a different Azure service endpoint.
The above access key is a fake one by the way, just so you know. Once you’re done Get-ClusterQuorum returns Cloud Witness as QuorumResource.
In the GUI you’ll see
When you open up the Blobs services in your storage account you’ll see that a blob service has been created with a name of msft-cloud-witness. When you select it you’ll see a file with a GUID as the name.
That guid is actually the same as your cluster instance ID that you can find in the registry of your cluster nodes under the HKLM\Cluster key in the string value ClusterInstanceID.
Your storage account can be used for multiple clusters. You’ll just see extra entries each with their own guid.
All this consumes so few resources it’s quite possibly the cheapest ever way of getting a cluster witness. Time will tell.
Things to consider
• Cloud Witness uses the HTTPS REST (NOT SMB 3) interface of the Azure Storage Account service. This means it requires the HTTPS port to be open on all cluster nodes to allow access over the internet. Alternatively an Azure Site-2-Site VPN or Express Route can be used. You’ll need one of those.
• REST means no ACLing for the CNO like on a SMB 3 FSW to be done. Security is handled automatically by the Failover Cluster which doesn’t store the actual access key, but generates a shared access security (SAS) token using the access key and stores it securely.
• The generated SAS Token is valid as long as the access key remains valid. When rotating the primary access key, it is important to first update the cloud witness (on all your clusters that are using that storage account) with the secondary access key before regenerating the primary access key.
• Plan your governance between cluster & Azure admins if these are not the same. I see Azure resources governance being neglected and as a cluster admin it’s nice to have some degree of control or say in the Azure part of the equation.
For completeness I’ll mention that the entire setup of a cloud witness is also very nicely integrated in to the Failover Cluster GUI.
Right click on the desired cluster and select “Configure Cluster Quorum Settings” from menu under “More Actions”
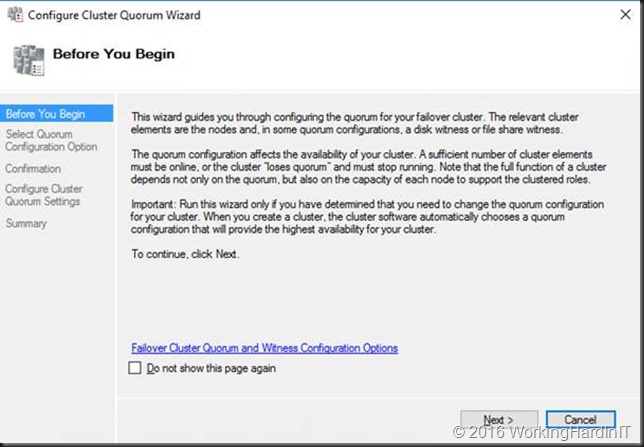
Click through the startup form (unless you’ve never ever done this, then you might want to read it).
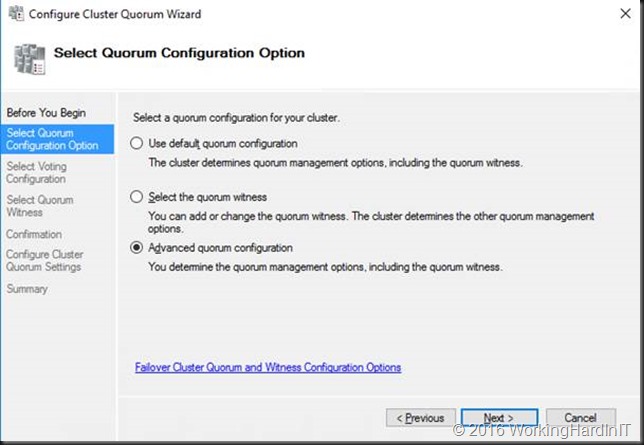
Select either “Select the quorum witness” or “Advanced quorum configuration”
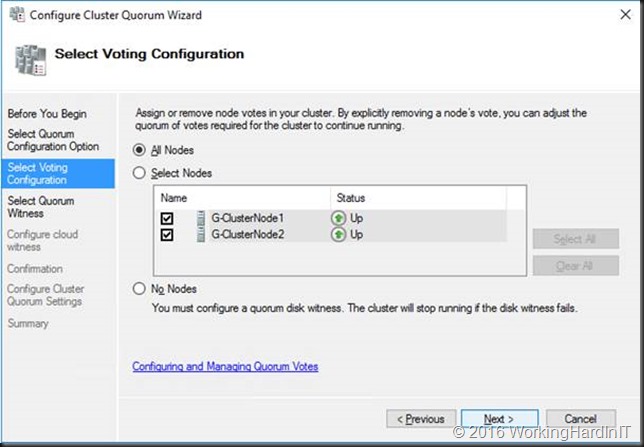
We keep the default selection of all nodes.
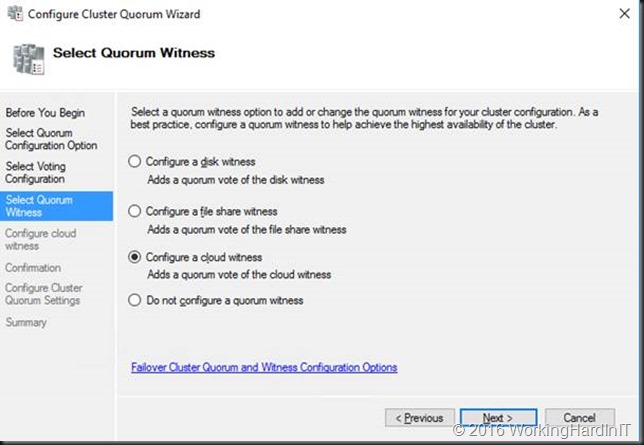
We select to “Configure a cloud witness”
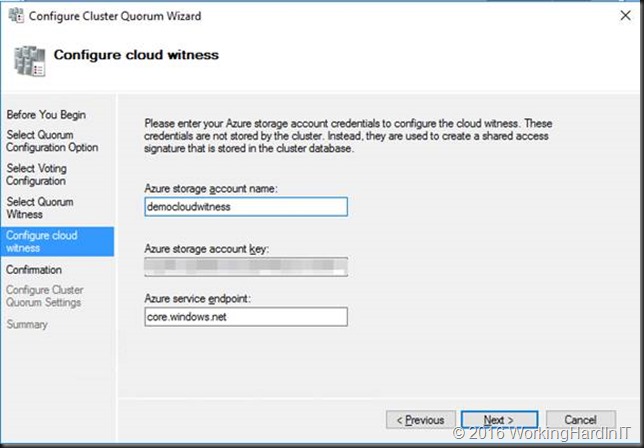
Type in your Azure storage account name, your primary access key for the “Azure storage account key” and leave the endpoint at its default. You’ll normally won’t need this unless you need to use a different Azure Service Endpoint.
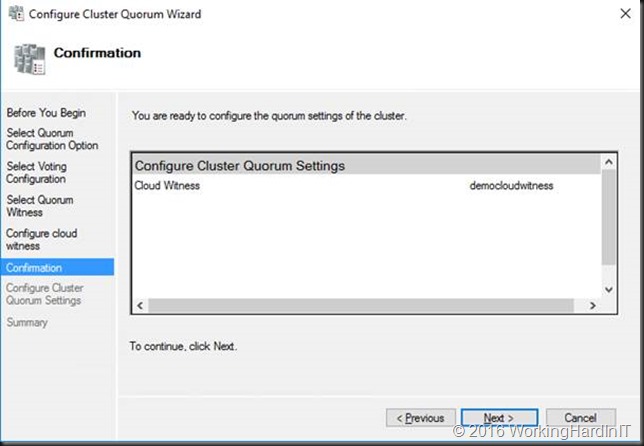
Click “Next”to review what you’re about to do
Click Next again and let the wizard run.
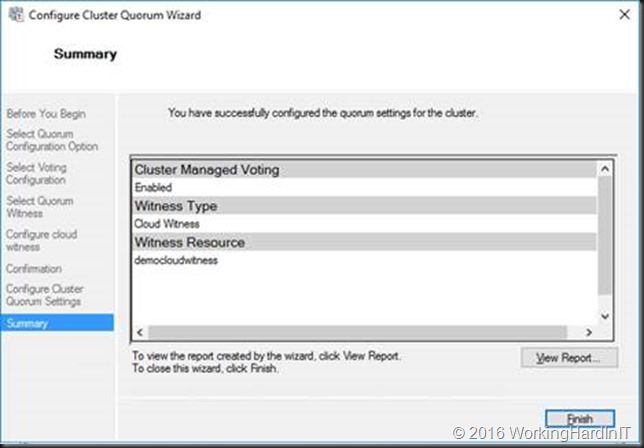
You’ll get a report when it’s done. If you get an error, make sure the information is a correct and you can reach Azure of HTTPS over the internet, VPN or Express Route.
Conclusion
I was pleasantly surprised by how it easy it was to set up a cloud witness. The biggest hurdle for some might be access to Azure in secured environments. The file itself contains no sensitive information at all and while a VPN or Express Route are secured connectivity options this might not be allowed or viable in certain environments. Other than this I have found it to be very reliable, effective cheap and easy. I really encourage you to test it and see what it can do for you.


