I’m one of those people that run Windows Server on their desktop workhorse. The reason for this is that this gives me the server features for rapid testing, scripting and taking screenshots for documentation. When you tweak it right you have a very nice desktop that doesn’t lack anything in functionality compared to a desktop but you do get the extras I just mentioned. An alternative is to run a Virtual Machine locally. The latter has become a lot easier & better now we have Hyper-V in the client ![]() .
.
This subject leads to another interesting capability of Windows 8. You can install Windows 8 as Server Core or Server with GUI, which is the full GUI option. But there is a world between those. This is the Minimal Server Interface option. How do these differ? Well actually “only” by the features that are enabled.
The feature Graphical Management Tools and Infrastructure is the set of features that makes up the difference between a Server Core installation and the Minimal Server Interface option of a Full server installation. This means that uninstalling this feature will convert a Full server to a Server Core installation. Server Graphical Shell cannot live without the Graphical Management Tools and Infrastructure as both are needed to get the full GUI server.
Server Graphical Shell is the same user interface that is installed by default when you choose the Server with GUI installation option during Setup. This always installs “Graphical Management Tools and Infrastructure” as a prerequisite. To decrease the servicing requirements of your server while still being able to use Microsoft Management Console (MMC) locally, you can uninstall the Server Graphical Shell using Server Manager, leaving you with the Minimal Server Interface. As stated above the Minimal Server Interface requires the “Graphical Management Tools and Infrastructure” feature to be installed.
The real good news is that you can switch between these server options with reinstalling. You can switch from Full Server with all whistles & bells to Server Core by enabling or disabling features. This an very nice improvement compared to Windows 2008 (R2) as with those versions you’re stuck with your choice and only a reinstall is the way to change this. Not only that but I can help out when you need the GUI for some reason temporarily.
A Walk Through of Installing The Desktop Experience
Even for lab environments it also can be handy to have some tools available. On my Windows Server 8 Beta Machine I needed the Snipping Tool for example. So I had to install the Desktop Experience feature.
Using the GUI
In Windows Server 8 you’ll find that under Server Manager, Manage “Add Roles and Features”.
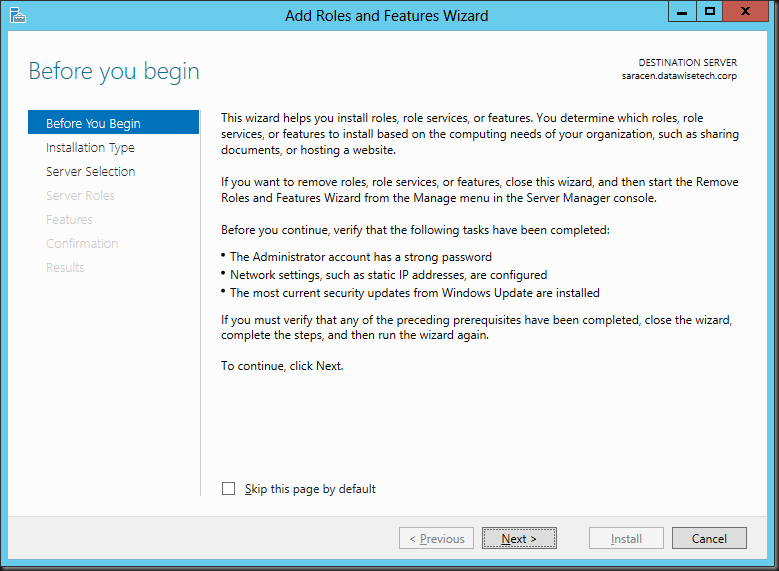
The “Add Roles and Features Wizard “ pops up at the default start screen which you can elect to skip for future use.
Select the Installation Type.
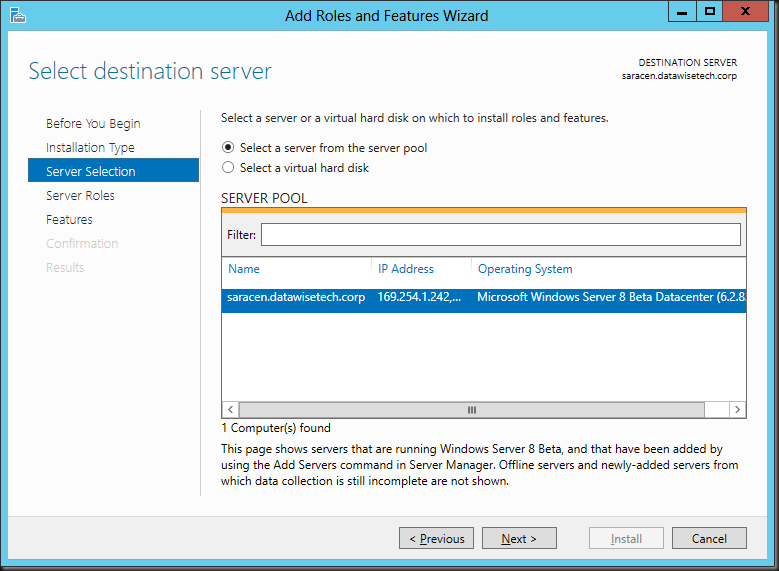
Select the server on which you want to work.
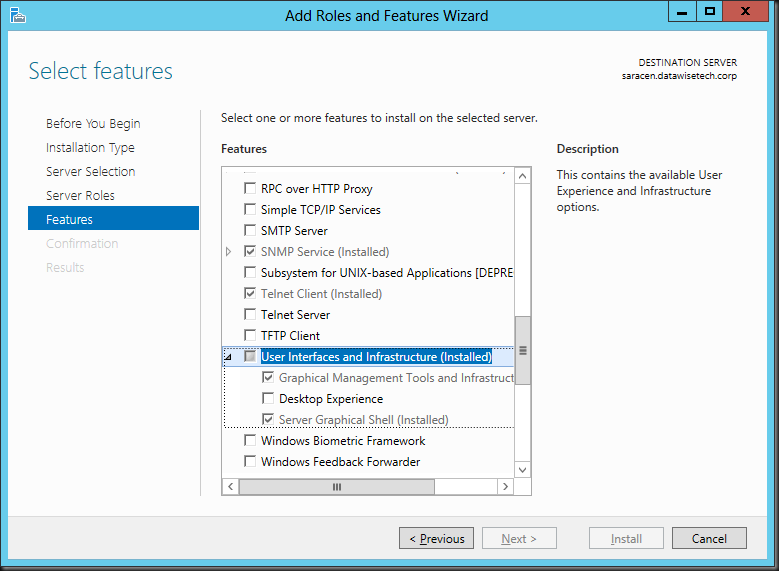
The Desktop Experience is a feature so go straight to “Features”. Scroll down until you see User Interfaces & Infrastructure (Installed), open the tree and you’ll see that you can select Desktop Experience.
As you can see The Desktop Experience feature requires that you also install the Graphical Management Tools and Infrastructure and Server Graphical Shell features, meaning it will only run of the Full Server GUI option.
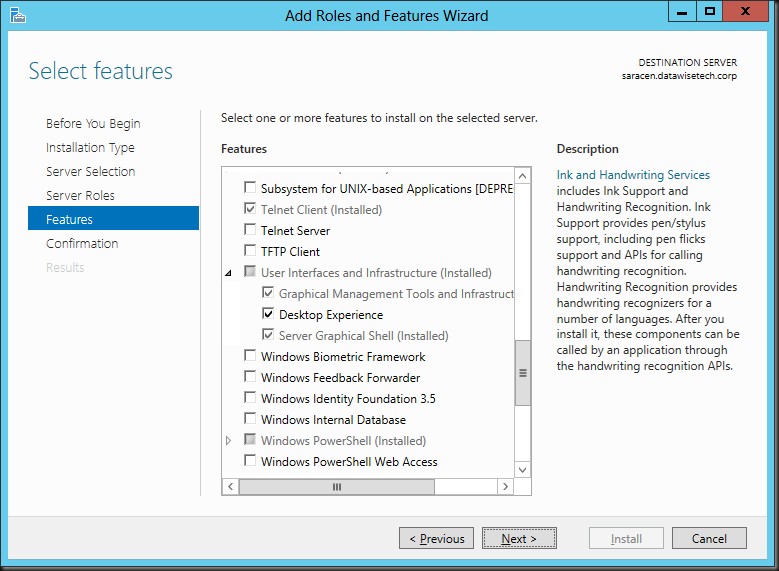
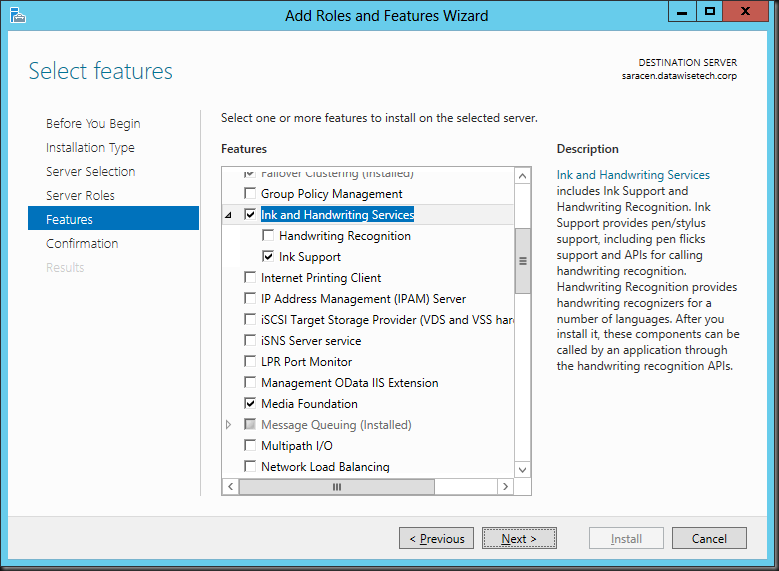
Once you select that a message will pop up telling you that the Ink Support feature under Ink and Handwriting services and the Media Foundation Feature are required for the Desktop Experience feature. Accept the defaults and click Add Features.
You can scroll along the GUI to check these features have indeed been selected.
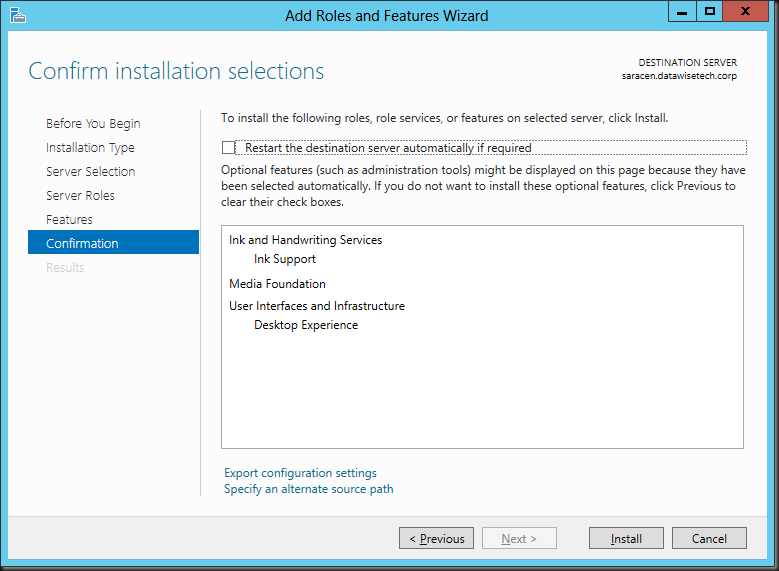
Click next and you’ll be asked to confirm the installation of the features. You can opt to restart automatically when needed.
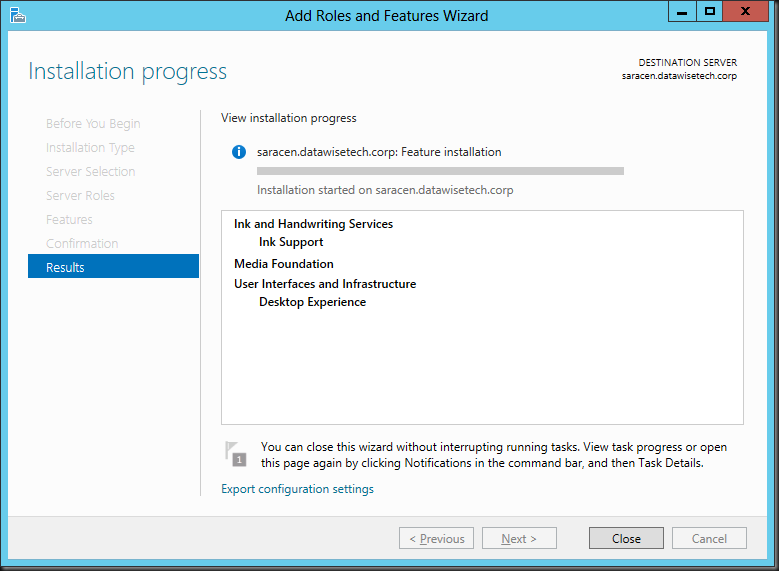
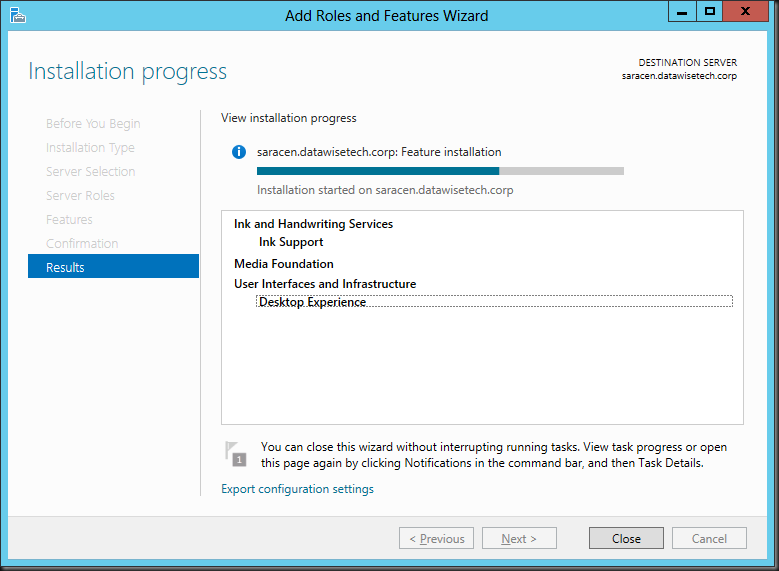
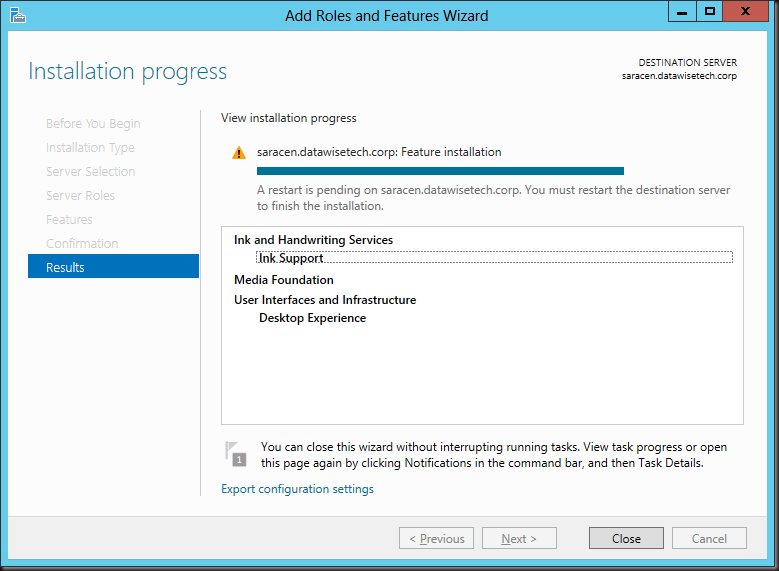
The Add Roles and Features Wizard starts the installation/ Please note that you can close the wizard and get o with something else. You don’t have to baby sit the GUI.
When finished the shows you need a restart.
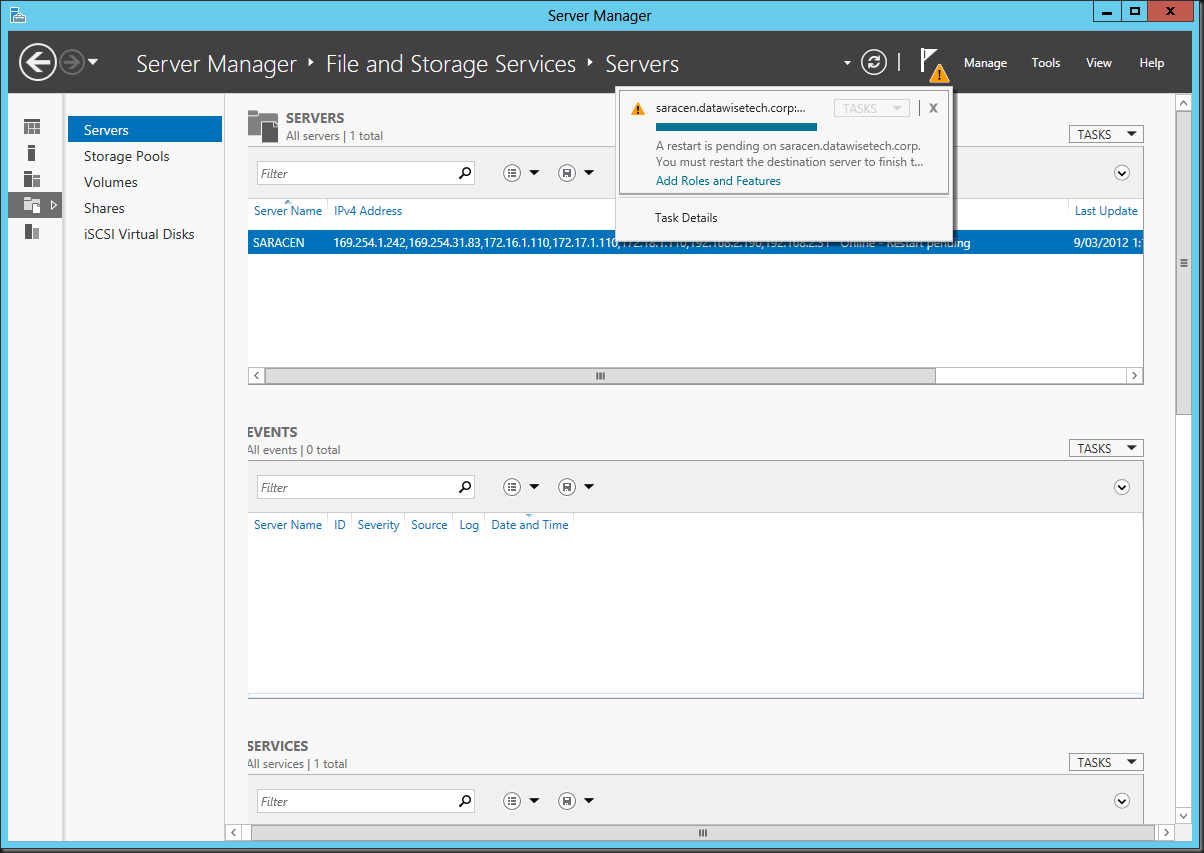
If you closed the wizard and came back to server manager late it will warn you about the fact something is pending with the yellow exclamation mark.
Using PowerShell
To install Desktop Experience with Windows PowerShell, use the following commands:
Import-Module ServerManager
Install-WindowsFeature Desktop-Experience
You’ll find that this also installs the “Ink Support” under “Ink and Handwriting Services” automatically for you. Note below than wen using DISM you’ have to manage all that yourself.
To install Media Foundation with Windows PowerShell, use the following commands:
Import-Module ServerManager
Install-WindowsFeature Server-Media-Foundation
Using DISM
This works but you need to do some more work. Each and every single feature part needs to be installed separately. You need Server Media Foundation, Desktop Experience, but here you’ll need to add Ink Support AND the yourself or you may run in to issues. In the Example below we left out ink support.
dism /online /enable-feature /all /featurename:ServerMediaFoundation
dism /online /enable-feature /all /featurename:DesktopExperience
That means It looks like you have no Desktop Experience installed in the GUI while the extra tools do appear on your desktop.
So to fix this we need to add Ink Support but also Ink And Handwriting Services as top level feature. If you don’t it wont be “grayed in” to indicate sub features have been selected (in our case the Ink Support).
dism /online /enable-feature /all /featurename:InkAndHandwritingServices
dism /online /enable-feature /all /featurename:InkSupport
You might have noted that DISM is a bit more hands on than PowerShell. PowerShell is perhaps the best automation tool to use but don’t forget that DISM has off line editing capabilities that can come in handy for all kinds of stuff from injecting drivers to fine tuning your deploy image. Powerful stuff!

![image_thumb[2] image_thumb[2]](https://blog.workinghardinit.work/wp-content/uploads/2012/03/image_thumb2_thumb.png)

![missing step_thumb[1] missing step_thumb[1]](https://blog.workinghardinit.work/wp-content/uploads/2012/03/missing-step_thumb1_thumb.png)


![image_thumb[11] image_thumb[11]](https://blog.workinghardinit.work/wp-content/uploads/2012/03/image_thumb11_thumb.png)
![image_thumb[6] image_thumb[6]](https://blog.workinghardinit.work/wp-content/uploads/2012/03/image_thumb6_thumb.png)
![image_thumb[10] image_thumb[10]](https://blog.workinghardinit.work/wp-content/uploads/2012/03/image_thumb10_thumb.png)
Pingback: Upgrading Hyper-V Cluster Nodes to Windows Server 8 (Beta) – Part 1 | Working Hard In IT