
This is not a step by step “How to” but we’ll address some thing you need to do and the tips and tricks that might make things a bit smoother for you.
1) Disable Short file names & Strip existing old file names
Never mind that this is needed to be able to do continuous availability on a file share cluster. You should have done this a long time ago. For one is enhances performance significantly. It also make sure that no crappy apps that require short file names to function can be introduced into the environment. While I’m an advocate for mutual agreements there are many cases where you need to protect users, the business against itself. Being to much of a politician as a technologist can be very bad for the company due to allowing bad workarounds and technology debt to be introduced. Stand tall!
Read up on this here Windows Server 2012 File Server Tip: Disable 8.3 Naming (and strip those short names too. Next to Jose’s great blog read Fsutil 8dot3name on how to do this.
If you still have applications that depend on short file names you need to isolate and virtualize them immediately. I feel sorry for you that this situation exists in your environment and I hope you get the necessary means to deal with swiftly and decisively by getting rid of these applications. Please see The Zombie ISV® to be reminded why.
Some tips:
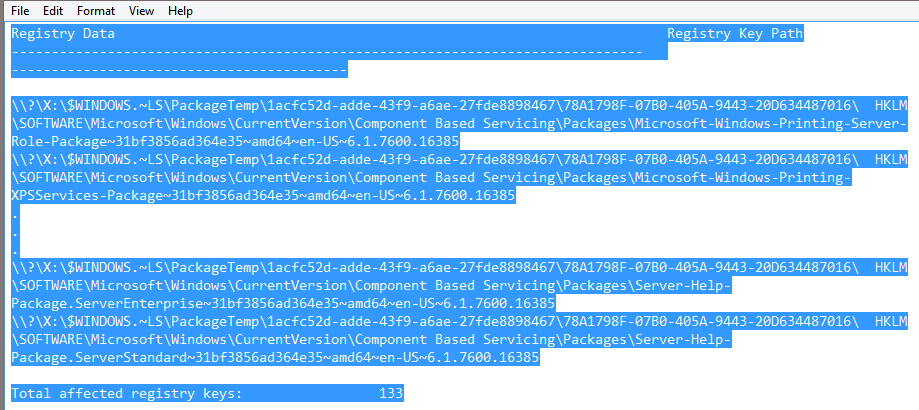
- Only use the /F switch if it’s a non system disk and you can afford to do so as you’re moving the data LUN to a new server anyone. Otherwise you might run into issues. See the below example.
- If you stumble on path that are too long, intervene. Talk to the owners. We got people to reduce “Human Resources Planning And Evaluations” sub folder & file names reduced to HRMPlanEval. You get the gist, trim them down.
- You’ll have great success on most files & folders but if they are open. Schedule a maintenance window to make sure you can run without anyone connected to the shares (Stop LanManServer during that maintenance window).

- Also verify no other processes are locking any files or folders (anti virus, backups, sync tools etc.)
2) Convert MBR disks to GPT if you can
With ever growing amounts of data to store and protect this makes sense. I’m not saying you need to start doing 64TB disks today but making sure you can grown beyond 2TB is smart. It doesn’t cost anything when you start out with GPT disks from the start. If you have older LUNs you might want to use the migration as an opportunity to convert MBR LUNs to GPT. That means copying the data and all NTFS permissions.
Please see NTFS Permissions On A File Server From Hell Saved By SetACL.exe & SetACL Studio for some tools that might help you out when you run into NTFS/ACL permissions and for parsing logs during this operation.
Here’s a useful Robocopy command to start out with:
ROBOCOPY L: V: /MIR /SEC /Z /R:2 /W:1 /V /TS /FP /NP /XA:SH /MT:16 /XD “System Volume Information” *RECYCLE* /LOG:”D:RoboCopyLogsMBR2GPTLUNL2V.txt”
3) Dump the existing shares on the old file sever into a text file for documentation an use on the new file server
Pre Windows Server 2012 the new SMB Cmdlets don’t work, but no fear, we have some other tools to use. Using NET SHARE does work and with you can also show the hidden and system share but the layout is a bit of a mess. I prefer to use.
Get-WmiObject –class Win32_Share > C:tempOldFileServerShares
It’s fast, complete and the layout is very user friendly. Which is what I need for easy use with PowerShell on the W2K12R2 file server. Some of you might say, what about the share security settings. 1) We’re going to cluster so exporting these from the registry doesn’t work and 2) you should have kept this plain vanilla and done security via the NFTS permissions on the folder structure only. But hey I’m a nice guy, so here’s a link to a community PowerShell script if you need to find out the share permissions: http://gallery.technet.microsoft.com/scriptcenter/List-Share-Permissions-83f8c419 I do however encourage you to use this time to consider just using security on NFTS.
4) Create the clustered file shares
Amongst the many gems in Windows Server 2012 R2 are the new SMB PowerShell Cmdlets. They are a simple and great way to create clustered files shares. Read up on these SMB Share Cmdlets and especially New-SmbShare
When we’ve unmapped the LUNs from the old file server and exposed them to the new file server cluster you’re ready to go. You can even reorganize the Shares, consolidate to less but bigger LUNs and, by just adapting the path to the share in the script make sure the users are not confused or nee to learn new shares and adapt how & what they connect to them. Here it goes:
New-SmbShare -Name “TEST2” -path “T:SharesTEST2” -fullaccess Everyone -EncryptData $True -FolderEnumerationMode AccessBased -ConcurrentUserLimit 0 -ScopeName TF-FS-MIG
First and foremost, this is where the good practice of not micromanaging file hare permissions will pay back big time. If you have done security via NTFS permissions with AG(U)DLP principle to your folder structure granting should be breeze right?
Before you ask, no you can’t do the old trick of importing the registry export of the shares and their security settings form the old file server when you’re going to cluster the file shares. That might sound bad but with some preparation and the PowerShell I demonstrated above you’ll find it easy enough.
5) Recuperate old file server name (Optional)
After you have decommissioned the old file server you could use a cluster alias to keep the old file server UNC path. This has the drawback you will fall back to connecting to the SMB shares via NTLM as aliases don’t support Kerberos authentication. But there is another trick. Once you got rid of the old server object in AD you can rename. If you can do this you’ll be able to keep Kerberos for authentication.
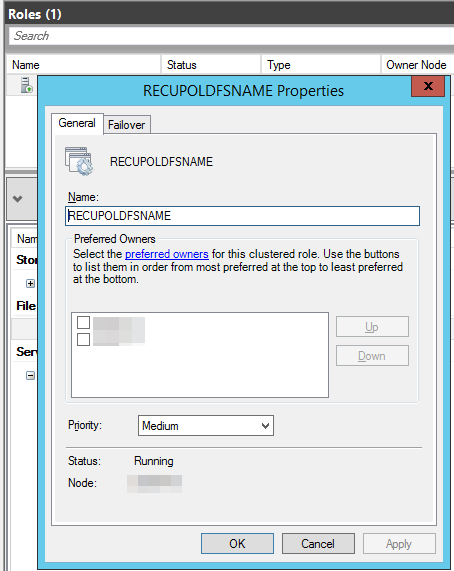
So after you’ve gotten rid of the old server in Active Directory go to the file server role. Select properties and rename it to recuperate the old files server name.
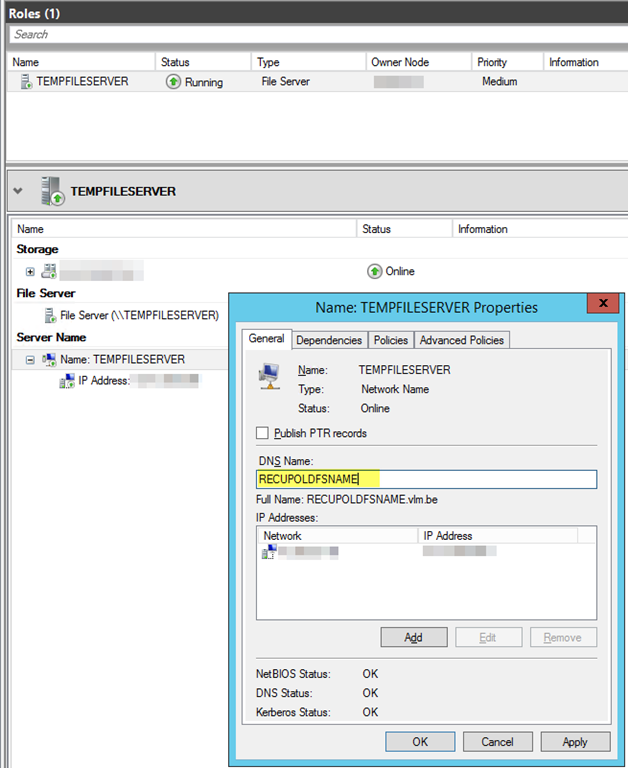
Now look at the resources tab. Right click and select the properties tab of “Server Name”. Rename the DNS Name. That will update the server name and the DNS record. This will cause the role to go down temporarily.
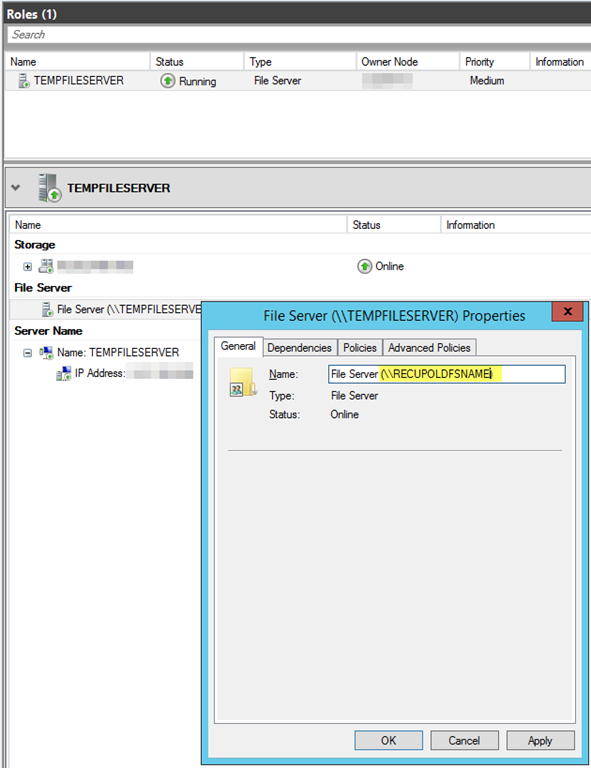
Right click and select the properties tab of “File Server”. Rename the UNC path to reflect the older file server name.
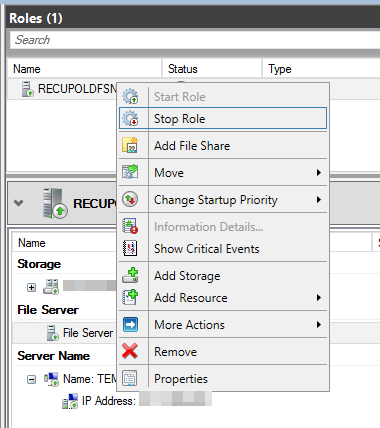
 For good measure and to test everything works: stop and restart the cluster role, connect to the shares and voila live should be good. Users can access the transparent failover file server like they used to do with the old non-cluster file server and they don’t sacrifice Kerberos to be able to do so!
Conclusion
I hope you enjoyed the tips and pointers on migrating an old file server to a Windows Server 2012 R2 file share cluster. Remember that these tips apply for various permutations of P2V, V2V as well as for P2P migrations.
Pingback: More Tips On Dealing With Removing Short File Names When Migrating To a SMB3 Transparant Failover File Server Cluster | Working Hard In IT
Hi, for Windows 2008 R2, cannot exist the script or command for migrate strong list if shared folders?
nice article