Licensed Replay Manager Node Reports being unlicensed

Licensed Replay Manager Node Reports being unlicensed

I was doing a hardware refresh on a bunch of Hyper-V clusters. This meant deploying many new DELL PowerEdge R740 servers. In this scenario, we leverage SC Series SC7020 AFA arrays. These come with Replay Manager software which we use for the hardware VSS provider. On one of the replaced nodes, we ran into an annoying issue. Annoying in the fact that the licensed Replay Manager Node reports being unlicensed in the node’s application event log. The application consistent replays do work on that node. But we always get the following error in the application event log:

Product is not licensed. Use Replay Manager Explorer ‘Configure Server’ or  PowerShell command ‘Add-RMLicenseInfo’ to activate product license.

Product is not licensed. Use Replay Manager Explorer 'Configure Server' or  PowerShell command 'Add-RMLicenseInfo' to activate product license.

On the Replay Manager Explorer, we just see that everything is fine and licensed. Via the GUI or via PowerShell we could not find a way to “re-license” an already installed server node.

What we tried but did not help

This is not a great situation the be in, therefore we need to fix it. First of all we removed the problematic node from Replay Manager explorer and tried to re-add it. That did not help to be able to relicense it. Uninstalling the service on the problematic node also did not work. Doing both didn’t fix it either. We need another approach.

The fix

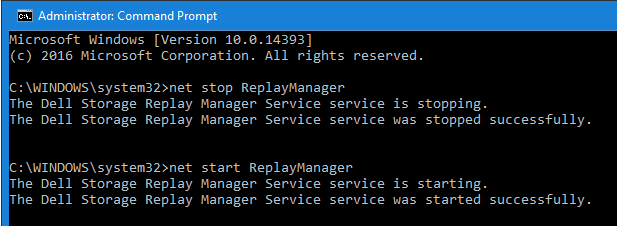
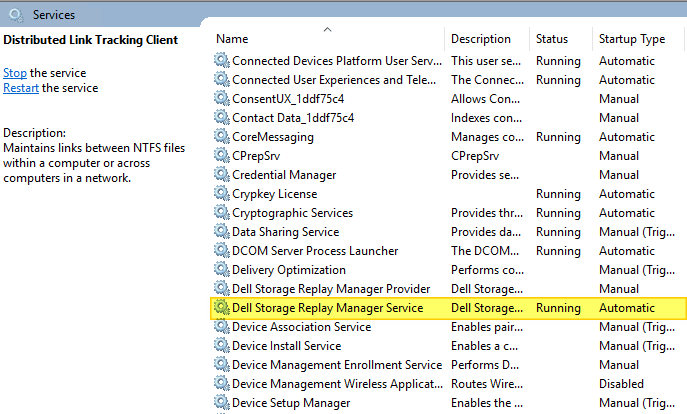
The trick to fixing the licensed Replay Manager Node reports being unlicensed is as follows. Stop the “Dell Storage Replay Manager Service” service.

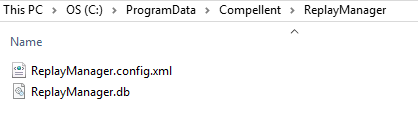
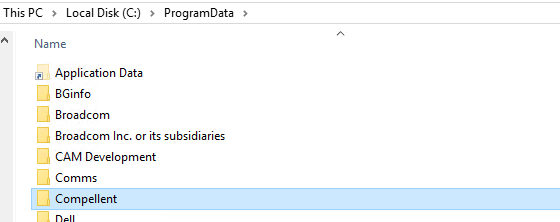
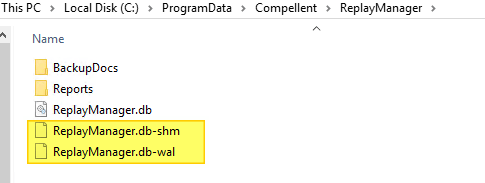
Delete (or rename if you want to be careful) the Compellent folder under C:\ProgramData

Restart the “Dell Storage Replay Manager Service” service. As a result you will see the folder and the files inside being regenerated. Wait until the temp files (ReplayManager.db-shm and ReplayManager.db-wal) of this process are gone.

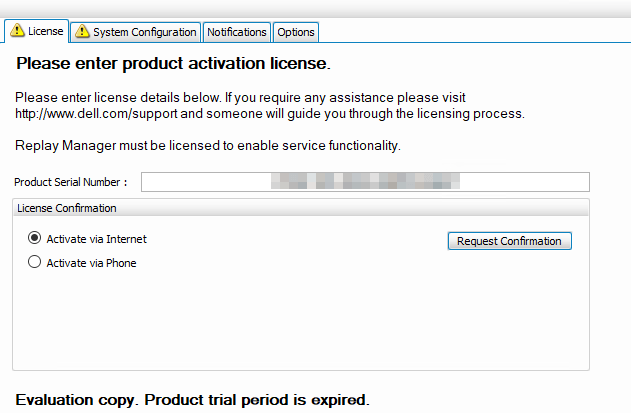
Open up Replay Manager Explorer or relaunch it for good measure if still open. Connect to the problematic node. Navigate to “Configure Server” On the license tab it reports that it is unlicensed. Now enter the license code and request confirmation (Activate via Internet) or Activate via phone.

The node is now licensed again.

The node is licensed again. The system needs to be configured.

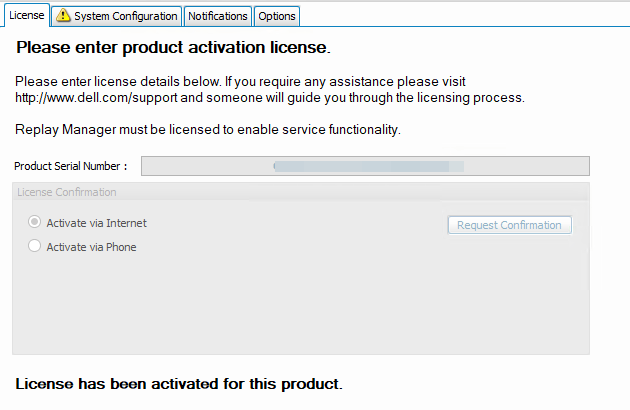
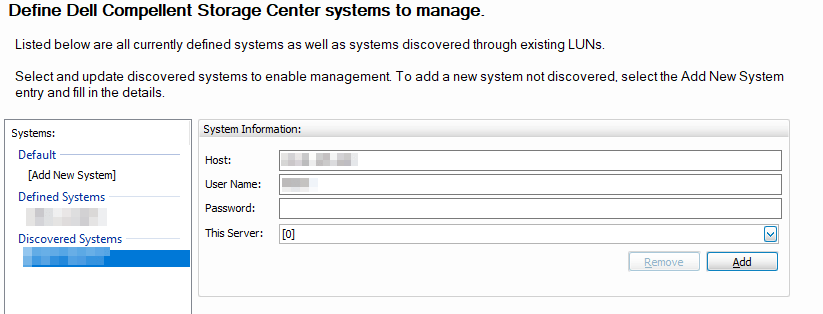
The image above shows the node is licensed again. You now need to configure the system again because that info is lost. For that, enter the username and password for your SC Arrays and add the correct node.

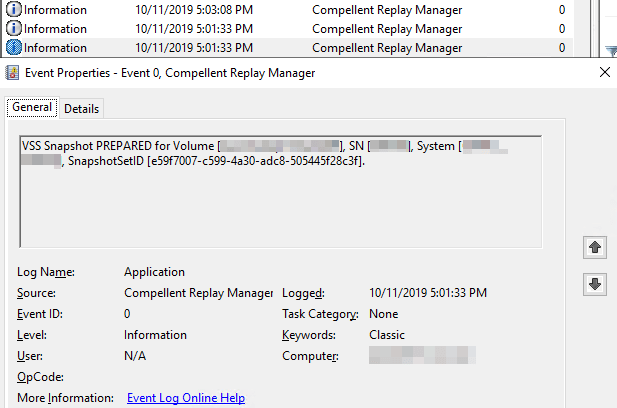
We now test creating a replay! Most importantly, we check the node’s application event log. The error Product is not licensed. Use Replay Manager Explorer ‘Configure Server’ or  PowerShell command ‘Add-RMLicenseInfo’ to activate product license. has gone!

We only see the 3 informational entries (prepared, committed, successful) associated with a successful and completed replay.

Above all, I hope this helps others who run into this.

Replay Manager Configure Server There was an error loading the configuration information.

Replay Manager Configure Server There was an error loading the configuration information

When Replacing a bunch of servers with new DELL R740s (Hyper-V clusters, File clusters, backup targets etc.) I ran into an issue with the DELL Replay Manager software. The servers leverage multiple DELL EMC Storage Center SANs. The have multiple ones for Scale-Out, Redundancy, Failover, Mutliple Datacenters, …

With some of the servers I noticed that the loading of the information was slow, while most others were just fine. But with 4 out of all servers the connection never actually happens. The connectivity was just fine, and test connectivity confirmed this. As this had zero impact on the actual replays that were scheduled this went unnoticed. But when you are adding and removing servers you might need to dive into Server Configuration and that were after a minute we got the below error thrown

Configure Server
There was an error loading the configuration information.
Error Message:
The request channel timed out while waiting for a reply after 00:01:00. Increase the timeout value passed to the call to Request or increase the SendTimeout value on the Binding. The time allotted to this operation may have been a portion of a longer timeout
.

Notice that the GUI says connecting to our demo server82… but unless you need info from the server you might still see the info it get’s from the Storage Center SAN itself.

This is quite annoying as we need to be in there. So how to fix this. I have some ideas as I know this error from .NET WCF but in this case I was looking for an easier way out especially when I don’t have all the information about this 3rd party application. The good news is that it is easily fixed.

Fixing this

Replay manager stores the replays and metadata info about those replays it creates on the SAN itself. That’s why you can still see those even when you actually ca’t connect to the server. The config of servers you add and use in Replay Manager is stored locally where the client lived. This files is portable, just copy it form your profile and had it to a colleague. No big deal.

Now the server configuration you do from the Replay Manager GUI tool itself is stored on each and any server where you have the Replay Manager service installed. You will find that file, ReplayManager.config.xml, under C:\ProgramData\Compellent\ReplayManager.

Make a copy to be sure and edit the original using a text editor that has elevated permissions so you can save your changes. In the example file of one server below note that server82 (green) has 2 old Compellent SC entries (yellow) that are no longer in service. One SAN it cannot find won’t exceed the time-out windows, but it does slow the GUI down significantly. 2 or more phantom old SAN slow things down looking for them and you get the time out error.

The fix is easy, cut the key values out of the file and save the file. You then restart the Replay manager service on that server via an elevated command prompt (or use the GUI):
net start ReplayManager
net stop ReplayManager

Restart the Replay manager service on the server you need to manager before connecting to the server again with the Replay manager client tool GUI.

When you now close and launch the Replay Manager GUI and connect to the server things will be a lot faster and certainly wont time out anymore.

Conclusion

Maintain your environment. Try to remove and decommissioned storage center SAN from your server configurations in Replay Manager before you take it off line an dispose of it.I f you forget you and run into slow loading Replay Manager GUI or hit a time out. Don’t panic. The Replay manager is actually quite solid and recoverable. We have shown you how to fix this by editing the ReplayManager.config.xml file on the server you need to connect to but can’t.You basically just remove the references to the no longer existing storage centers I hope it helps some of you out there if you run into this. Feel free to reach out in the comments if you have any questions.

Dell Storage Manager Collector Update error: Error applying transforms. Verify that the specified transform paths are valid.

Introduction

This is a quick assist for those people who run into the following error when updating their DellEMC SC Series Dell Storage Manager Data Collector and/or Client.

Error applying transforms. Verify that the specified transform paths are valid.

It will want to find a path to 1033.msi in your users’ profile appdata local temp folder but it is not there. Only different ones.

When trouble shooting this error Google might lead you to use various app cleaner tool or the like. This could work or not. It can also lead to new errors. The installer might now complain that updating is only for installed apps and require your to really uninstall the application. This could leave you with a non functional application until you fix the mess.

The easy fix

The solution is easier. Just navigate to the following key in the Windows registry:

COMPUTER\HKEY_CLASSES_ROOT\Installer\Product

Their you find for the key for the Dell Storage Manager Client and/or the Dell Storage Manager Collector. There you will find a Transforms value with the path that throws you the error. Just delete that  the value in that key.

Dell Storage Manager Collector

image

Dell Storage Manager Client

image

Now run your Dell Storage Manager Data Collector and/or Client installers again and things should go well. As always, take a VM checkpoint or another type of backup before you do any work on production server or at least exports the keys you modify so you can restore them

Upgrading to DELLEMC Unisphere Central for SC Series

Upgrading to DELLEMC Unisphere Central for SC Series

To prepare for rolling out SCOS 7.3 (see my blog post SC Series SCOS 7.3 for more information on this version) we upgraded our Dell Storage Manager Data Collector and DELL Storage Manager Client to 18.1.10.171. I am happy to report that went flawlessly. This means we are ready to work with CoPilot and will upgrade our SANs over the next week. That is always a phased roll out, to minimize risk.

Upgrading to 18.1.10.171 actually means we are upgrading to DELLEMC Unisphere Central for SC Series, which was announced as part of the SCOS 7.3 upgrade benefits.

The upgrade process itself is straight forward and isn’t different from what we are used to. First you upgrade the Storage Manager Data Collector and then the Storage Manager Client. If you have a remote Storage Manager Data Collector you must then upgrade that one as well.

image

Make sure you have successful backup and create a checkpoint before you start the upgrade. That way you also have an easy exit plan when things go south.

Upgrading the Storage Manager Data Collector & Client

This needs to be done first. It can take a while so be patient. Run the Storage Manager Data Collector 178.1.10.171.exe with elevated permissions. It unpacks and asks you to select a language.

image

Click OK to continue and just follow the wizard.

image

It will ask you to confirm you want to upgrade.

image

Click yes and follow the wizard.

image

Click “Next” to kick of the upgrade and relax.

image

The wizard will provide you with plenty of feedback of what it is doing along the way.

image

The final step after the upgrade is to start the Data Collector service.

image

Starting the Data Collector service can take quite a while. Be patient. When it’s done the wizard will inform you of this.

image

Click “Finish” to close the installer.

On your desktop you’ll notice that you now have an icon called DELL EMC Unisphere Central. This indicates that the storage management for DELL EMC offerings are converging.

image

Do note that if you have a remote Storage Manager Data Collector you must now upgrade that one also, Do NOT forget to keep both deployments at the same software levels.

You are now ready to upgrade the Storage Manager Client. Run the installer with elevated permissions.

image

Just follow the wizard, normally this goes really fast and that’s it. You can log into the new and see that the GUI is very familiar to anyone using already.

What is new is the look and feel of the DELLEMC Unisphere Central for SC Series. It’s not you father’s data collector any more.

image

We’ll talk about DELLEMC Unisphere Central for SC Series later when we have had a chance to work with it some more in real live.